Approve a Purchase Order
Review and approve or reject a purchase order that is awaiting internal approval.
Last updated 12 October 2026
Who can use this?
Available to any user assigned as a PO Approver on a specific approval step. You only see POs in your own queue. Approvers cannot act on POs assigned to other users.
Open the approval link from your email
When a Purchase Order requires your approval, ProcureFlow sends an email notification to your inbox with the subject "PO [number] needs your approval".
Click the blue link in the email to open the PO approval page directly in ProcureFlow.
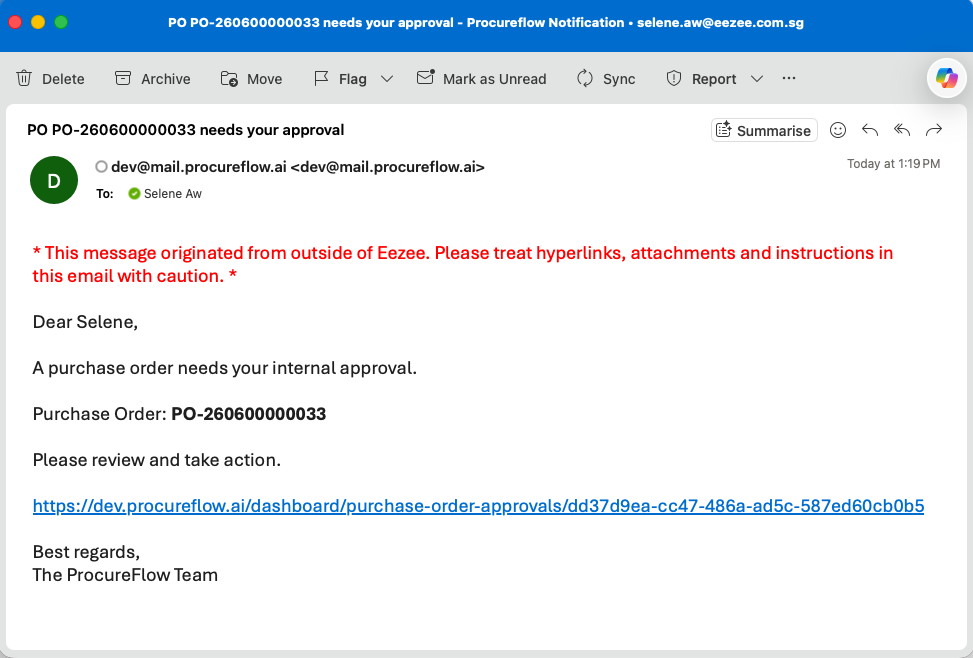
Open the pending PO
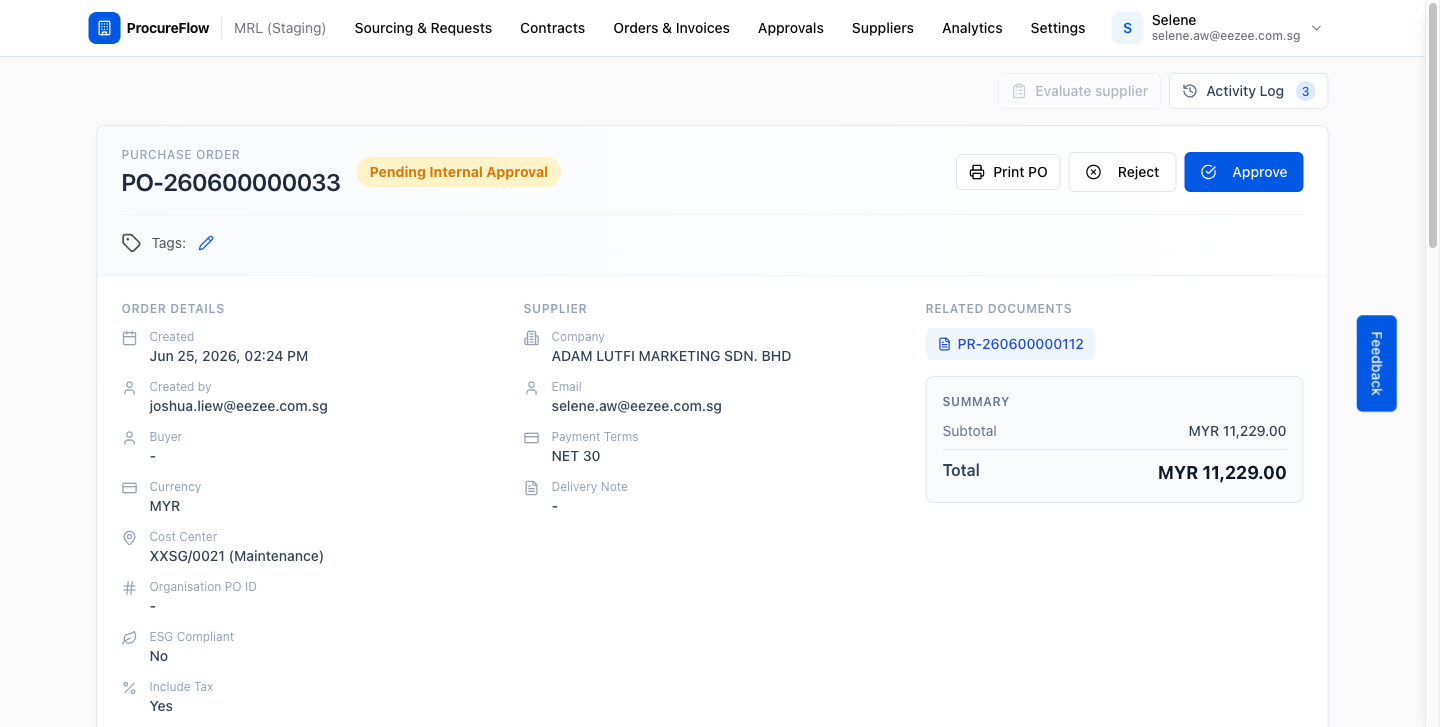
Click the blue PO reference number (e.g. PO-260600000033) to open the full Purchase Order.
The page loads with all order details: supplier, cost centre, line items, shipping address, and the approval path. The status badge at the top reads Pending Approval.
Review the approval path
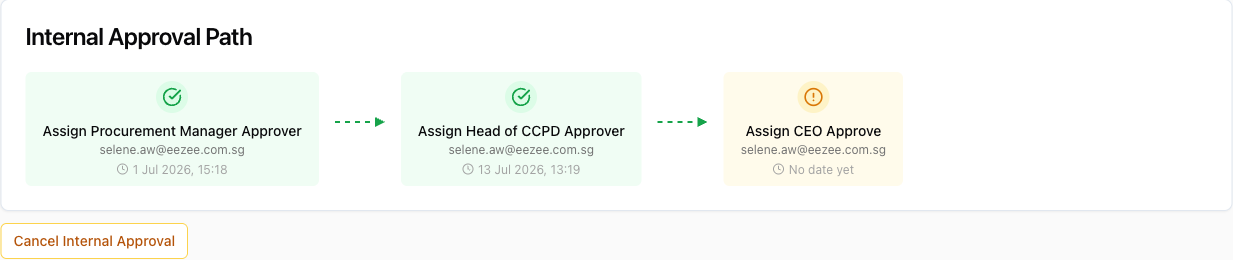
Scroll down to the Internal Approval Path section to see where this PO sits in the workflow:
- Completed steps: a green checkmark with the approver's name and timestamp.
- Your pending step: an orange clock icon with "No date yet".
Review the PO line items, amounts, and shipping details before deciding.
Click Approve (or Reject)
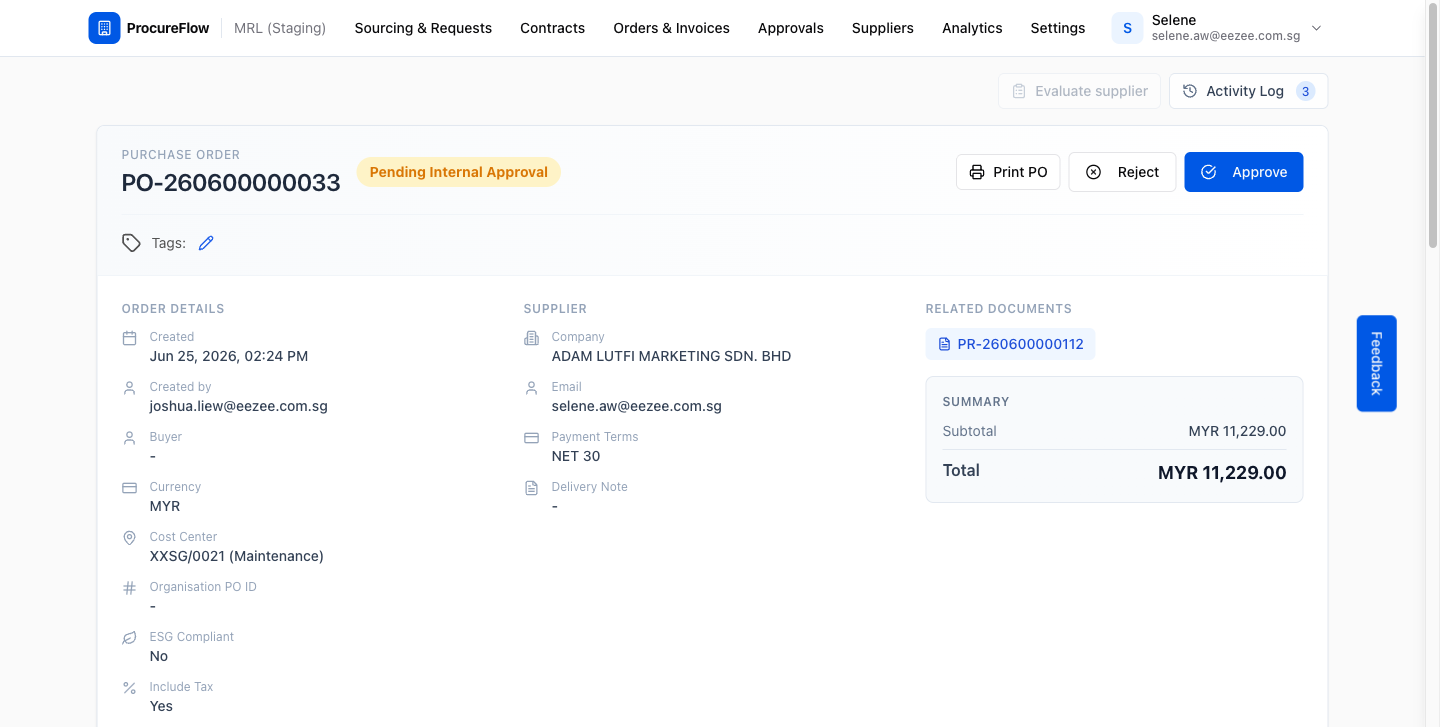
Once you have reviewed the PO, scroll back to the top of the page. The Approve and Reject buttons are in the action bar on the right side of the PO header.
Choose one:
- Click Approve to open the confirmation dialog.
- Click Reject to return the PO. Rejection requires a mandatory reason.
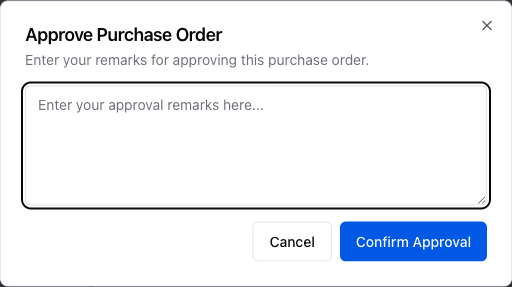
Enter remarks and confirm
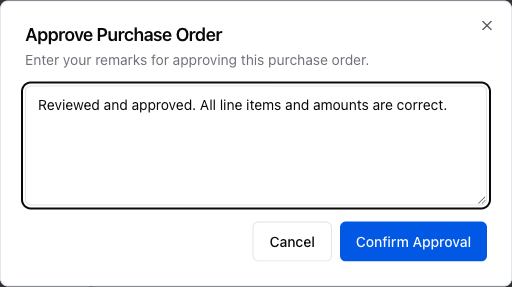
Add your remarks, then confirm:
- Optionally type your approval remarks in the text field. These are recorded in the audit trail and visible to other approvers via View remarks.
- Click Confirm Approval.
Remarks are optional for approvals but required for rejections.
Approval confirmed
A success toast notification confirms the approval, and the page refreshes:
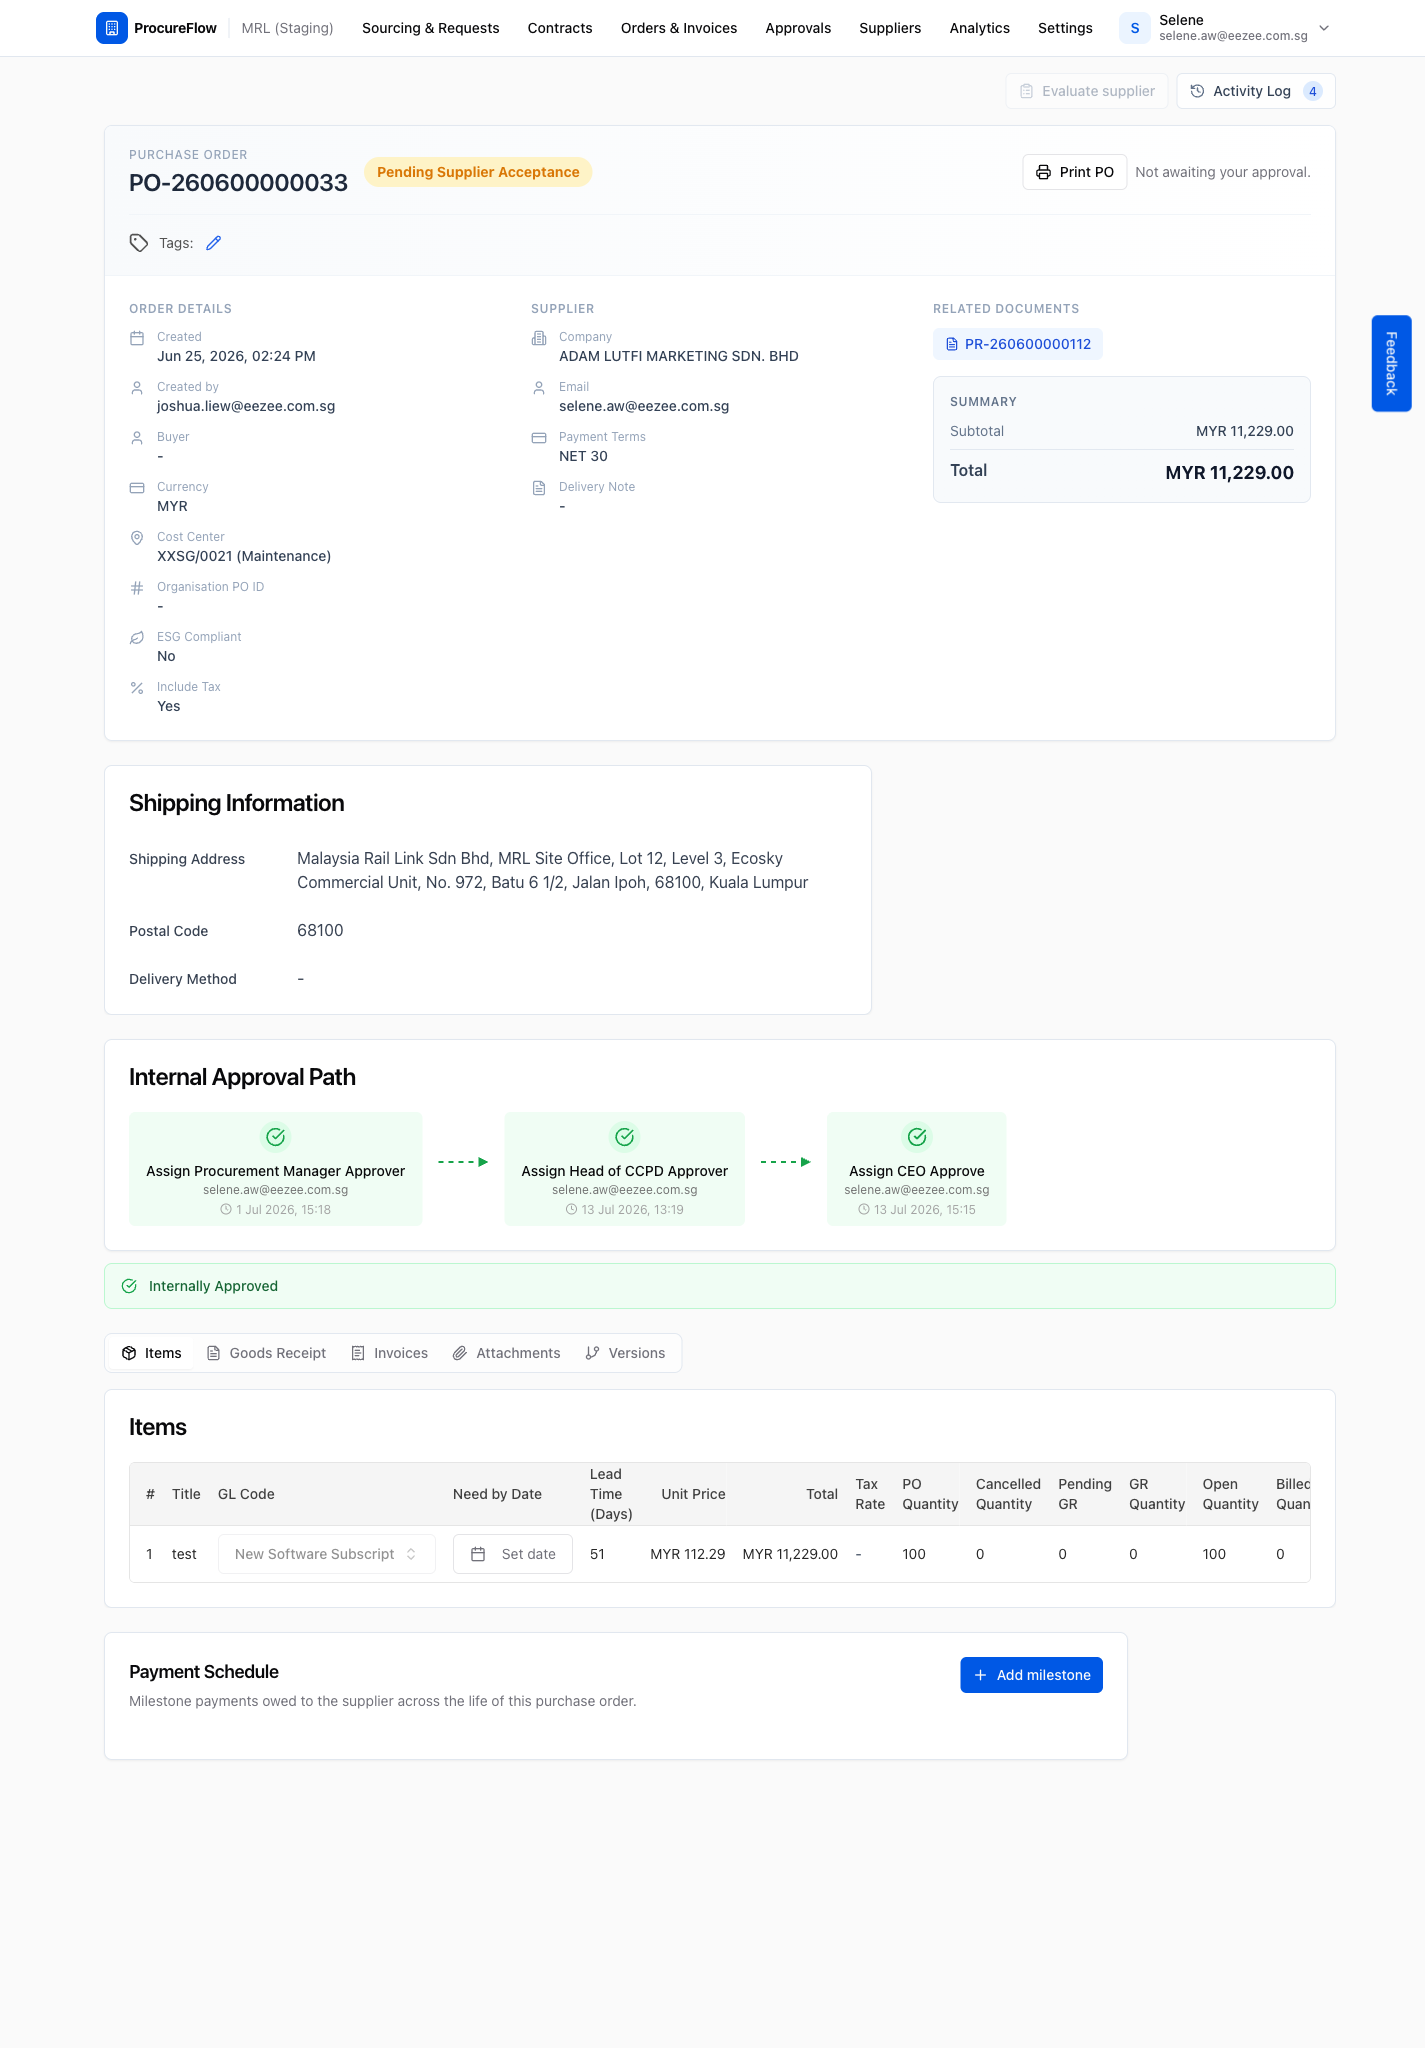
- The Approve / Reject buttons are replaced by Not awaiting your approval.
- Once all approval steps are complete, the PO status changes to Pending Supplier Acceptance. The PO has been internally approved and is now awaiting the supplier to acknowledge it.
- The Internal Approval Path shows all steps ticked with a completion label Internally Approved.
Issue a Purchase Order
After an RFQ evaluation is fully approved, a Purchase Order is created. You assign the Organisation PO ID (from your ERP or purchasing system) and send the PO to the supplier.
Mark as Sent to Supplier
Record that a purchase order has been sent to a buyer-managed supplier on their behalf.