Accept or Reject a PO
When a buyer issues a Purchase Order, you must log in to the Supplier Portal and formally accept or reject it before a delivery can be submitted.
Last updated 12 October 2026
Who can use this?
Available to Supplier contacts only. Buyers manage purchase orders through the main ProcureFlow dashboard.
Log in to the Supplier Portal
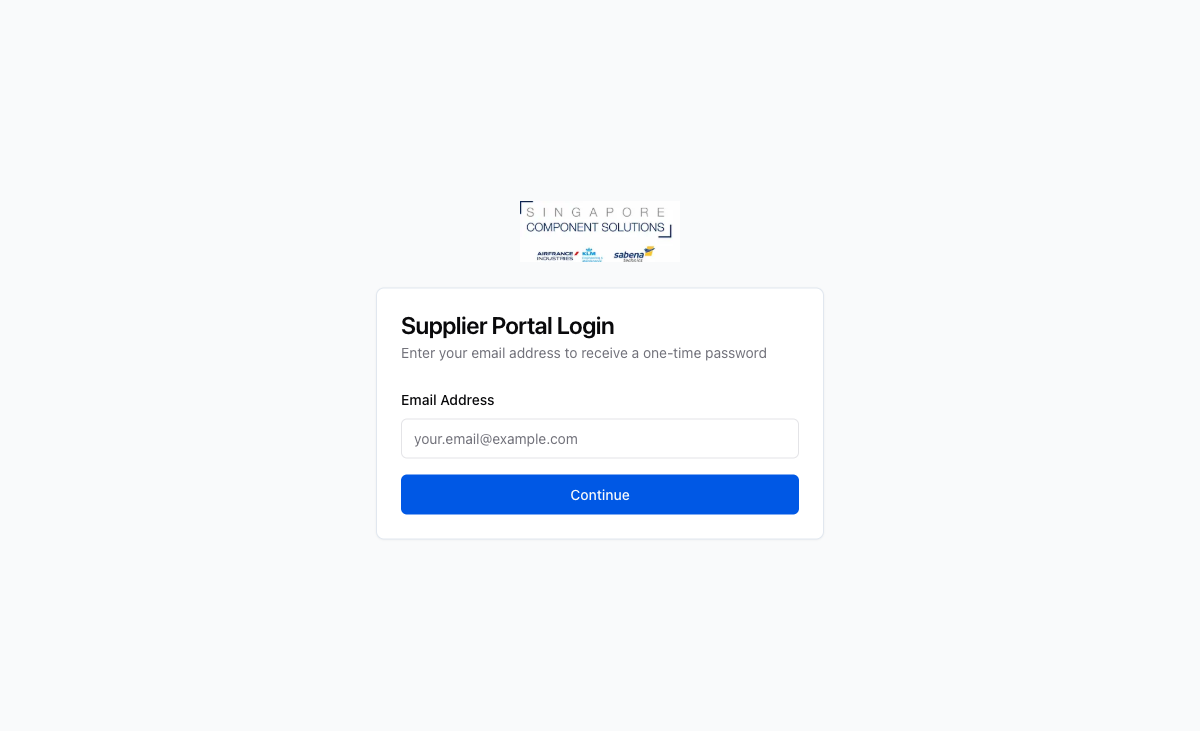
Open the Supplier Portal link shared with you. Enter your email address and click Continue. A 6-digit one-time password (OTP) will be sent to your inbox.
Enter the one-time password
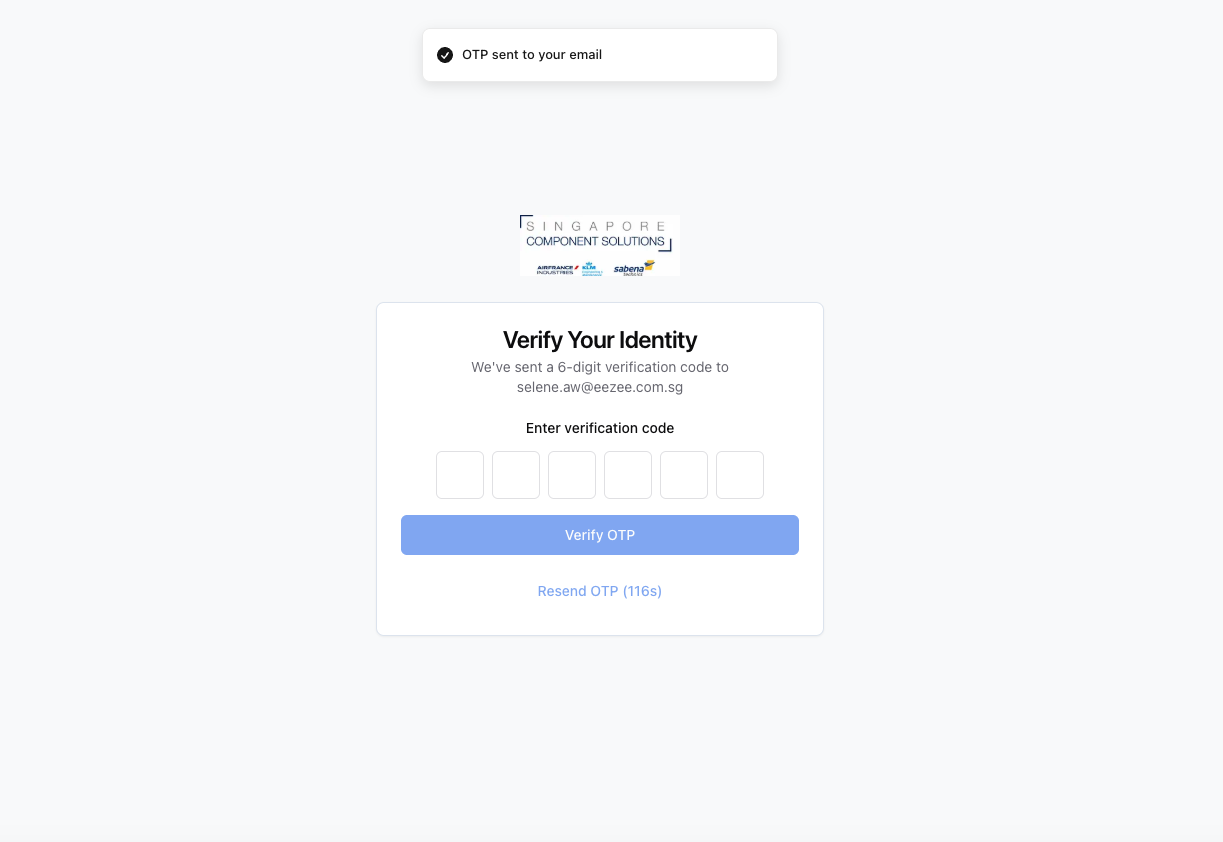
Check your email for a 6-digit OTP. Enter each digit in the boxes shown and click Verify OTP. The code expires after a few minutes; use Resend OTP if needed.
Review the Purchase Order
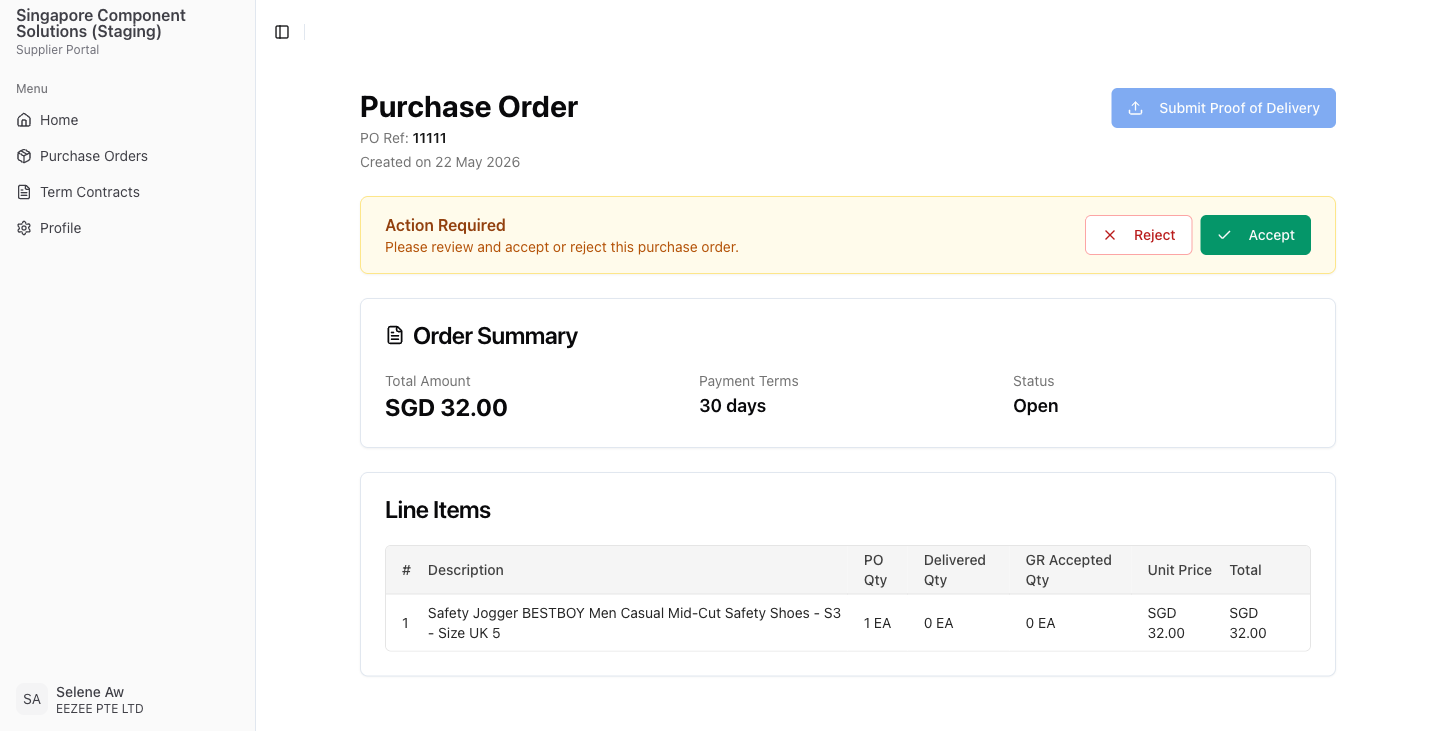
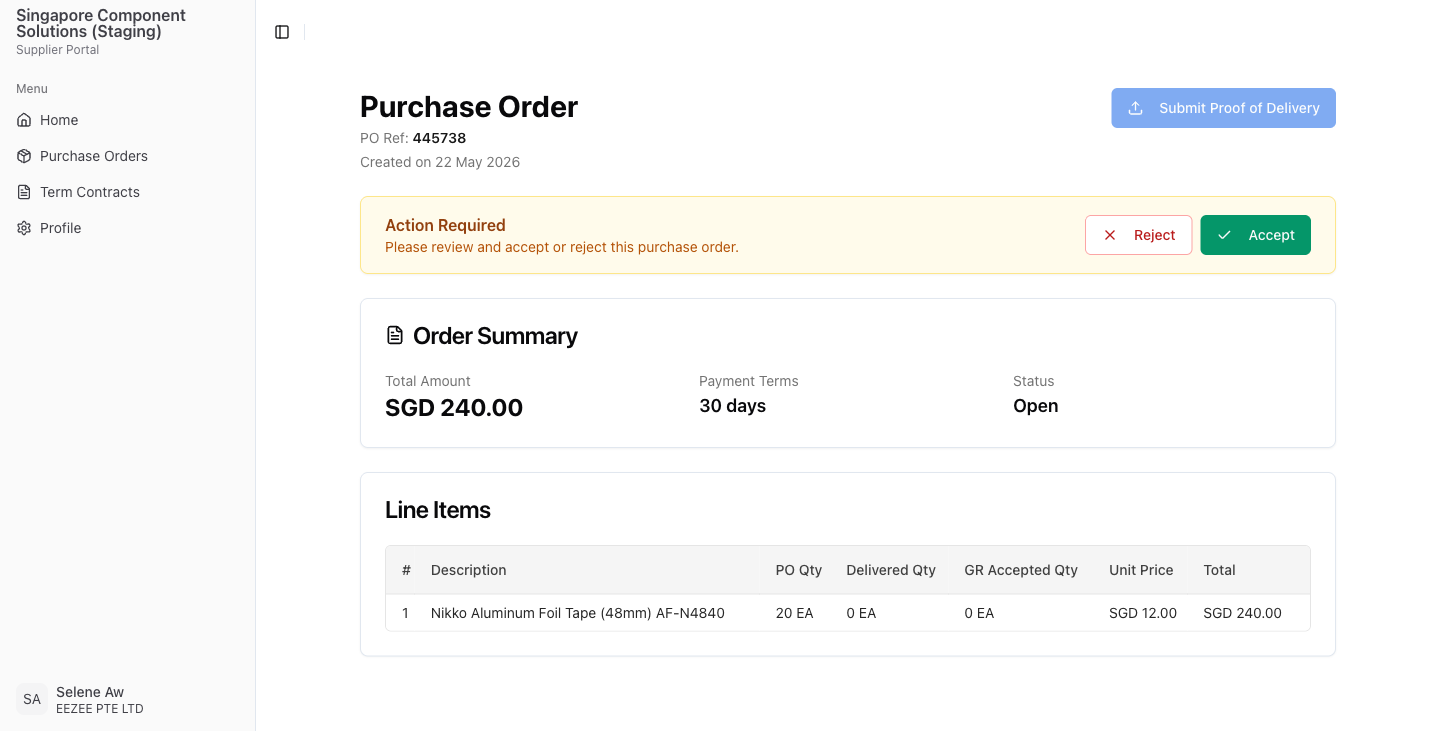
The PO detail page shows the order summary, line items, unit prices, and payment terms. If an Action Required banner appears at the top, the buyer requires you to formally accept or reject this PO before a delivery can be submitted.
Accept the Purchase Order and set delivery dates
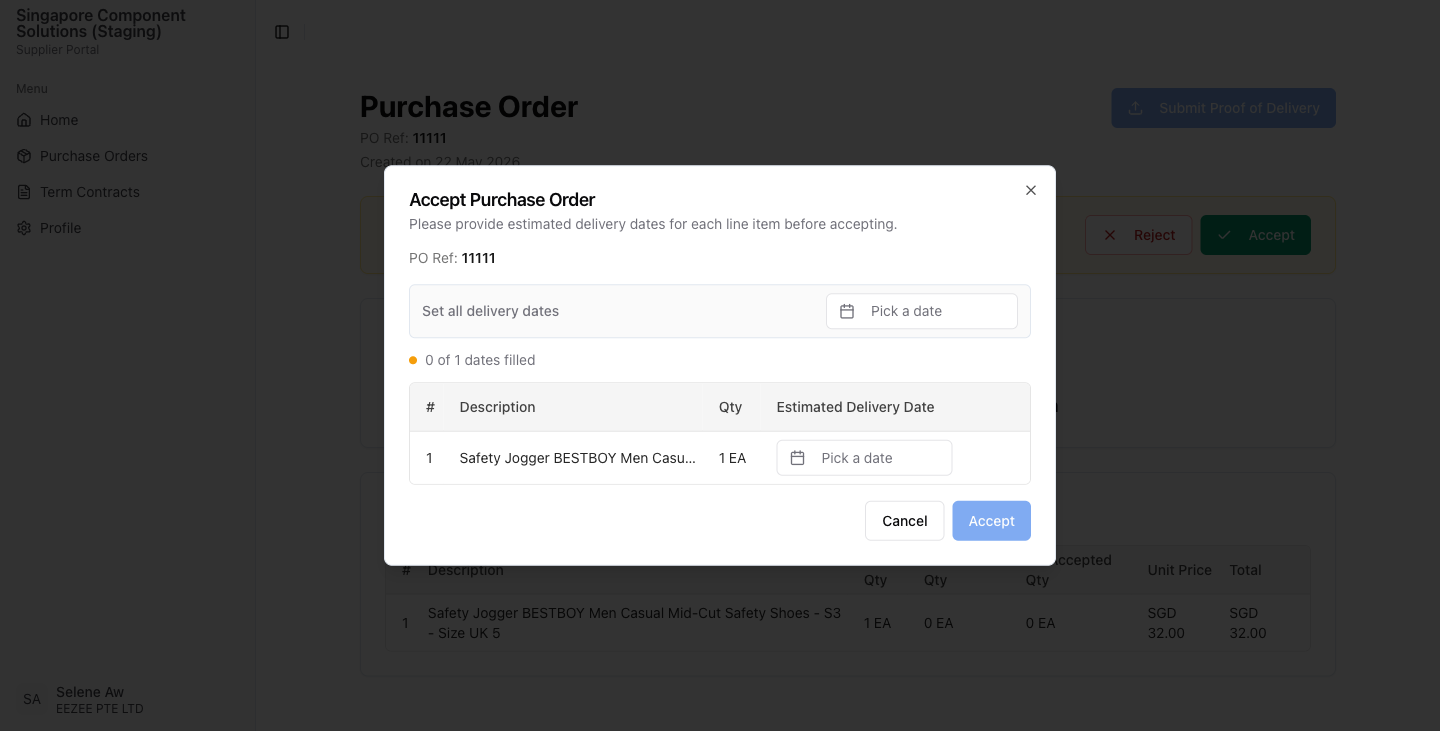
Click Accept on the Action Required banner. A dialog lists all line items. For each item, select an Estimated Delivery Date using the date picker. Use Set all delivery dates to apply the same date to every item at once. When all dates are filled the Accept button becomes active.
Confirm the accepted status
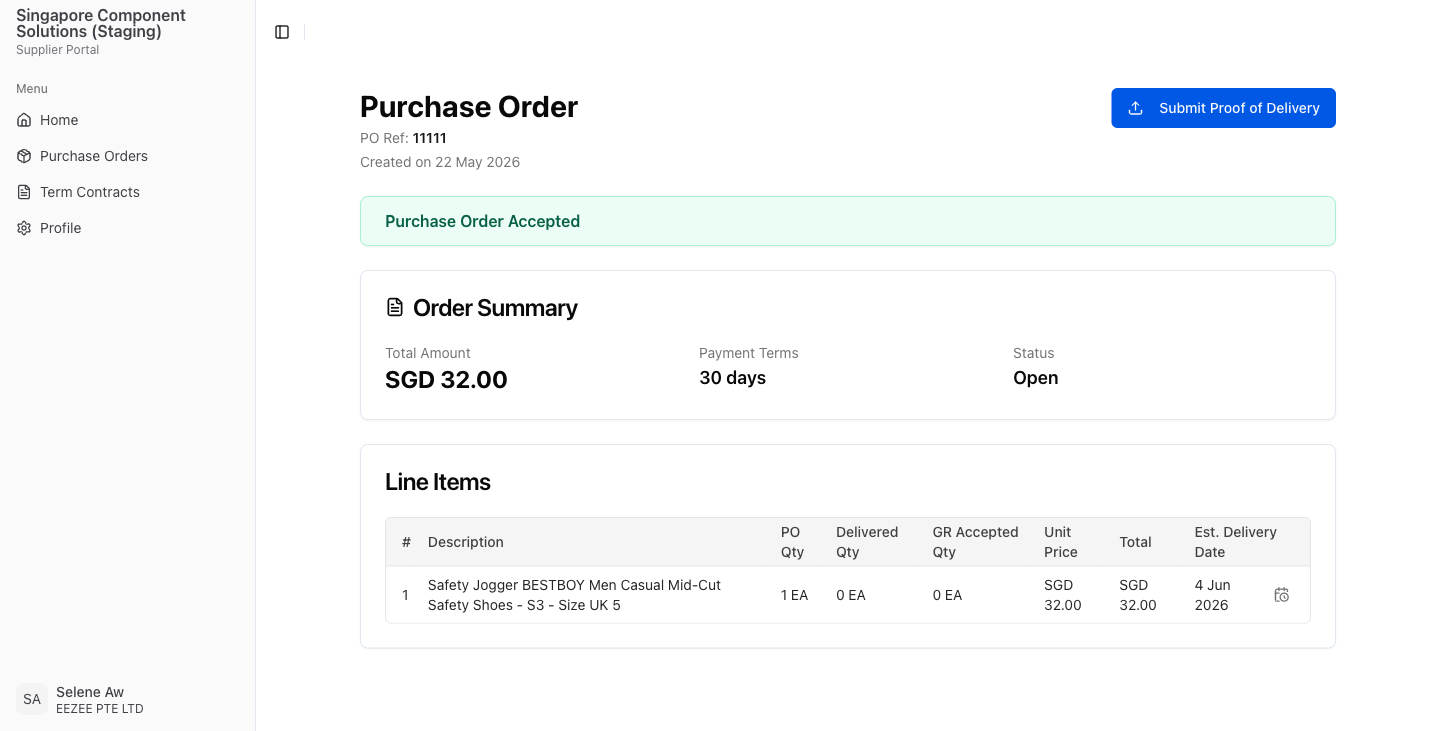
After clicking Accept, the dialog closes and the page refreshes. The Purchase Order Accepted badge replaces the Action Required banner, and the Submit Proof of Delivery button is now active. The buyer is notified automatically.
Reject the Purchase Order
If you are unable to fulfil the order, click Reject on the Action Required banner. A confirmation dialog will appear showing the PO reference. Click Reject to confirm. The buyer will be notified and the PO will be marked as rejected.
Confirm the rejected status
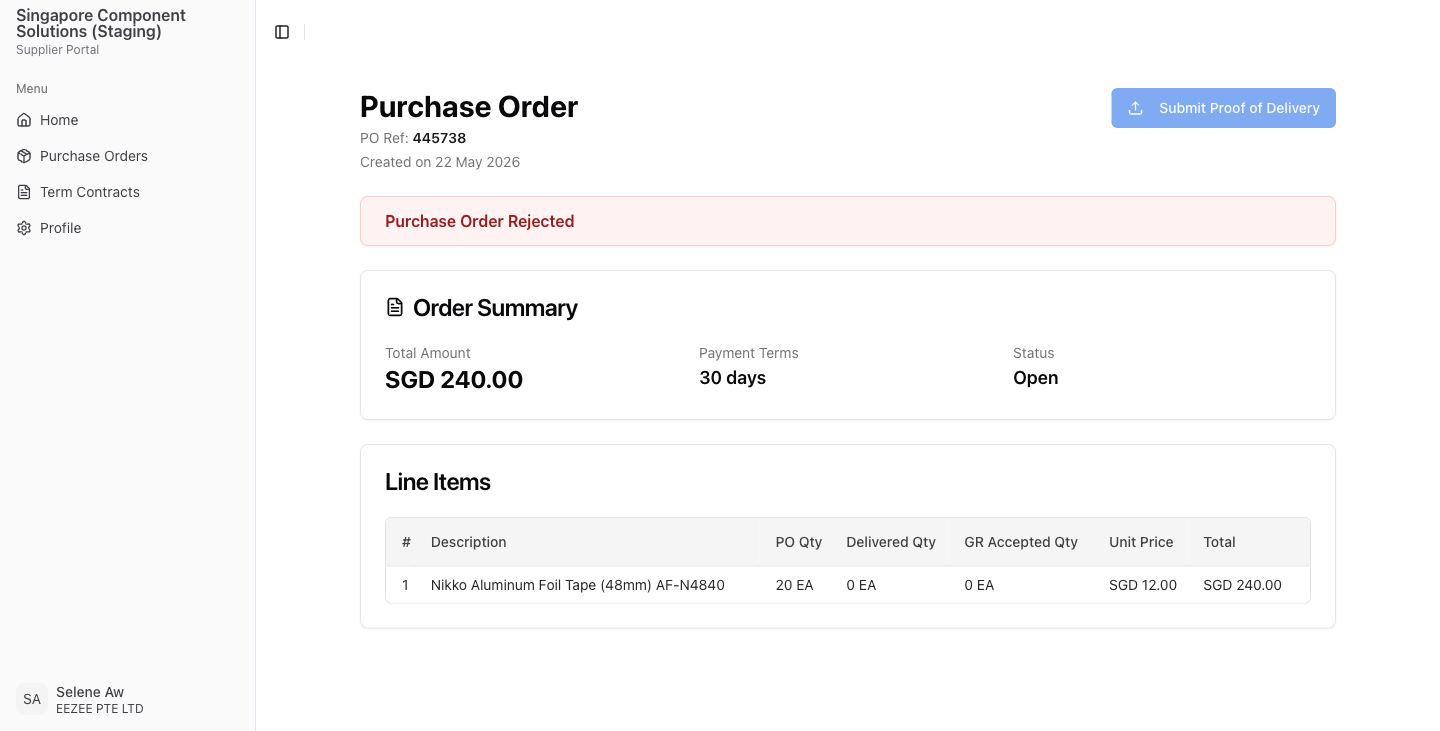
After confirming, the dialog closes and the page refreshes. The Purchase Order Rejected badge replaces the Action Required banner. The Submit Proof of Delivery button remains disabled. The buyer is notified automatically.
Submit a Quote
How to respond to a Request for Quotation (RFQ) from a buyer on ProcureFlow. Enter your prices, lead times, and submit before the deadline.
Update Delivery Date
After accepting a Purchase Order, you can update the estimated delivery date for any line item directly from the PO detail page.