Create GR & Invoice
Once a Purchase Order has been accepted, submit your proof of delivery and invoice directly through the Supplier Portal.
Last updated 12 October 2026
Who can use this?
Available to Supplier contacts only. Buyers manage purchase orders through the main ProcureFlow dashboard.
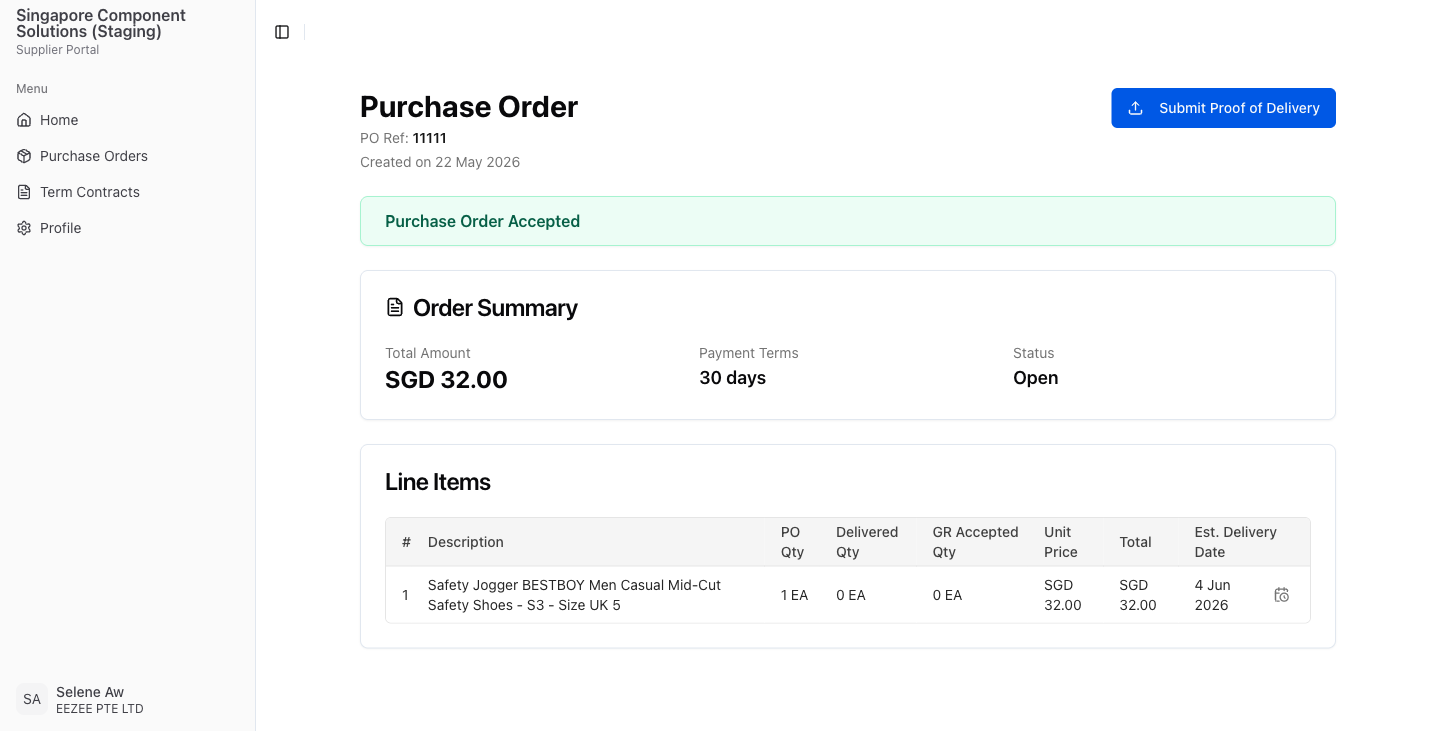
Open the Submit Proof of Delivery form
Navigate to the accepted Purchase Order in the Supplier Portal. At the top of the page, click the Submit Proof of Delivery button. This button is only active after the PO has been accepted.
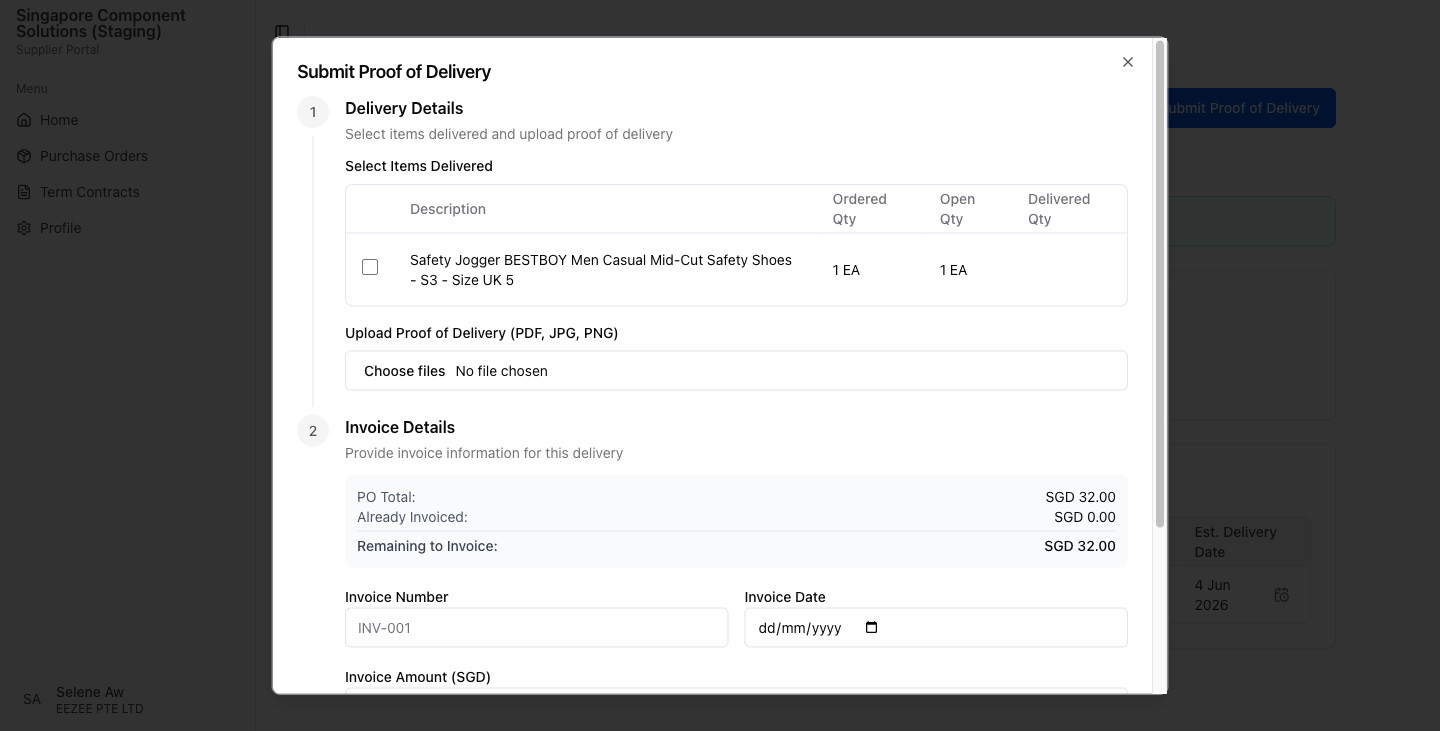
Select the items you are delivering
The form has two sections. In Section 1: Delivery Details, tick the checkbox next to each line item included in this shipment. The Delivered Qty field auto-fills with the remaining open quantity. Adjust it if you are making a partial delivery.
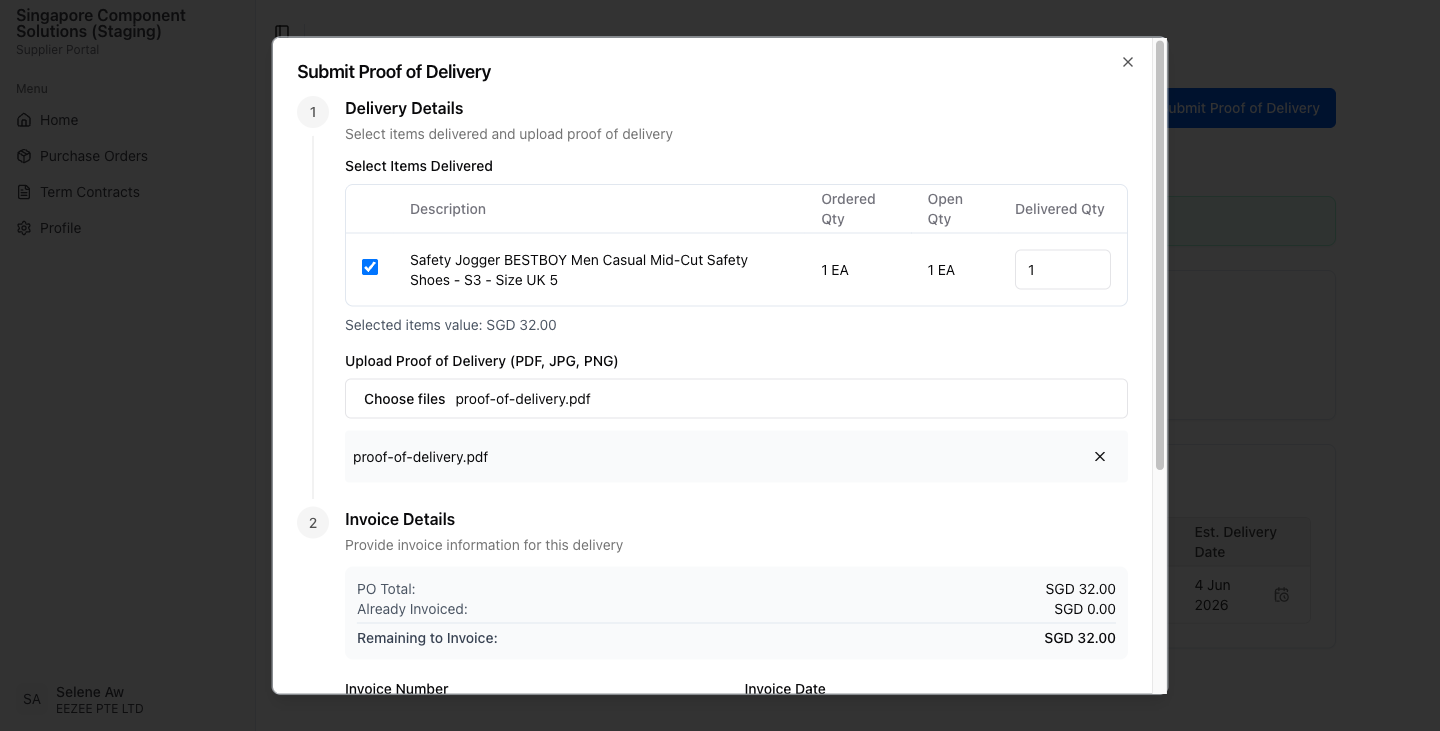
Upload your Proof of Delivery document
Below the items table, click Choose File under Upload Proof of Delivery. Select a PDF, JPG, or PNG file. You can attach multiple documents if needed.
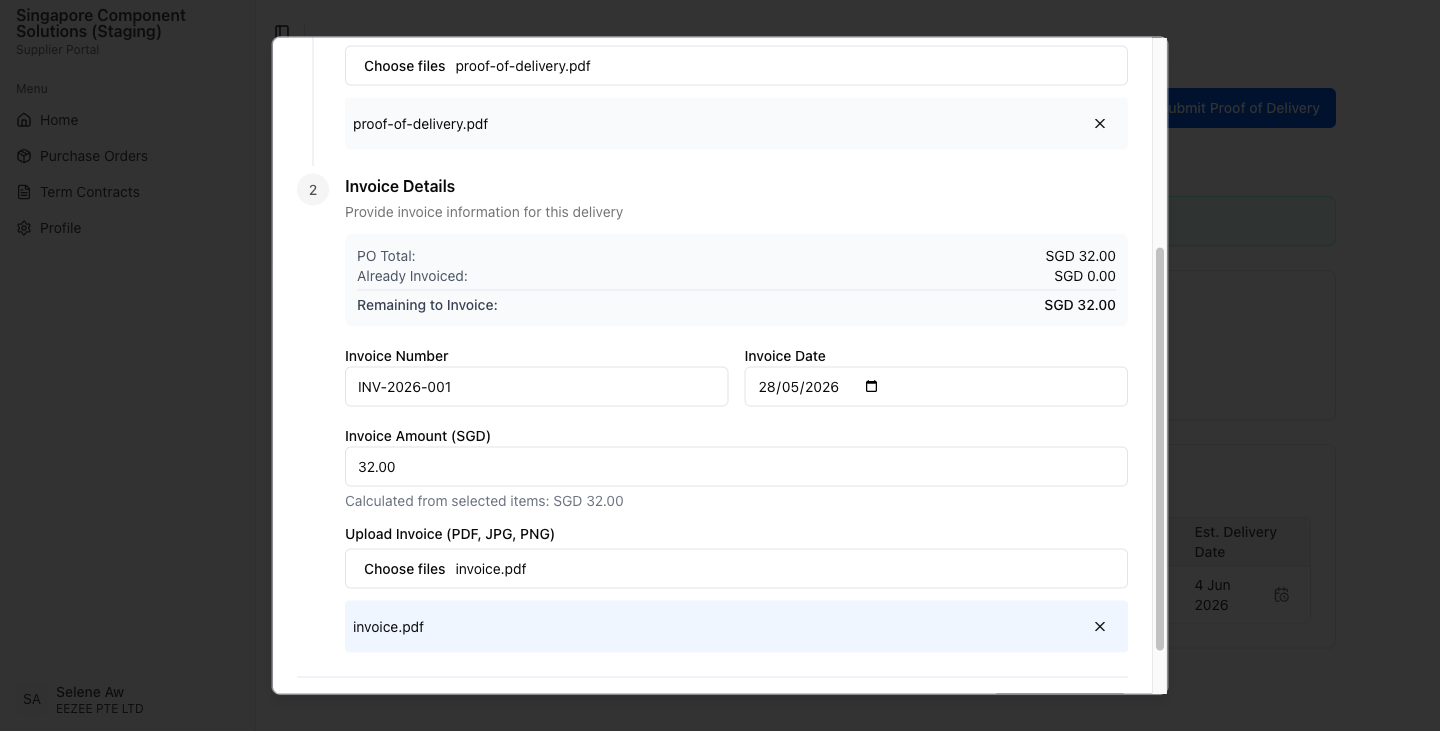
Fill in invoice details and upload your invoice
In Section 2: Invoice Details, complete all fields:
Invoice Number - your invoice reference (e.g. INV-2026-001) Invoice Date - the date printed on your invoice Invoice Amount - auto-filled from the selected items; adjust only if your invoice differs Upload Invoice - attach your invoice document (PDF, JPG, or PNG)
Submit and confirm
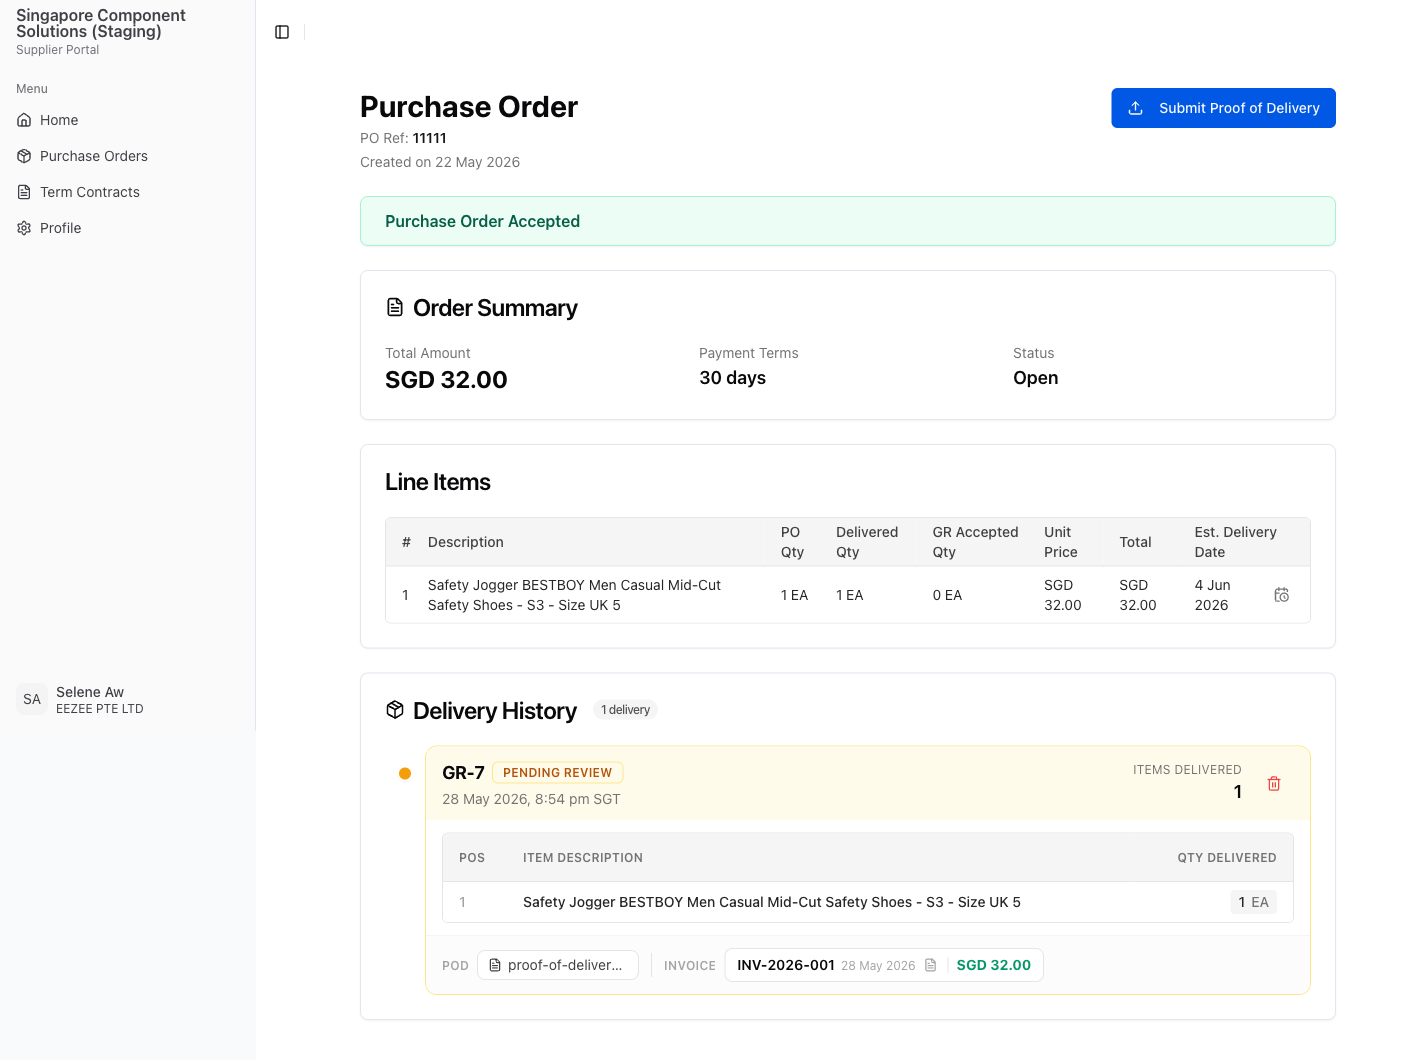
Click Submit Delivery at the bottom of the form. The dialog closes and the page refreshes. A Delivery History section appears at the bottom of the PO, showing your new goods receipt with a Pending Review status. The buyer reviews and accepts or rejects it.
Update Delivery Date
After accepting a Purchase Order, you can update the estimated delivery date for any line item directly from the PO detail page.
Proforma Invoice (COD)
As a Cash-on-Delivery (COD) supplier, raise an advance (proforma) invoice from the supplier portal before delivery, with no goods receipt required.