Assign GL Codes
Control which General Ledger codes are available when raising purchase requests and purchase orders against a specific cost center.
Last updated 12 October 2026
Who can use this?
Available to Admin users only. Buyers and approvers do not have access to Organisation Settings.
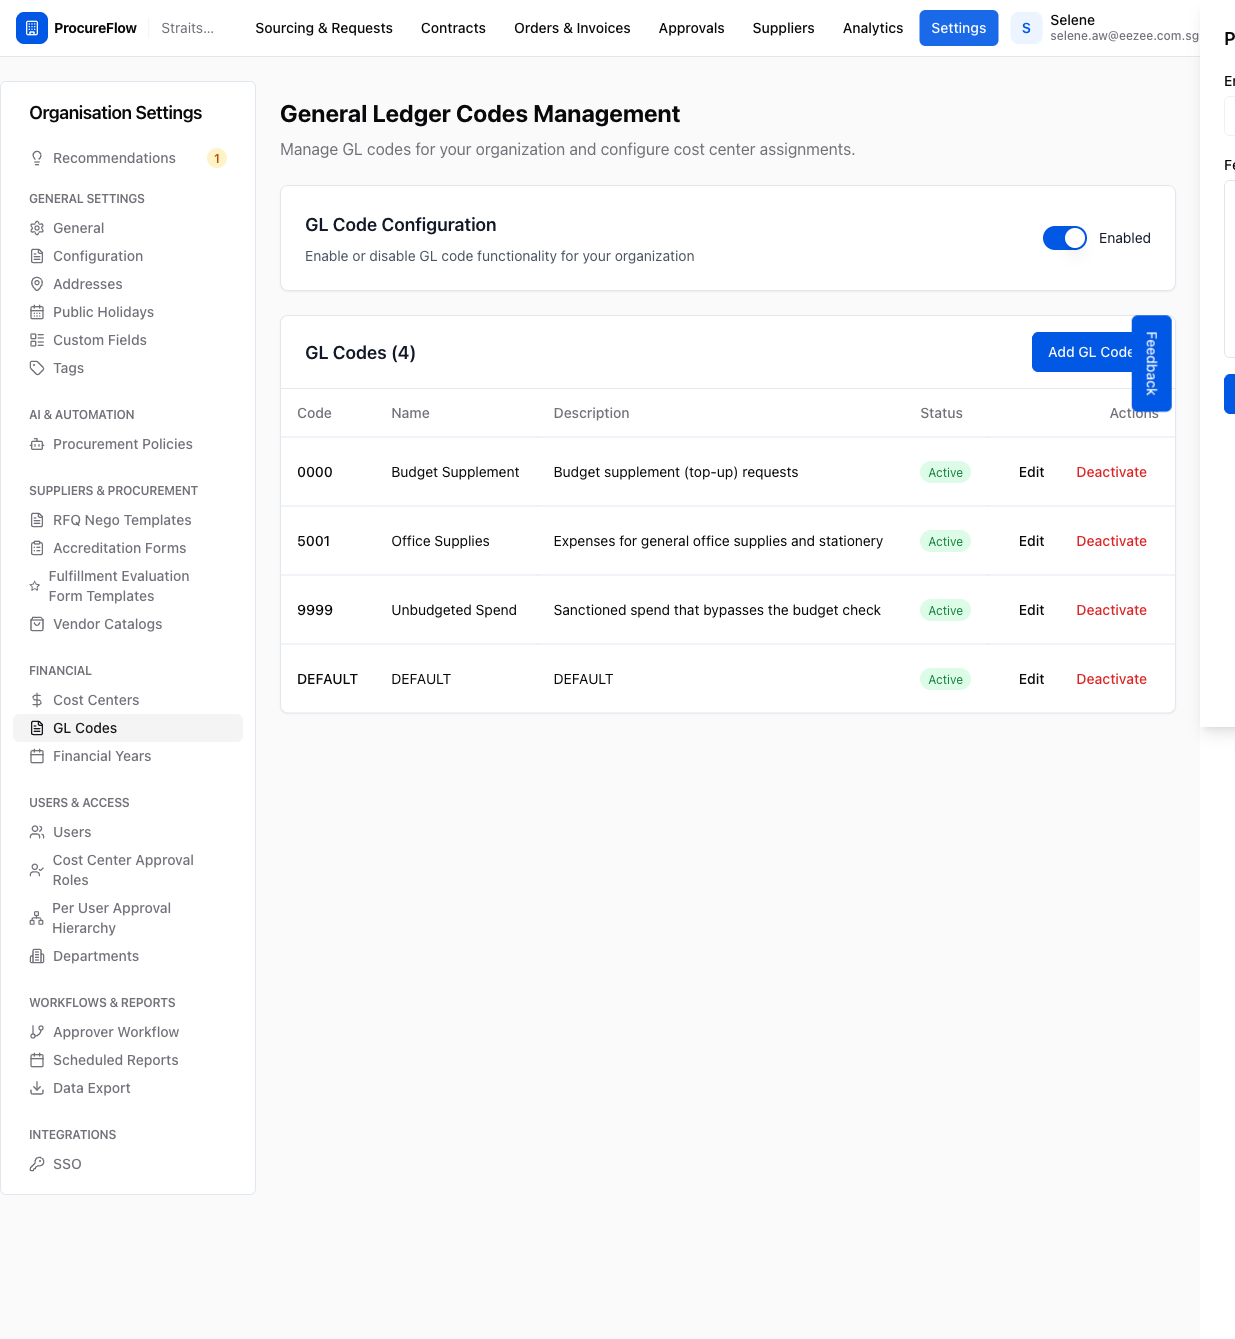
Verify GL codes exist for your organisation
- Go to Settings → GL Codes (under the Financial section in the left sidebar).
- Confirm the GL code feature is toggled Enabled and that the GL codes you want to assign are listed here.
- If no codes exist yet, create them before proceeding.
Open Cost Centers
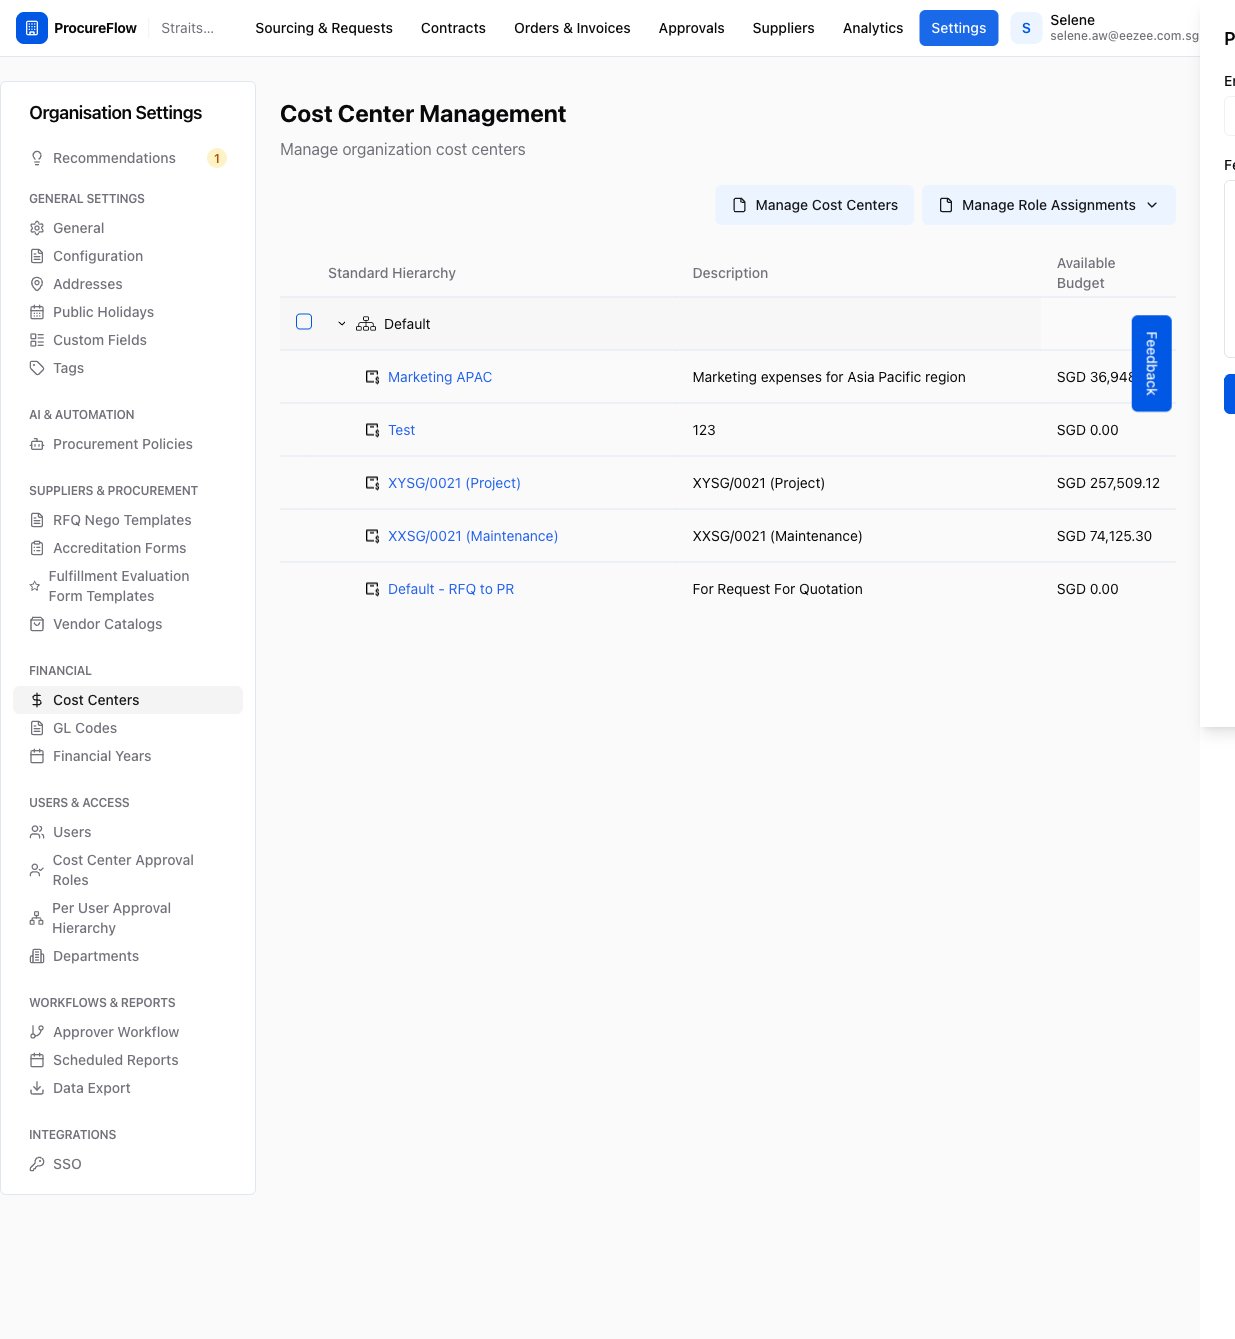
In the left sidebar under Financial, click Cost Centers.
Cost centers may be grouped in a hierarchy. Click the › chevron next to a group name to expand it and reveal the cost centers inside.
Open the target cost center
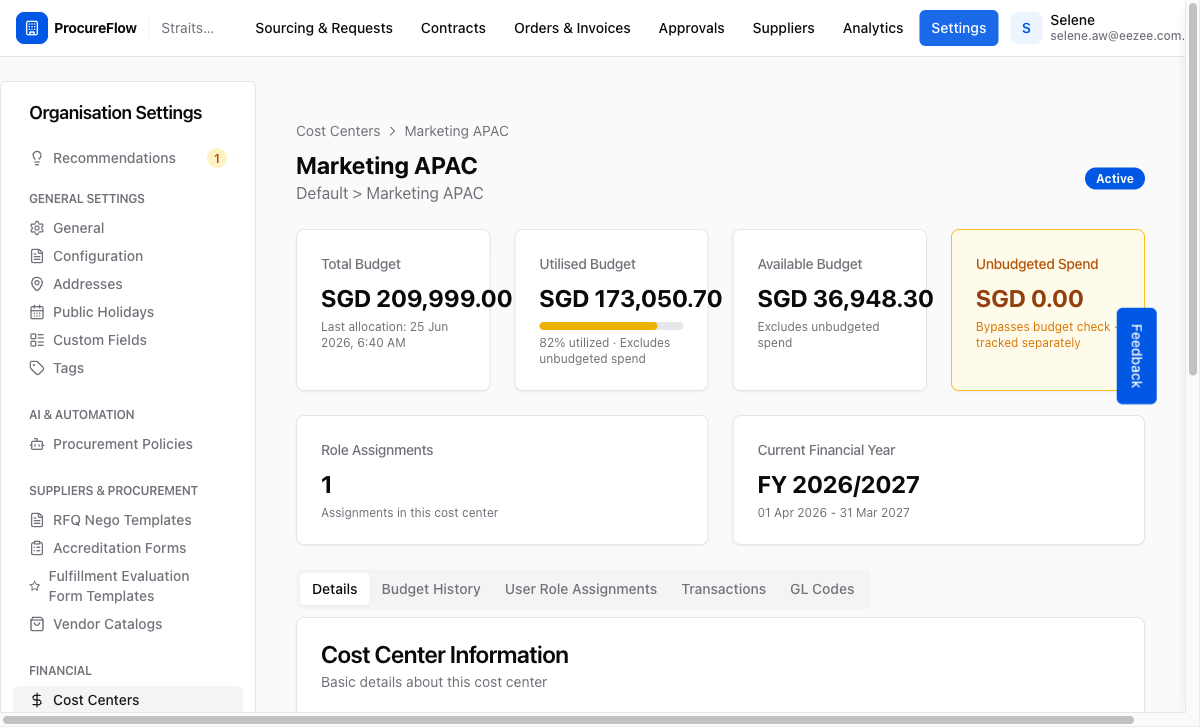
Click the cost center name (for example, Marketing APAC) to open its detail page.
You will see budget summary cards and a tab bar at the top of the detail section.
Click the GL Codes tab
In the tab bar, click GL Codes. This tab is only visible when GL codes are enabled for your organisation.
You will see all GL codes available in the org, with any currently assigned ones highlighted and checked.
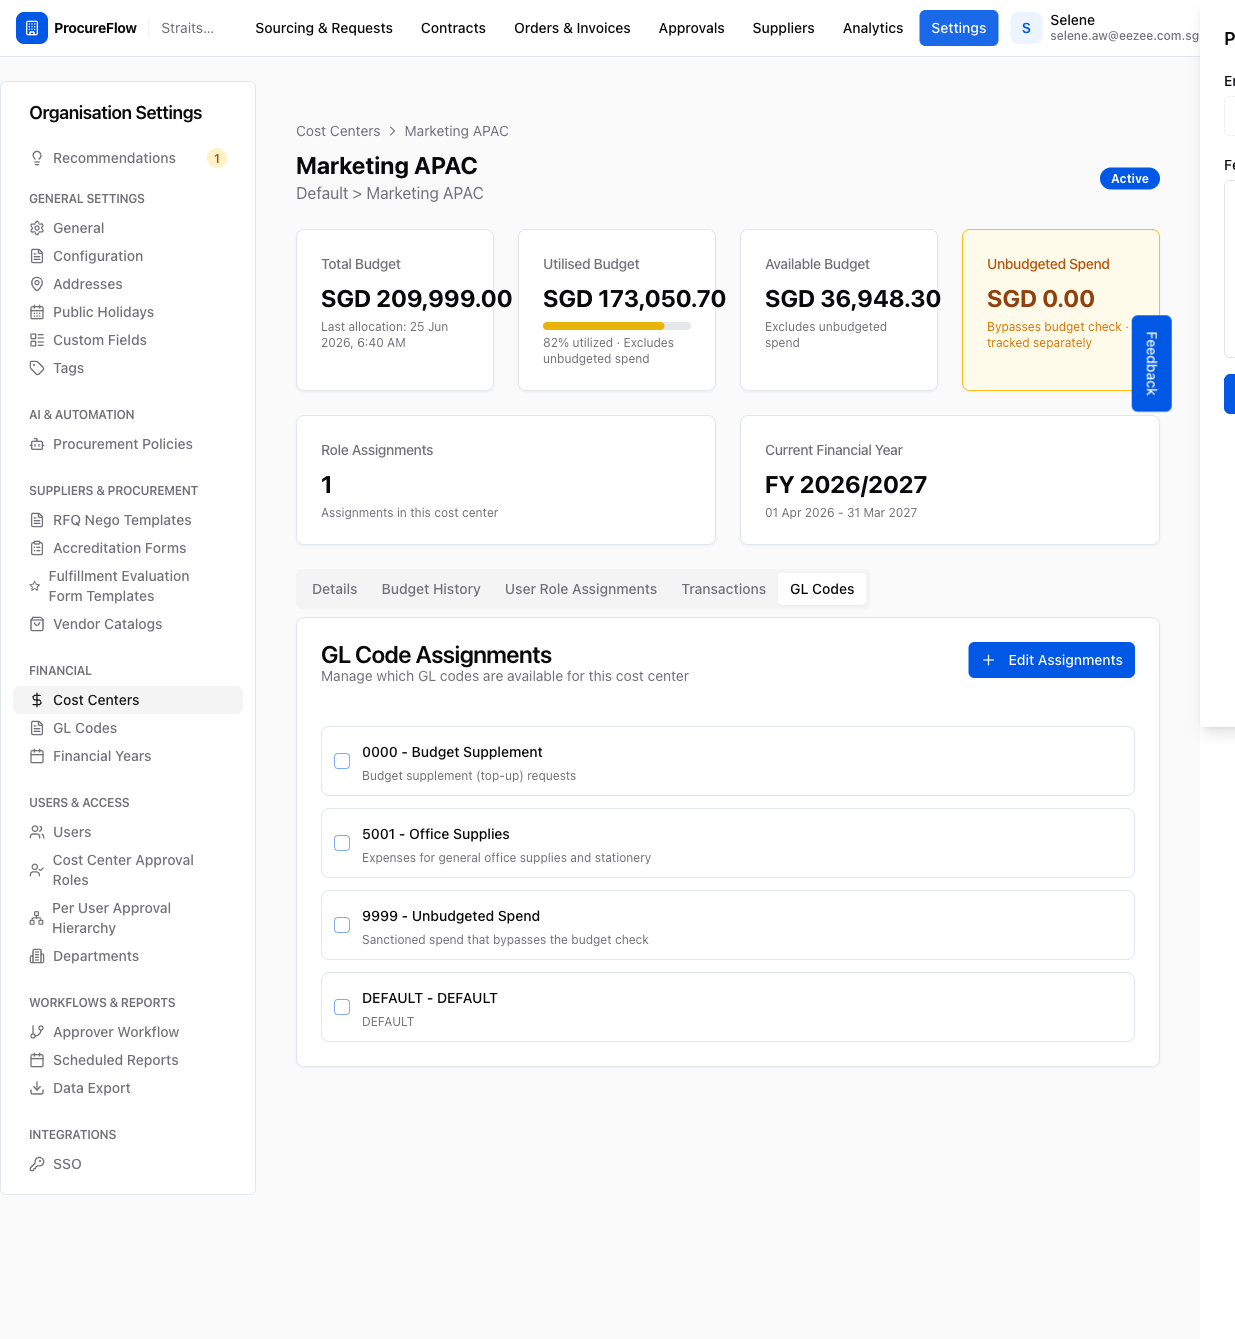
Click Edit Assignments
Click Edit Assignments in the top-right of the GL Code Assignments card.
The card switches to edit mode:
- The checkboxes become interactive.
- A Save Changes button appears.
- A Cancel button lets you discard any changes without saving.
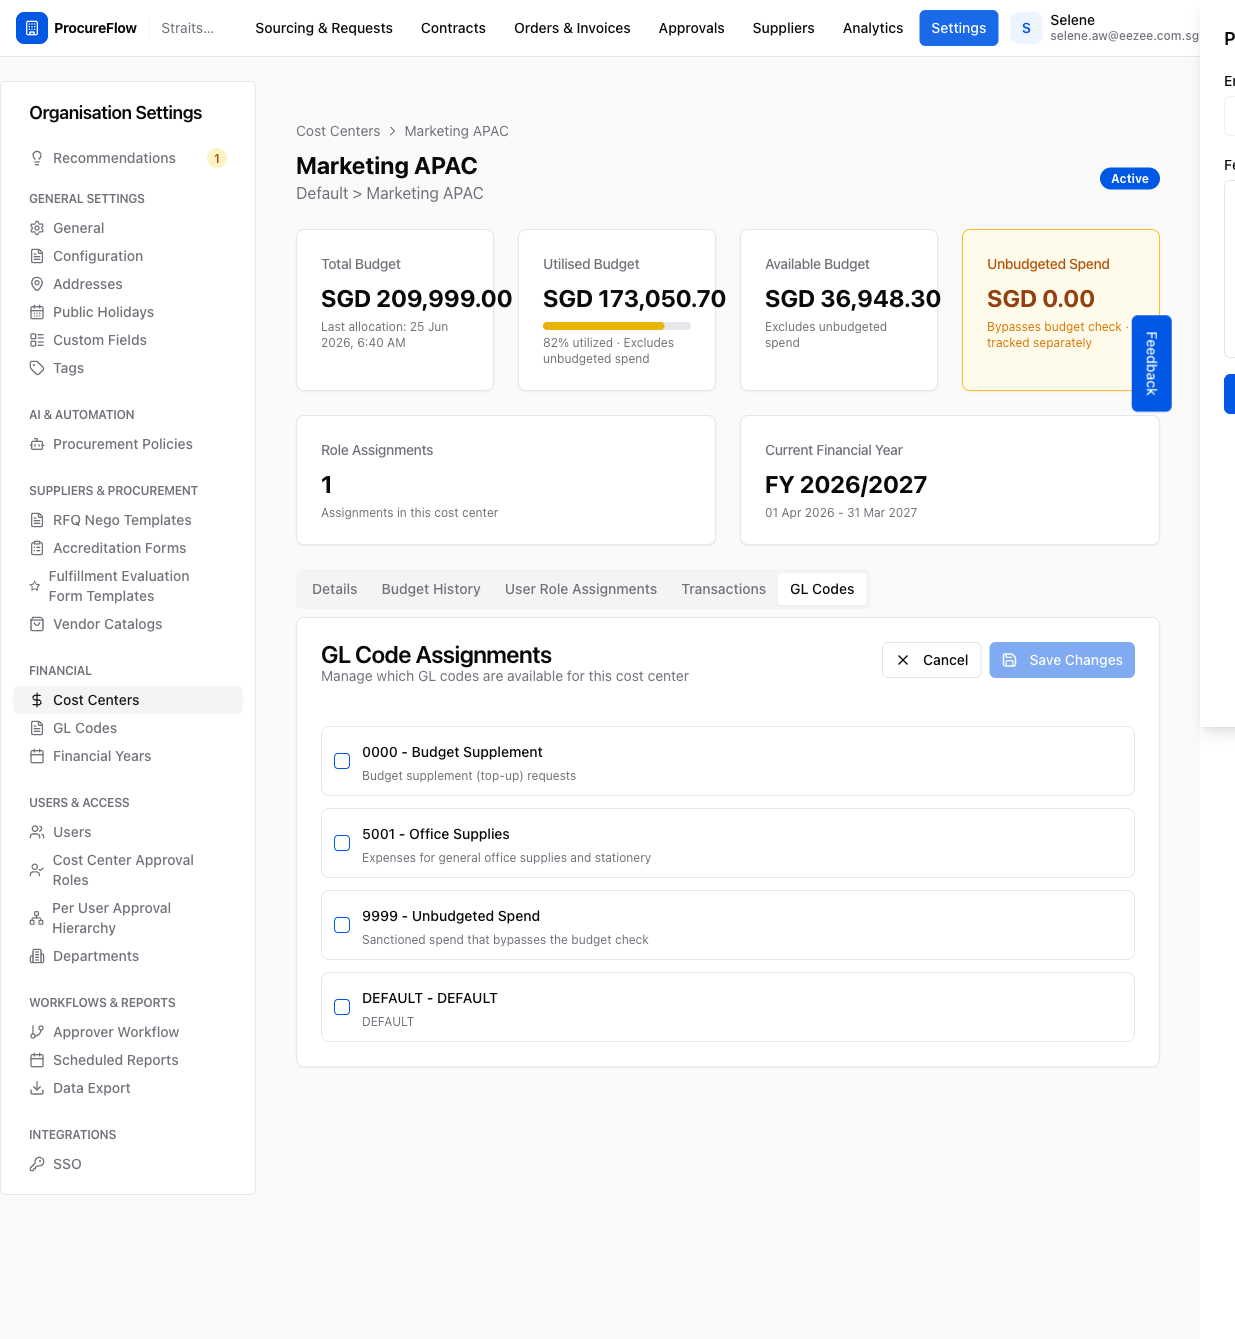
Select the GL codes to assign
Check the GL codes you want to make available for this cost center.
- Each newly checked code shows a Will be added badge.
- Any unchecked previously-assigned code shows Will be removed.
The Save Changes button shows the total number of pending changes.
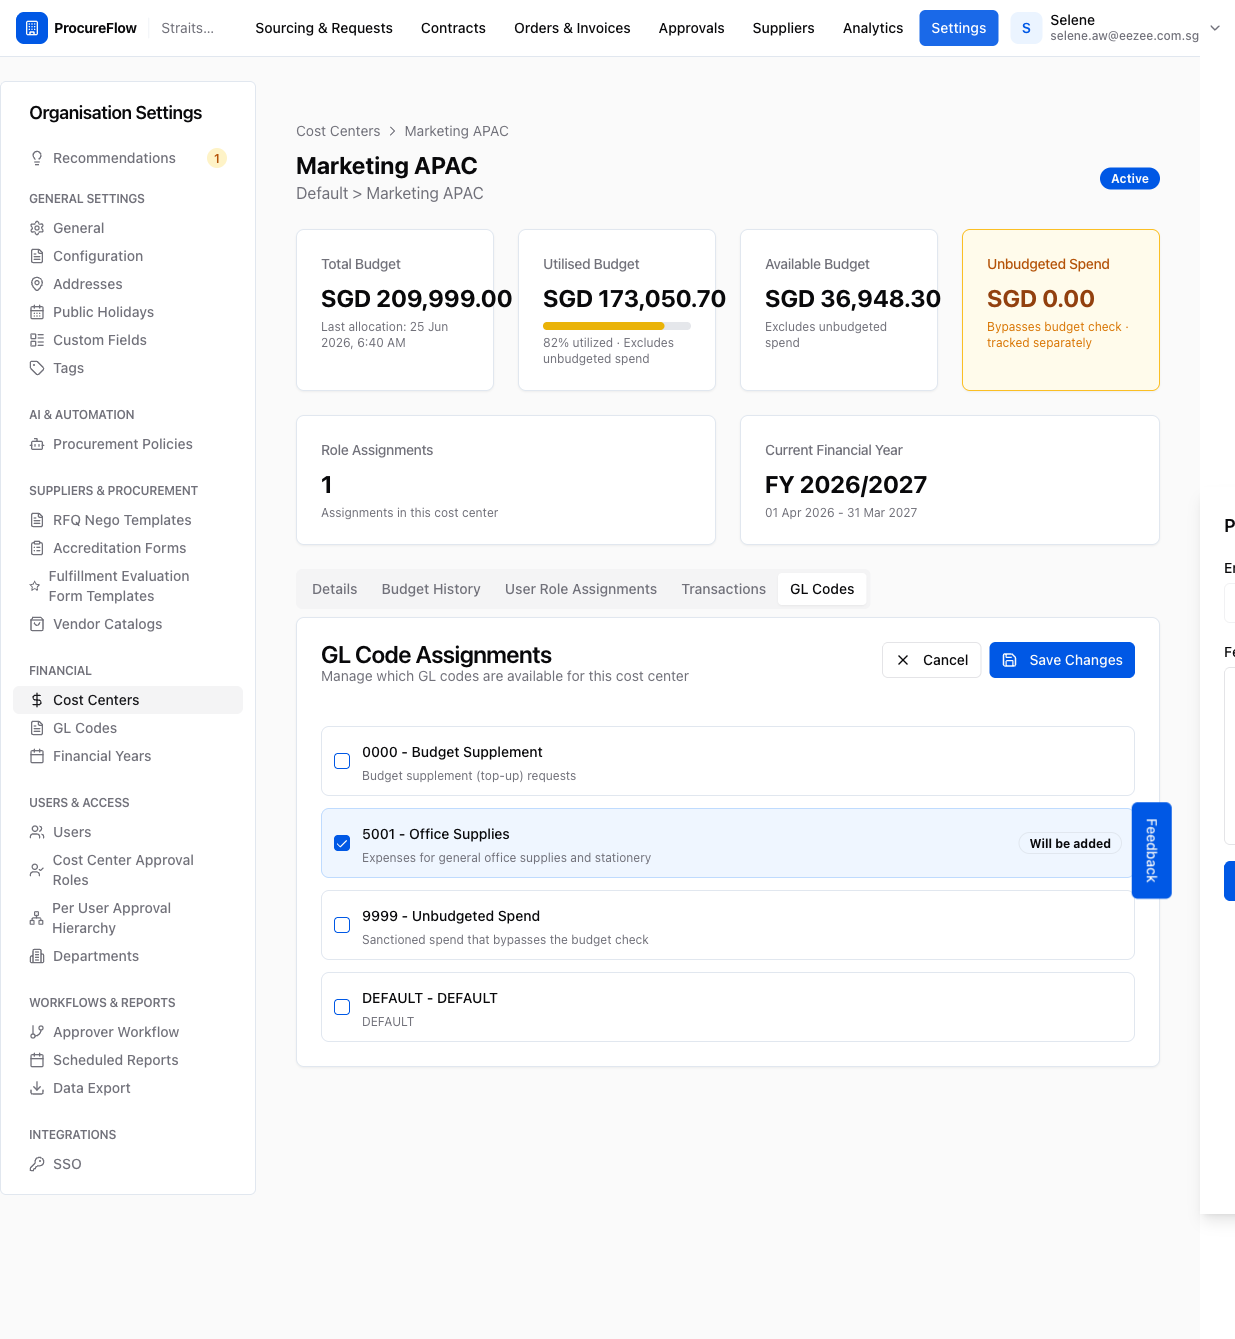
Save changes
Click Save Changes.
Once saved:
- The page returns to view mode.
- A Currently Assigned summary appears at the top of the card, listing all assigned codes.
- A success toast confirms the update.
Top Up a Cost Center
Add a new budget allocation to an existing cost center. This guide walks an admin through navigating to a cost center and recording a budget top-up with a reference name, amount, and financial year.
Create a Payment Run
Group payable invoices into a single payment run, download the bank payment request, and mark the run as settled once paid.