Top Up a Cost Center
Add a new budget allocation to an existing cost center. This guide walks an admin through navigating to a cost center and recording a budget top-up with a reference name, amount, and financial year.
Last updated 12 October 2026
Who can use this?
Available to Admin only. Other roles do not have access to these settings.
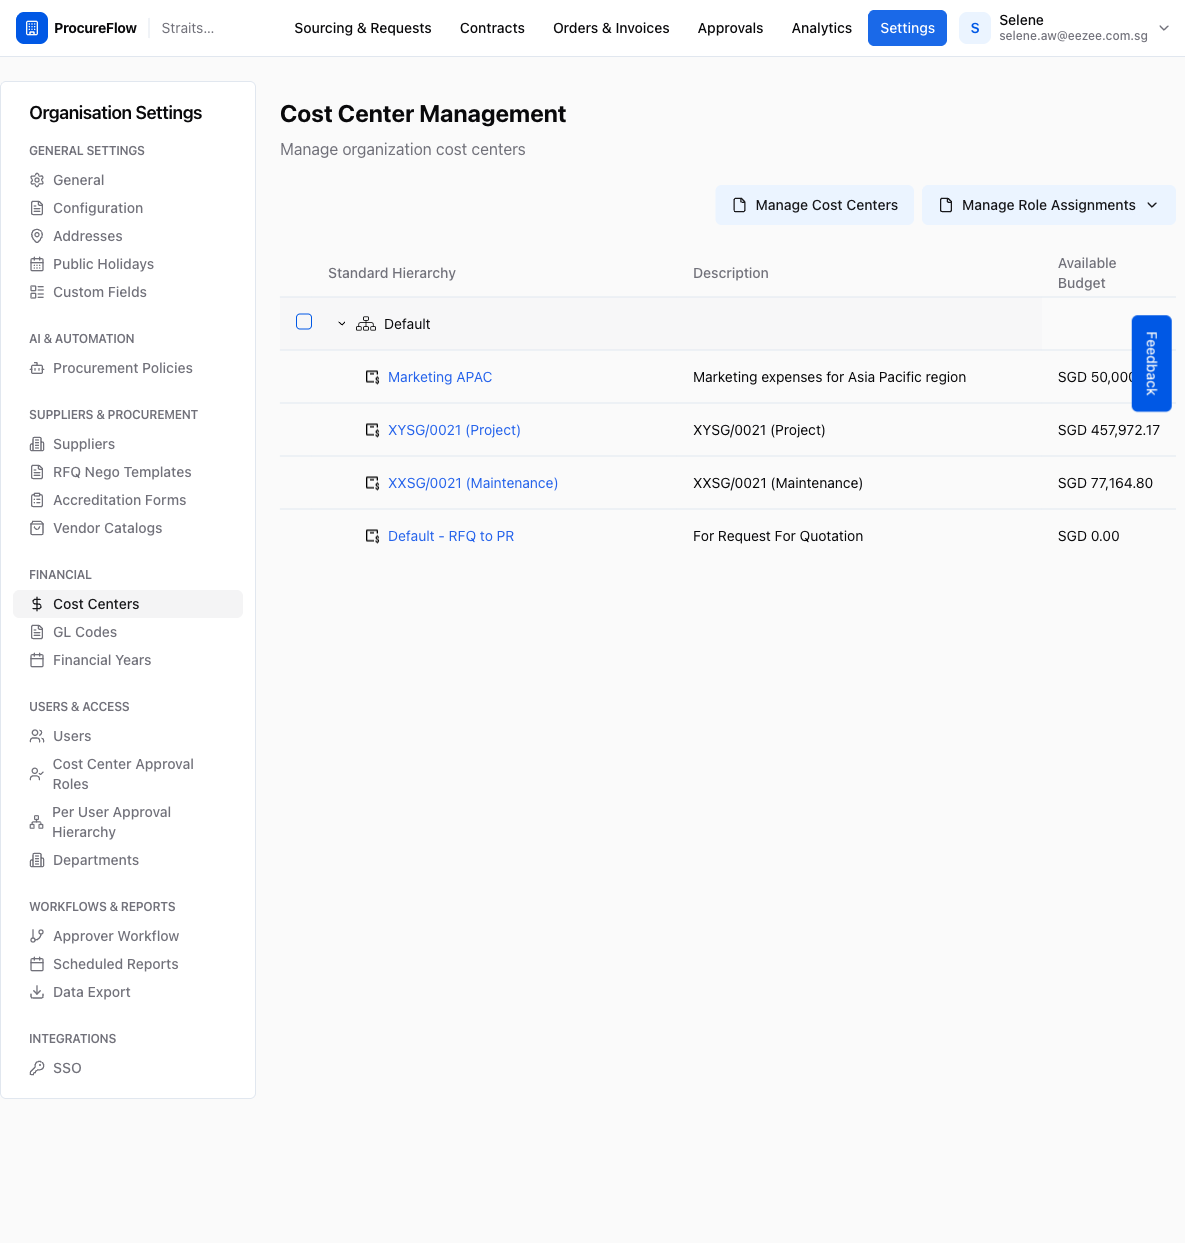
Go to Cost Centers
- In the left sidebar, click Settings.
- Select Cost Centers under the Financial section.
The Cost Center Management page lists all cost center groups and their available budgets.
Open the Cost Center
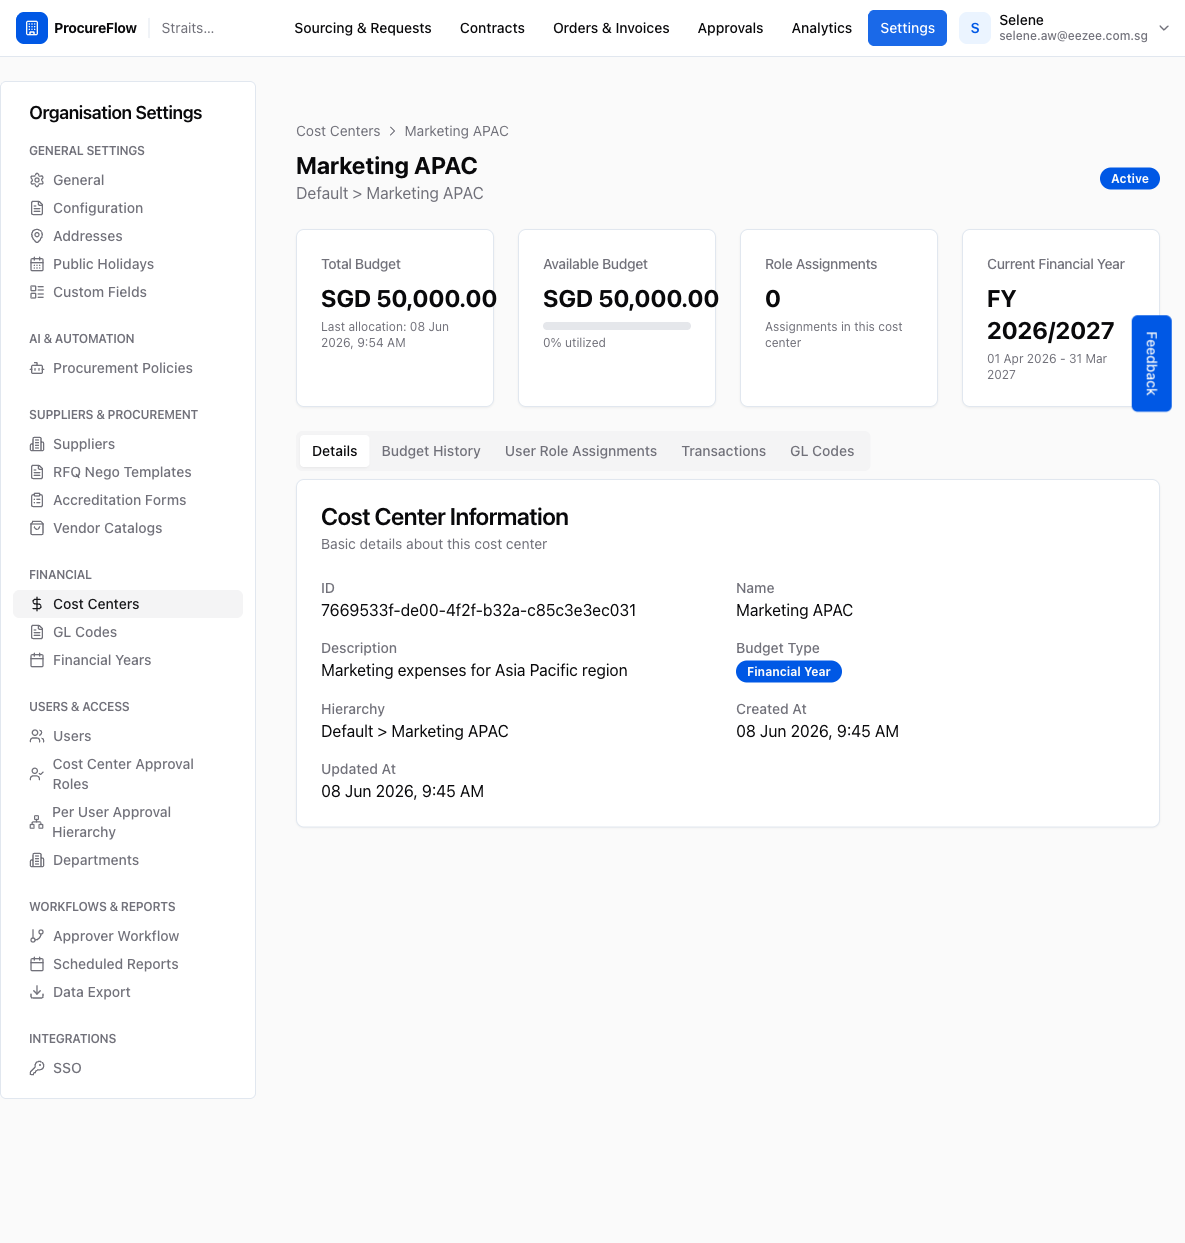
Click the name of the cost center you want to top up.
This opens the Cost Center detail page, which shows a summary of:
- Total budget
- Available budget
- Role assignments
- Current financial year
Open the Budget History tab
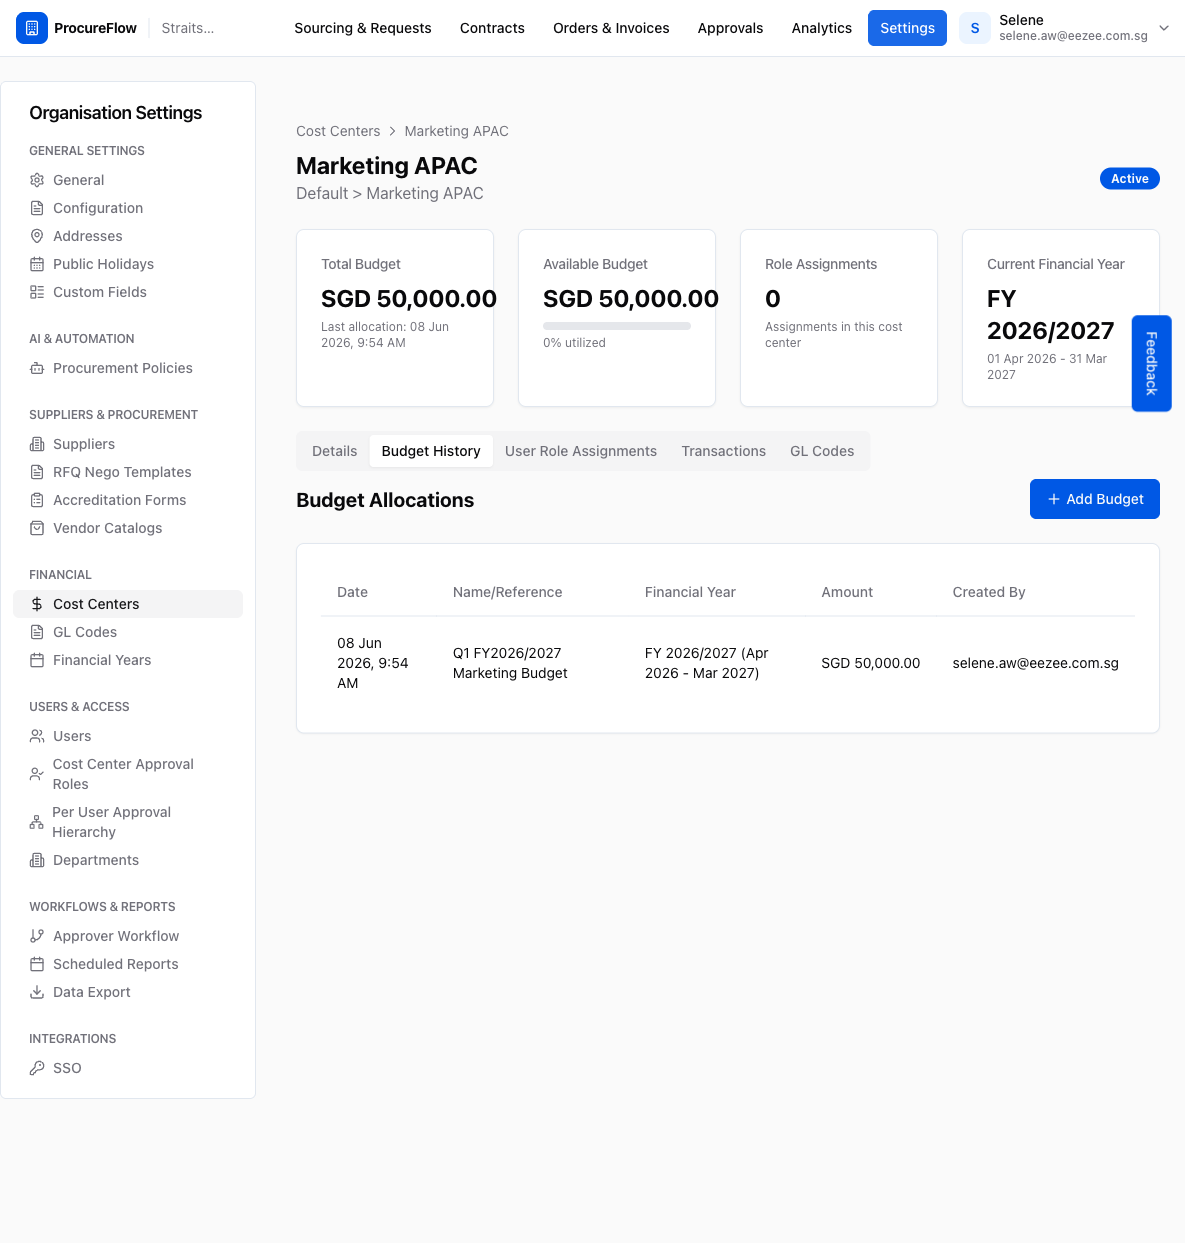
Click the Budget History tab.
This shows all previous budget allocations for this cost center, including:
- Date
- Reference name
- Financial year
- Amount
- Who created each allocation
Click Add Budget
Click the Add Budget button in the top-right corner of the Budget Allocations section.
A dialog will appear with fields for the reference name, amount, and (if the cost center uses Financial Year budgeting) a financial year selector.
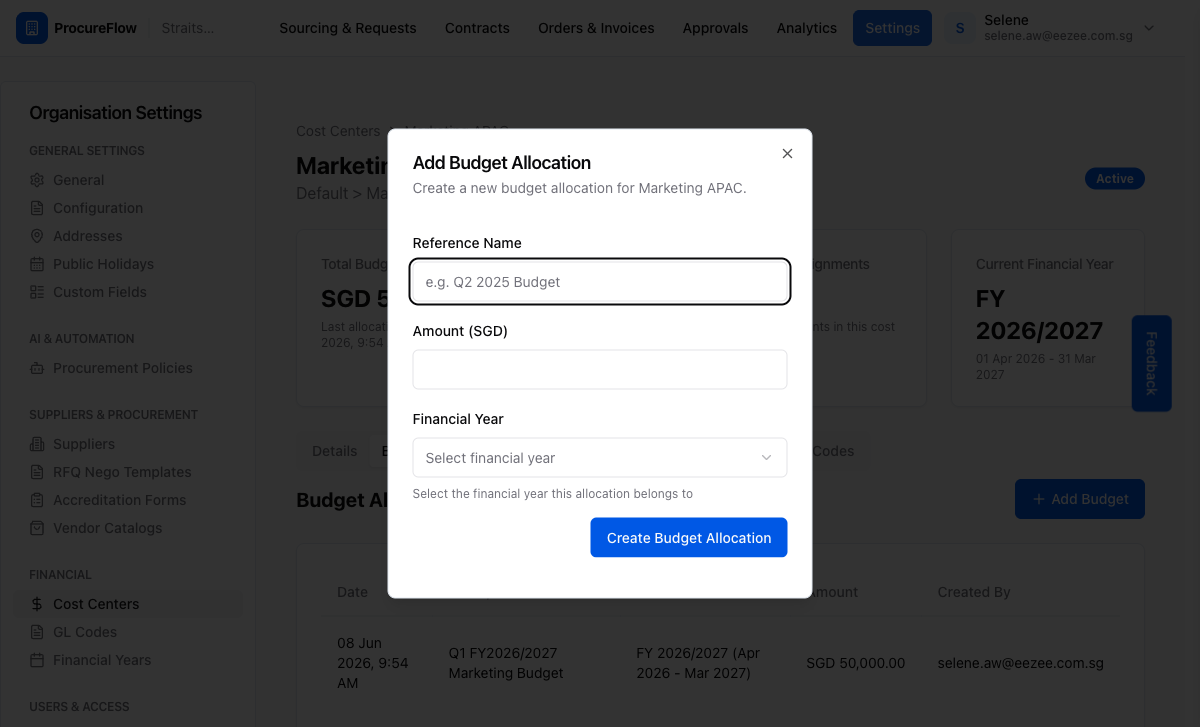
Fill in the budget details
Complete all fields in the dialog:
- Reference Name: A label for this allocation, e.g. "Q2 FY2026/2027 Marketing Budget". This is for record-keeping and will appear in the budget history table.
- Amount: The amount to add, in the organisation's currency (SGD in this example). Must be greater than zero.
- Financial Year: Select the financial year this allocation applies to. This field only appears for cost centers set to Financial Year budgeting mode.
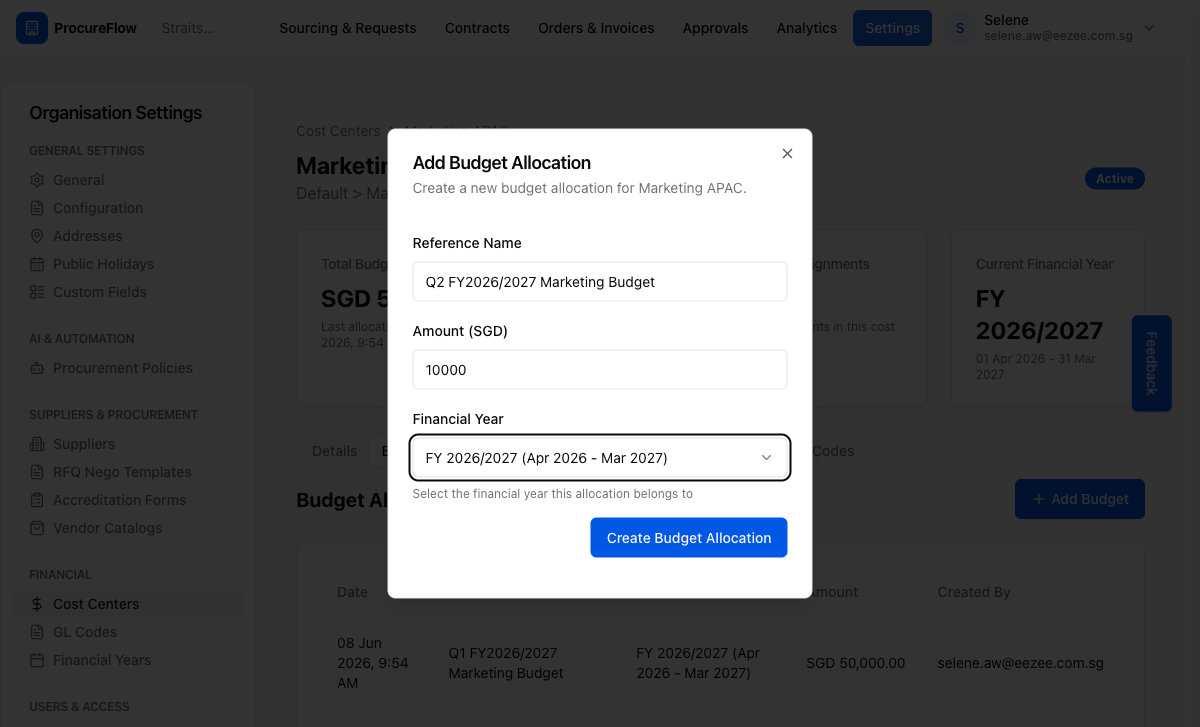
Submit and confirm
Click Create Budget Allocation.
After you click:
- A green success toast notification will appear confirming the allocation was created.
- The dialog will close automatically and the page will refresh.
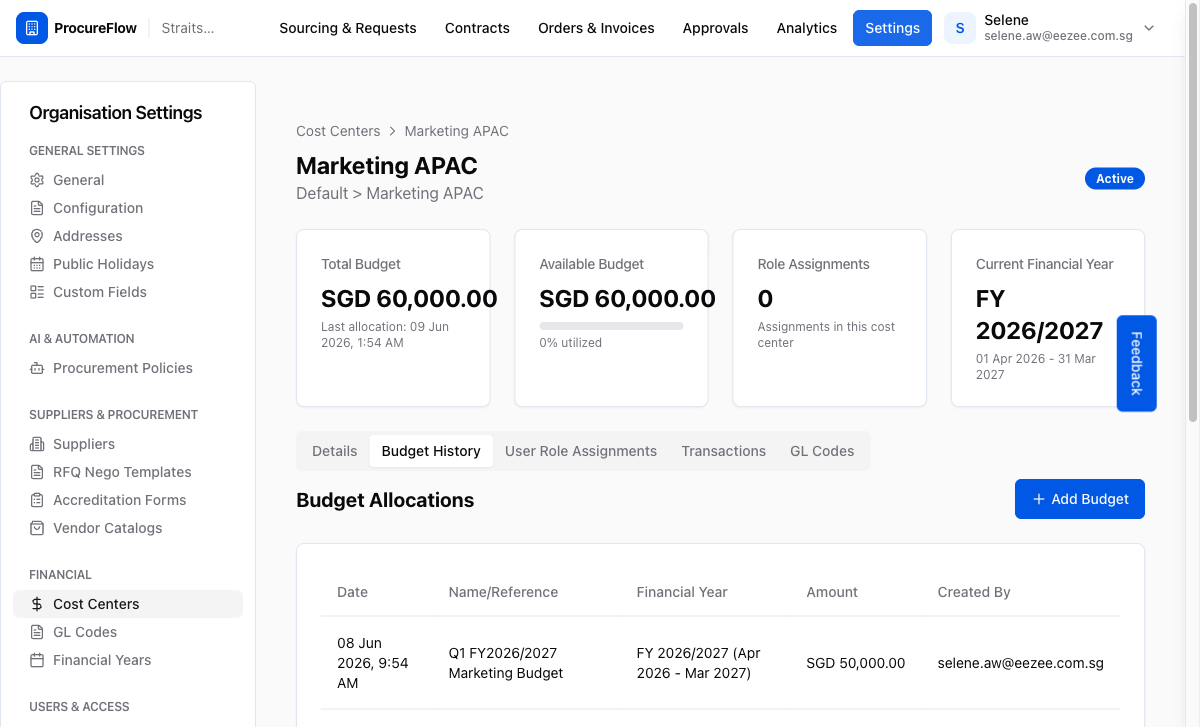
Verify the updated budget
After the page refreshes:
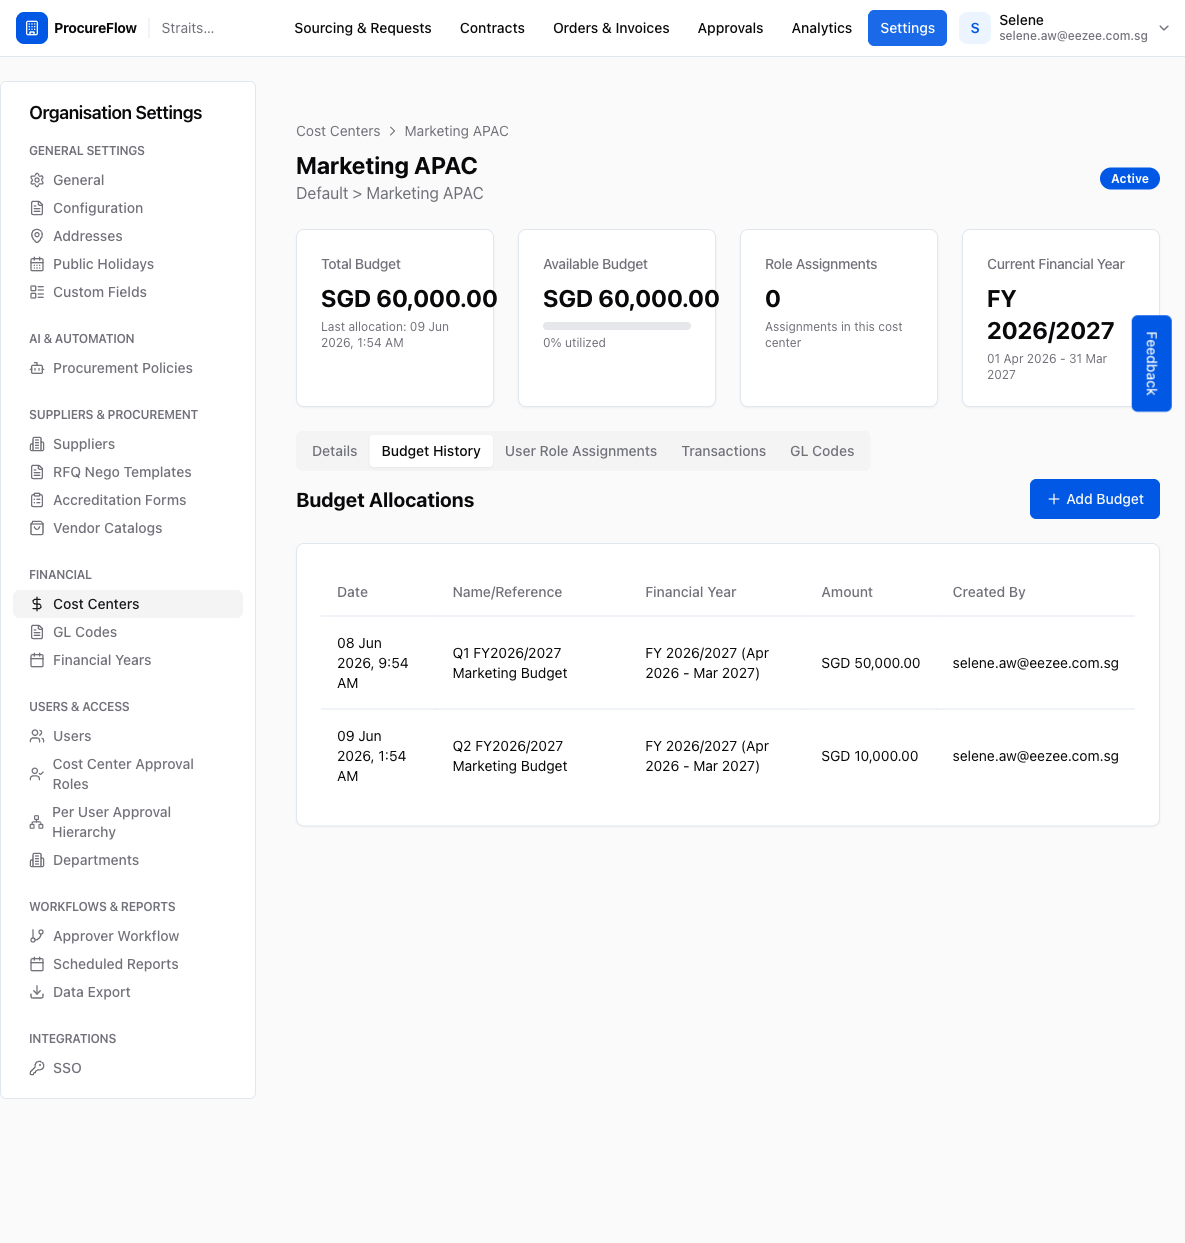
- The Budget History table will show the new allocation as the latest entry.
- The Total Budget and Available Budget summary cards at the top of the page will also update to reflect the added amount.