Allocate Budget
Step-by-step guide for adding budget allocations to a cost center, covering both Lifetime and Financial Year budget types.
Last updated 12 October 2026
Who can use this?
Available to Admin only. Other roles do not have access to these settings.
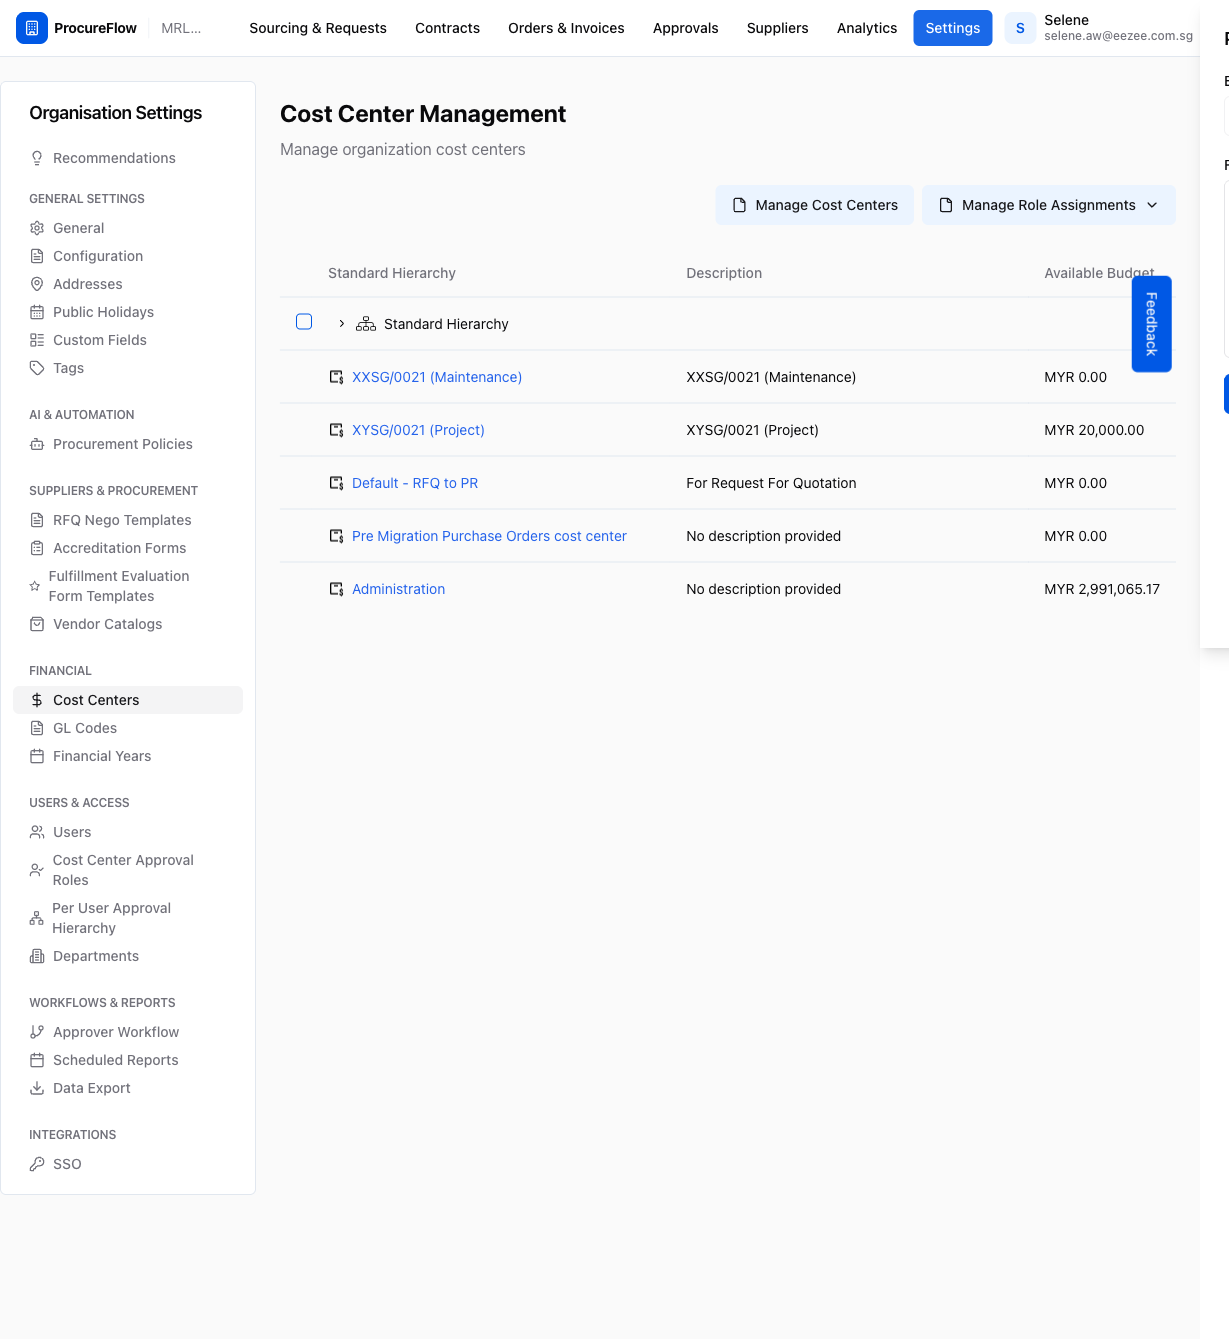
Navigate to Cost Centers
- Go to Settings in the top navigation bar.
- In the left sidebar under Financial, click Cost Centers.
The page shows a hierarchy of all cost center groups and cost centers.
Open a cost center
- Click the expand arrow next to a group to reveal cost centers inside it.
- Click the cost center name (shown in blue) to open its detail page.
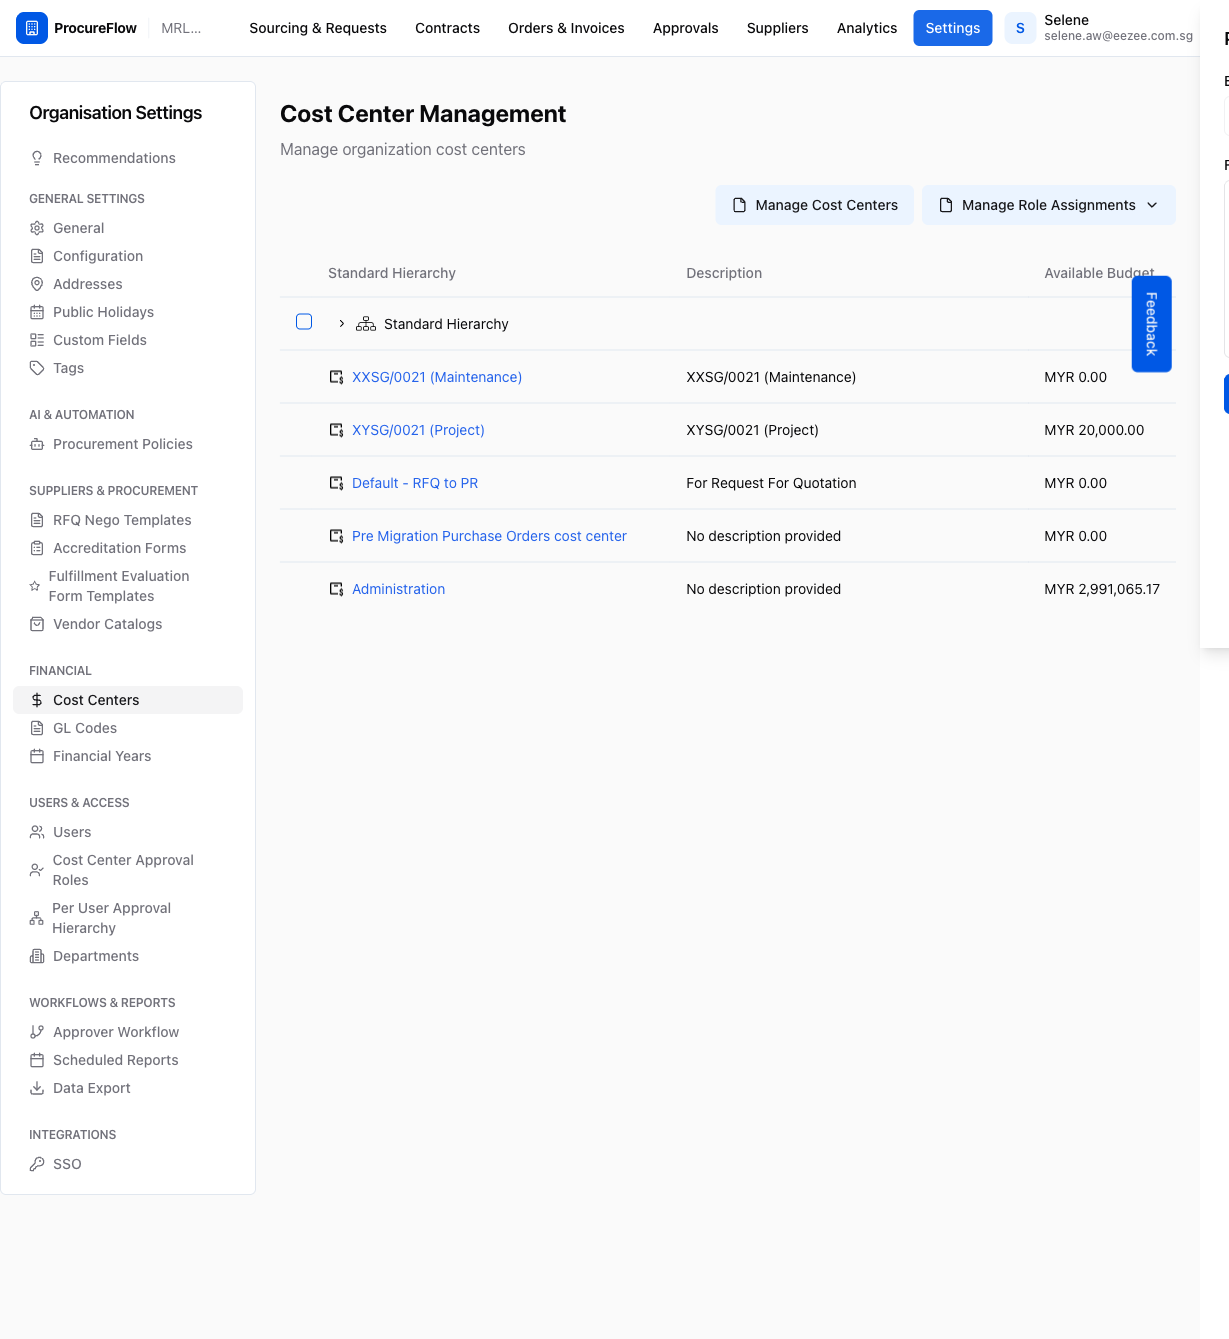
Review the cost center overview
The cost center detail page shows four summary cards at the top:
- Total Budget: the sum of all budget allocated to this cost center (for the current financial year if FY type).
- Available Budget: total budget minus spending, with a utilisation progress bar.
- Role Assignments: number of users assigned to this cost center.
- Current Financial Year: shown only for Financial Year budget type cost centers; displays the active FY period.
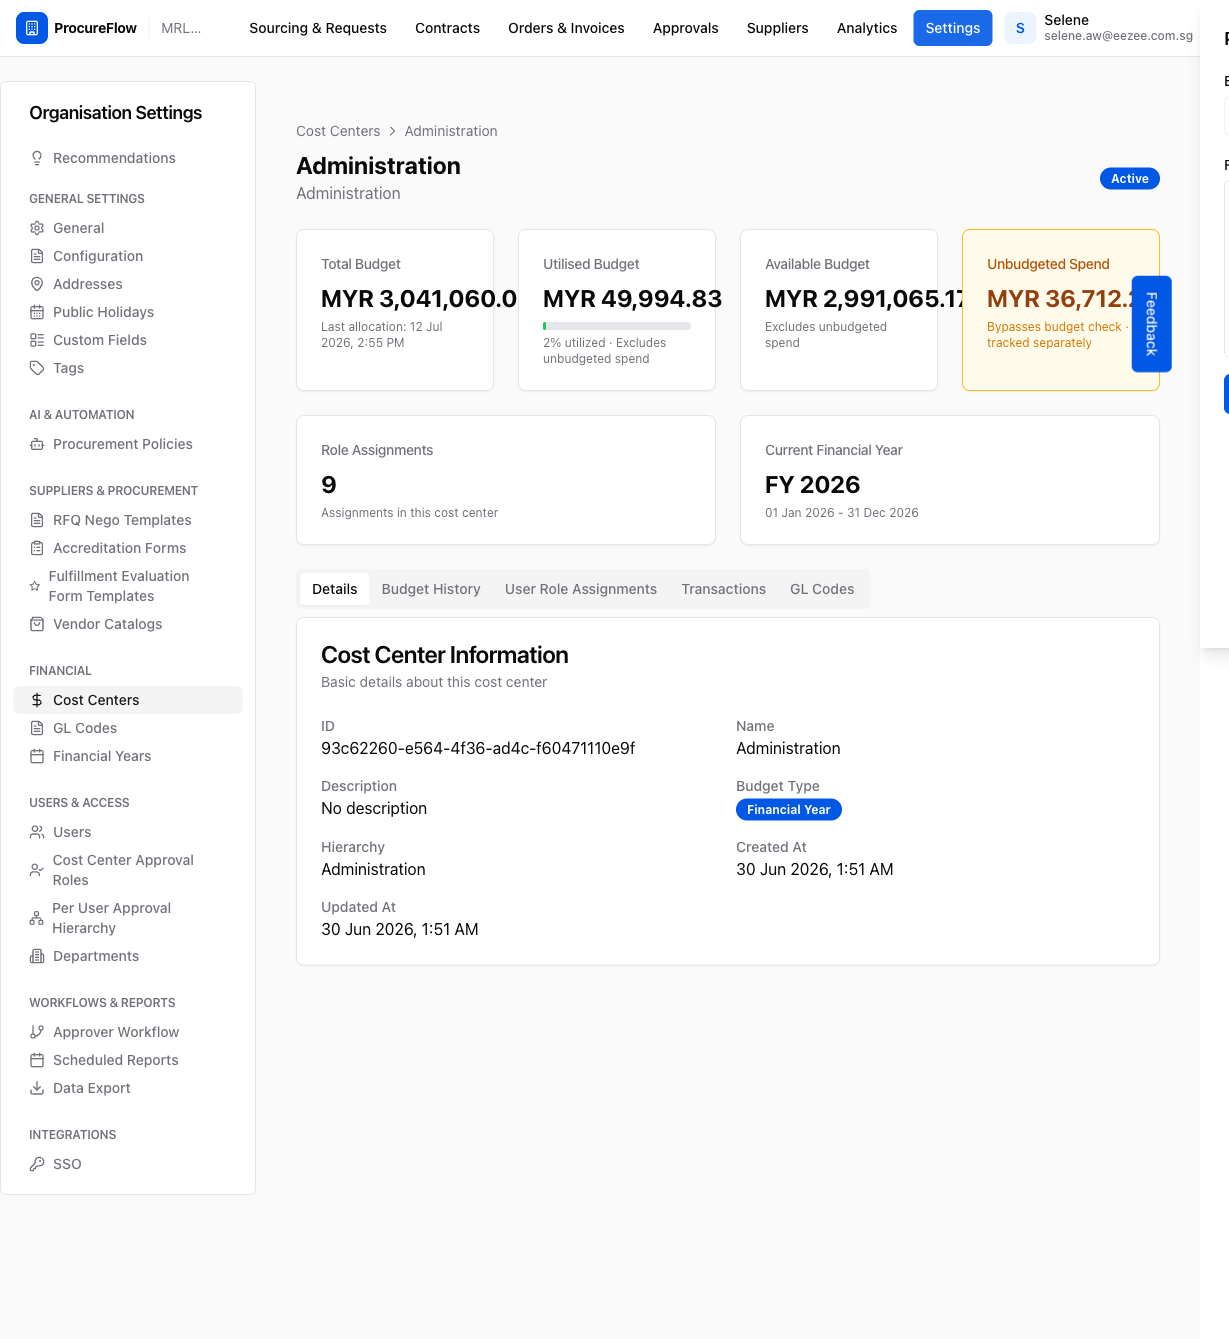
Open the Budget History tab
Click the Budget History tab below the summary cards.
This tab lists all past budget allocations and contains the Add Budget button to create a new one.
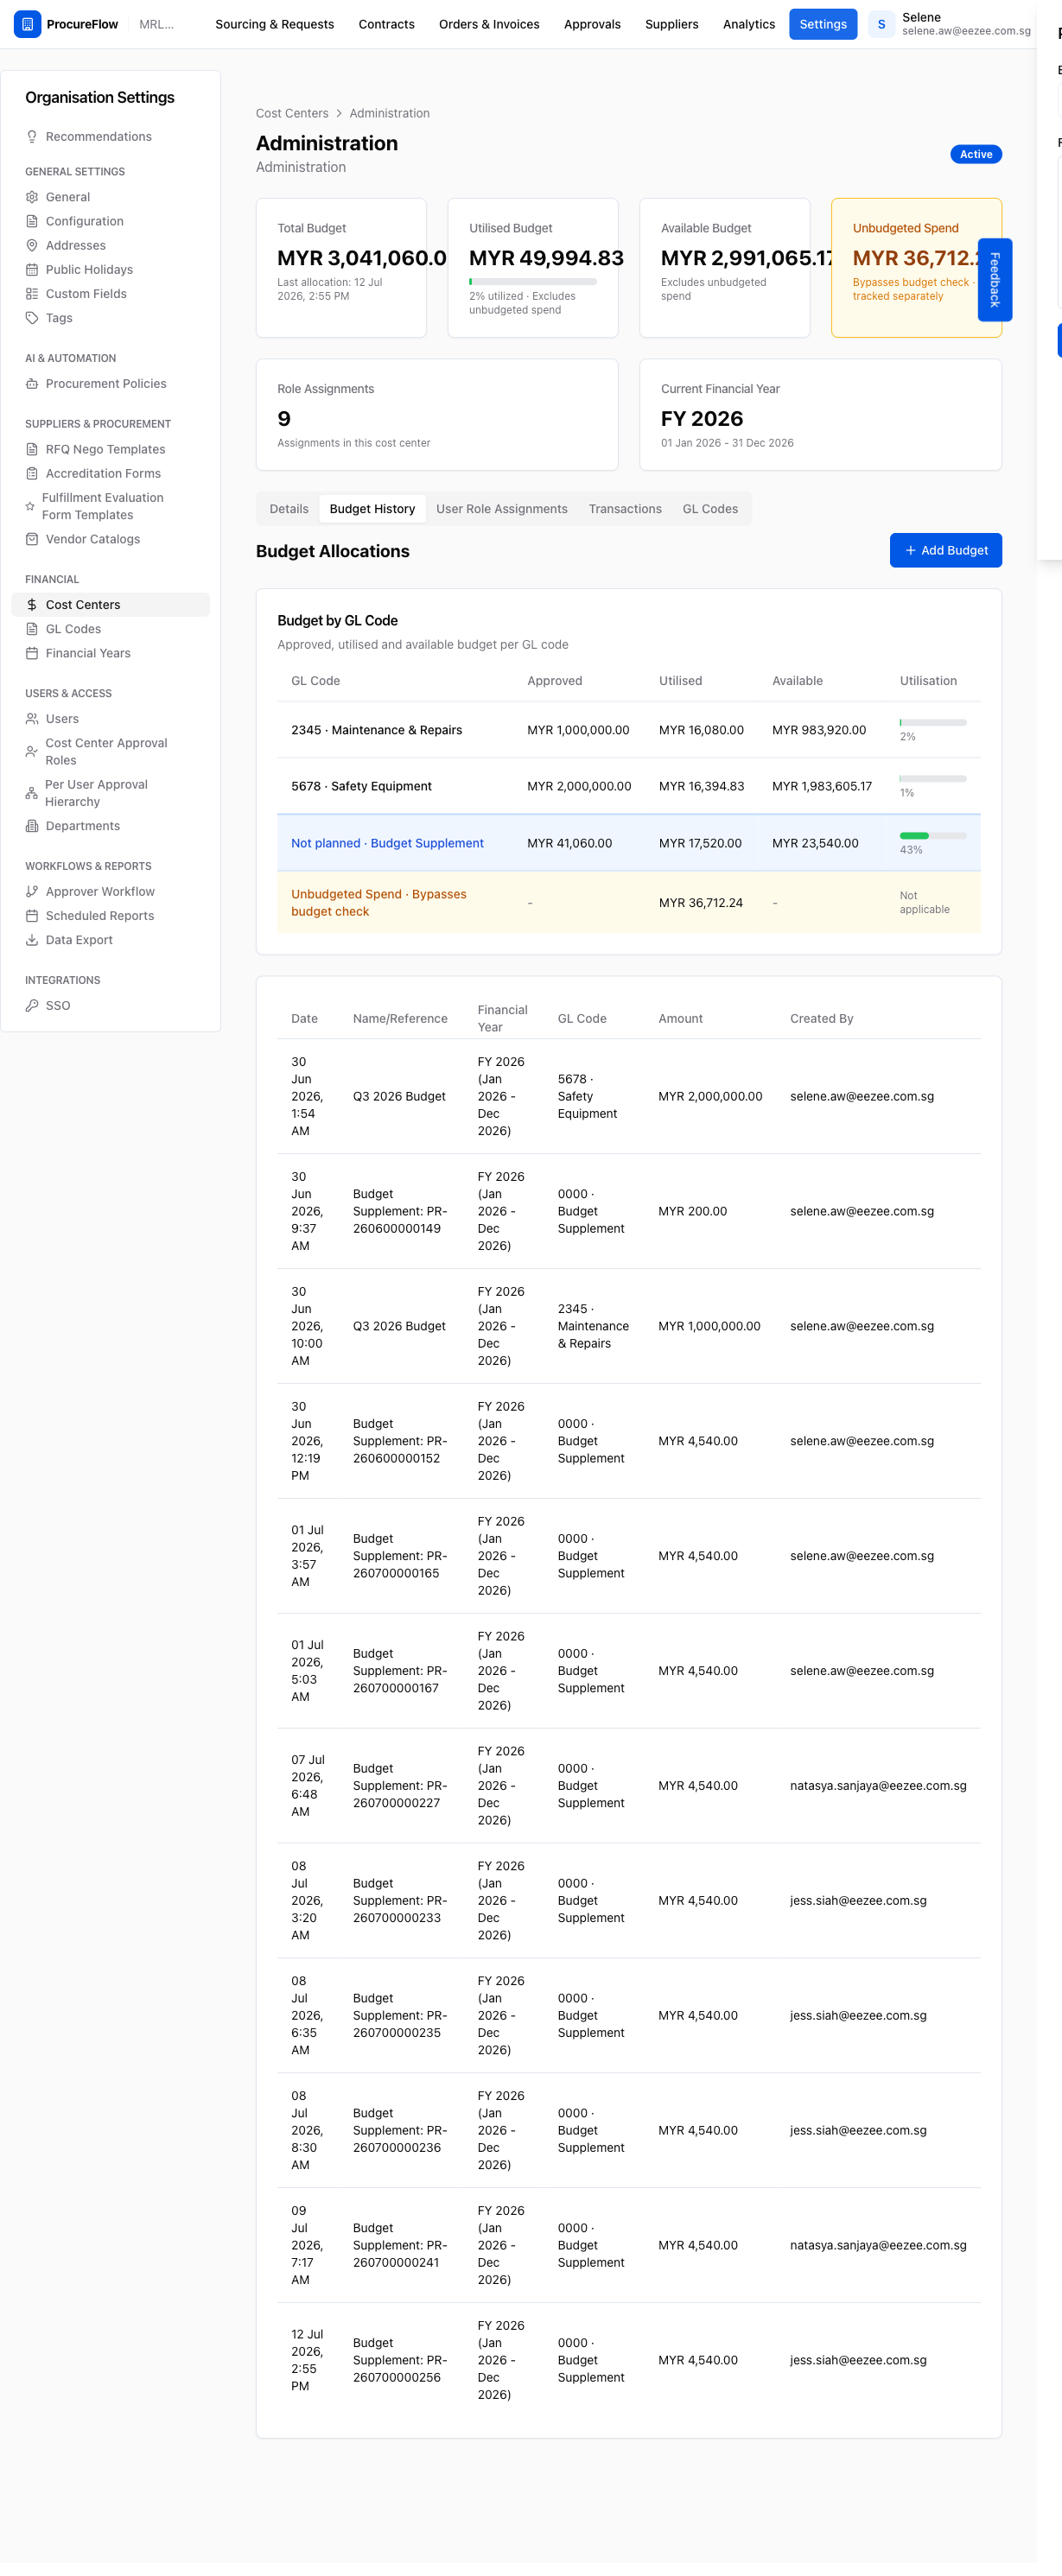
Open the Add Budget form
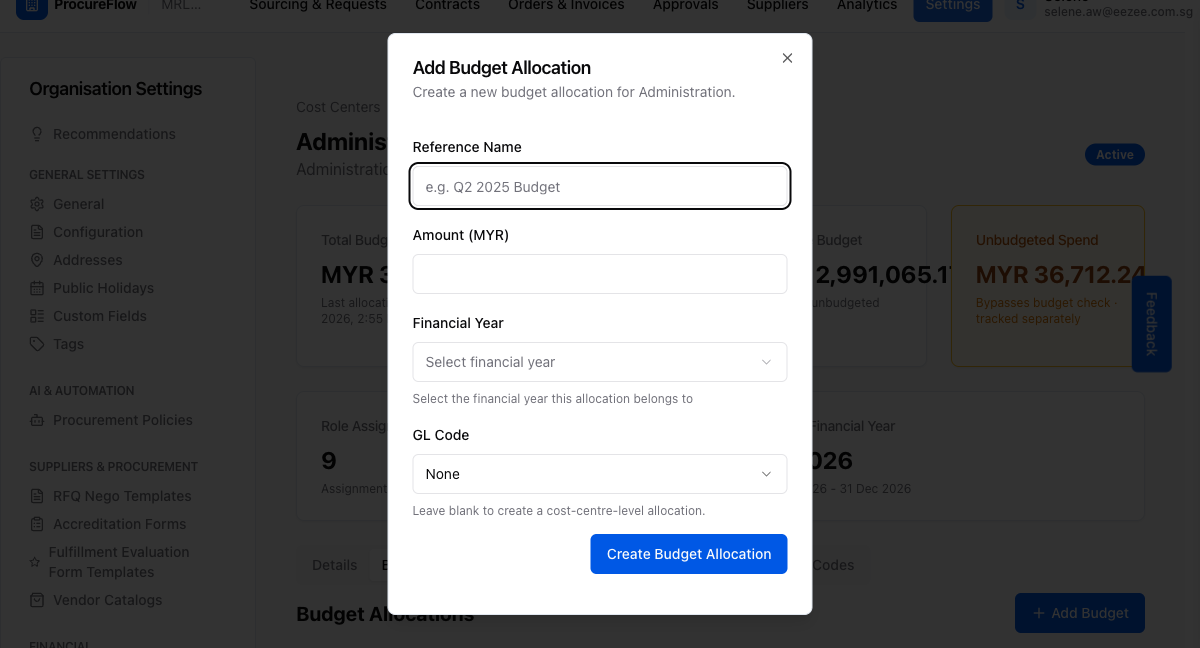
Click the + Add Budget button. A dialog opens with the following fields:
- Reference Name: a label to identify this allocation (e.g. Q3 FY2026 Top-up - Maintenance).
- Amount: the amount to allocate in the organisation's currency.
- GL Code: optional. Select a GL code to allocate the budget at the GL code level within this cost center. Leave blank to allocate at the cost center level.
- Financial Year: visible only for Financial Year budget type cost centers (see Step 6).
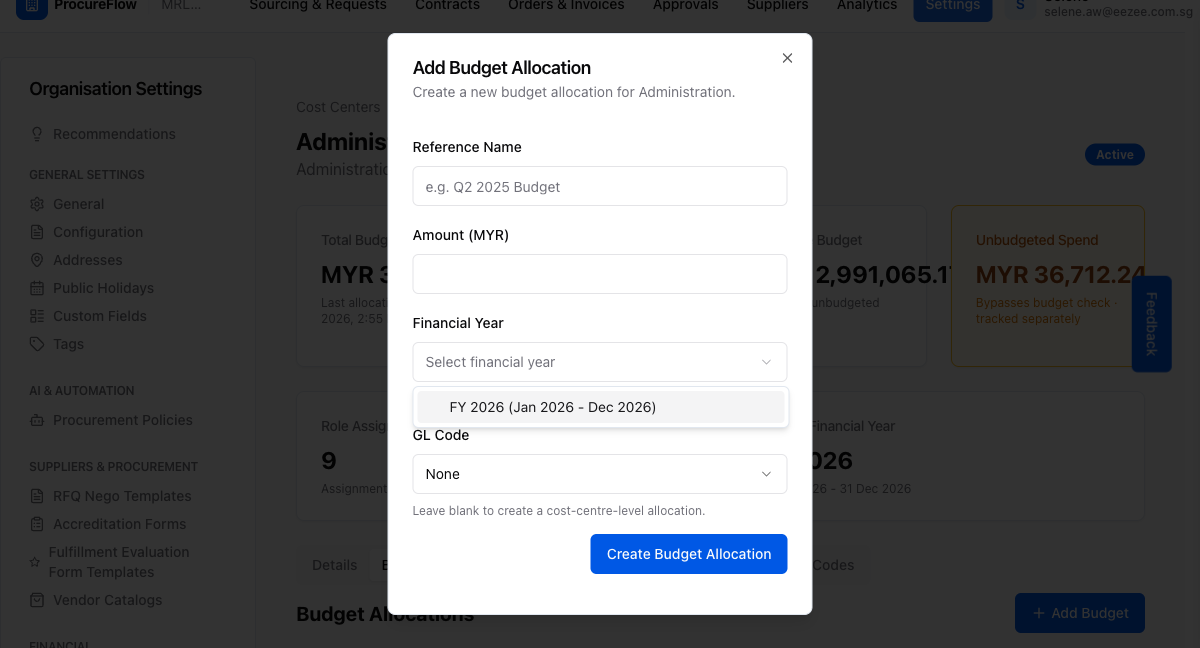
Select a Financial Year (FY budget type only)
If the cost center uses the Financial Year budget type, a Financial Year dropdown appears.
Click it and select the year this allocation belongs to.
All financial years configured for your organisation appear in the list.
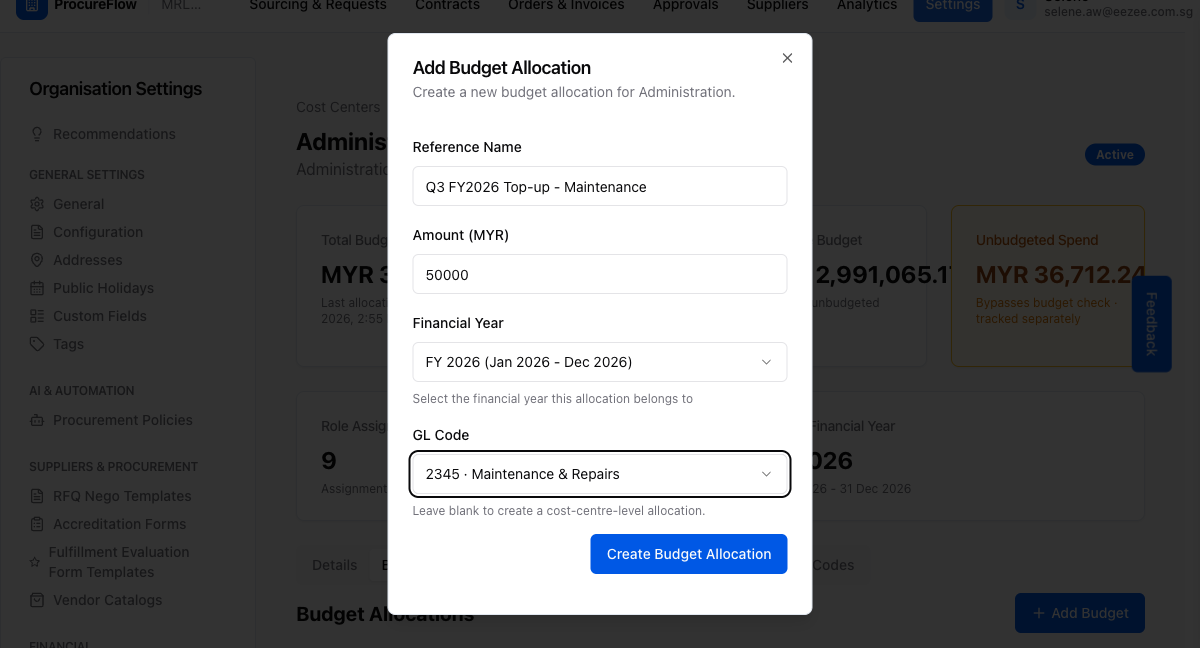
Fill in the allocation details and submit
- Enter a Reference Name.
- Enter the Amount.
- Optionally select a GL Code.
- Confirm the Financial Year is selected (if applicable).
- Click Create Budget Allocation.
Budget allocated
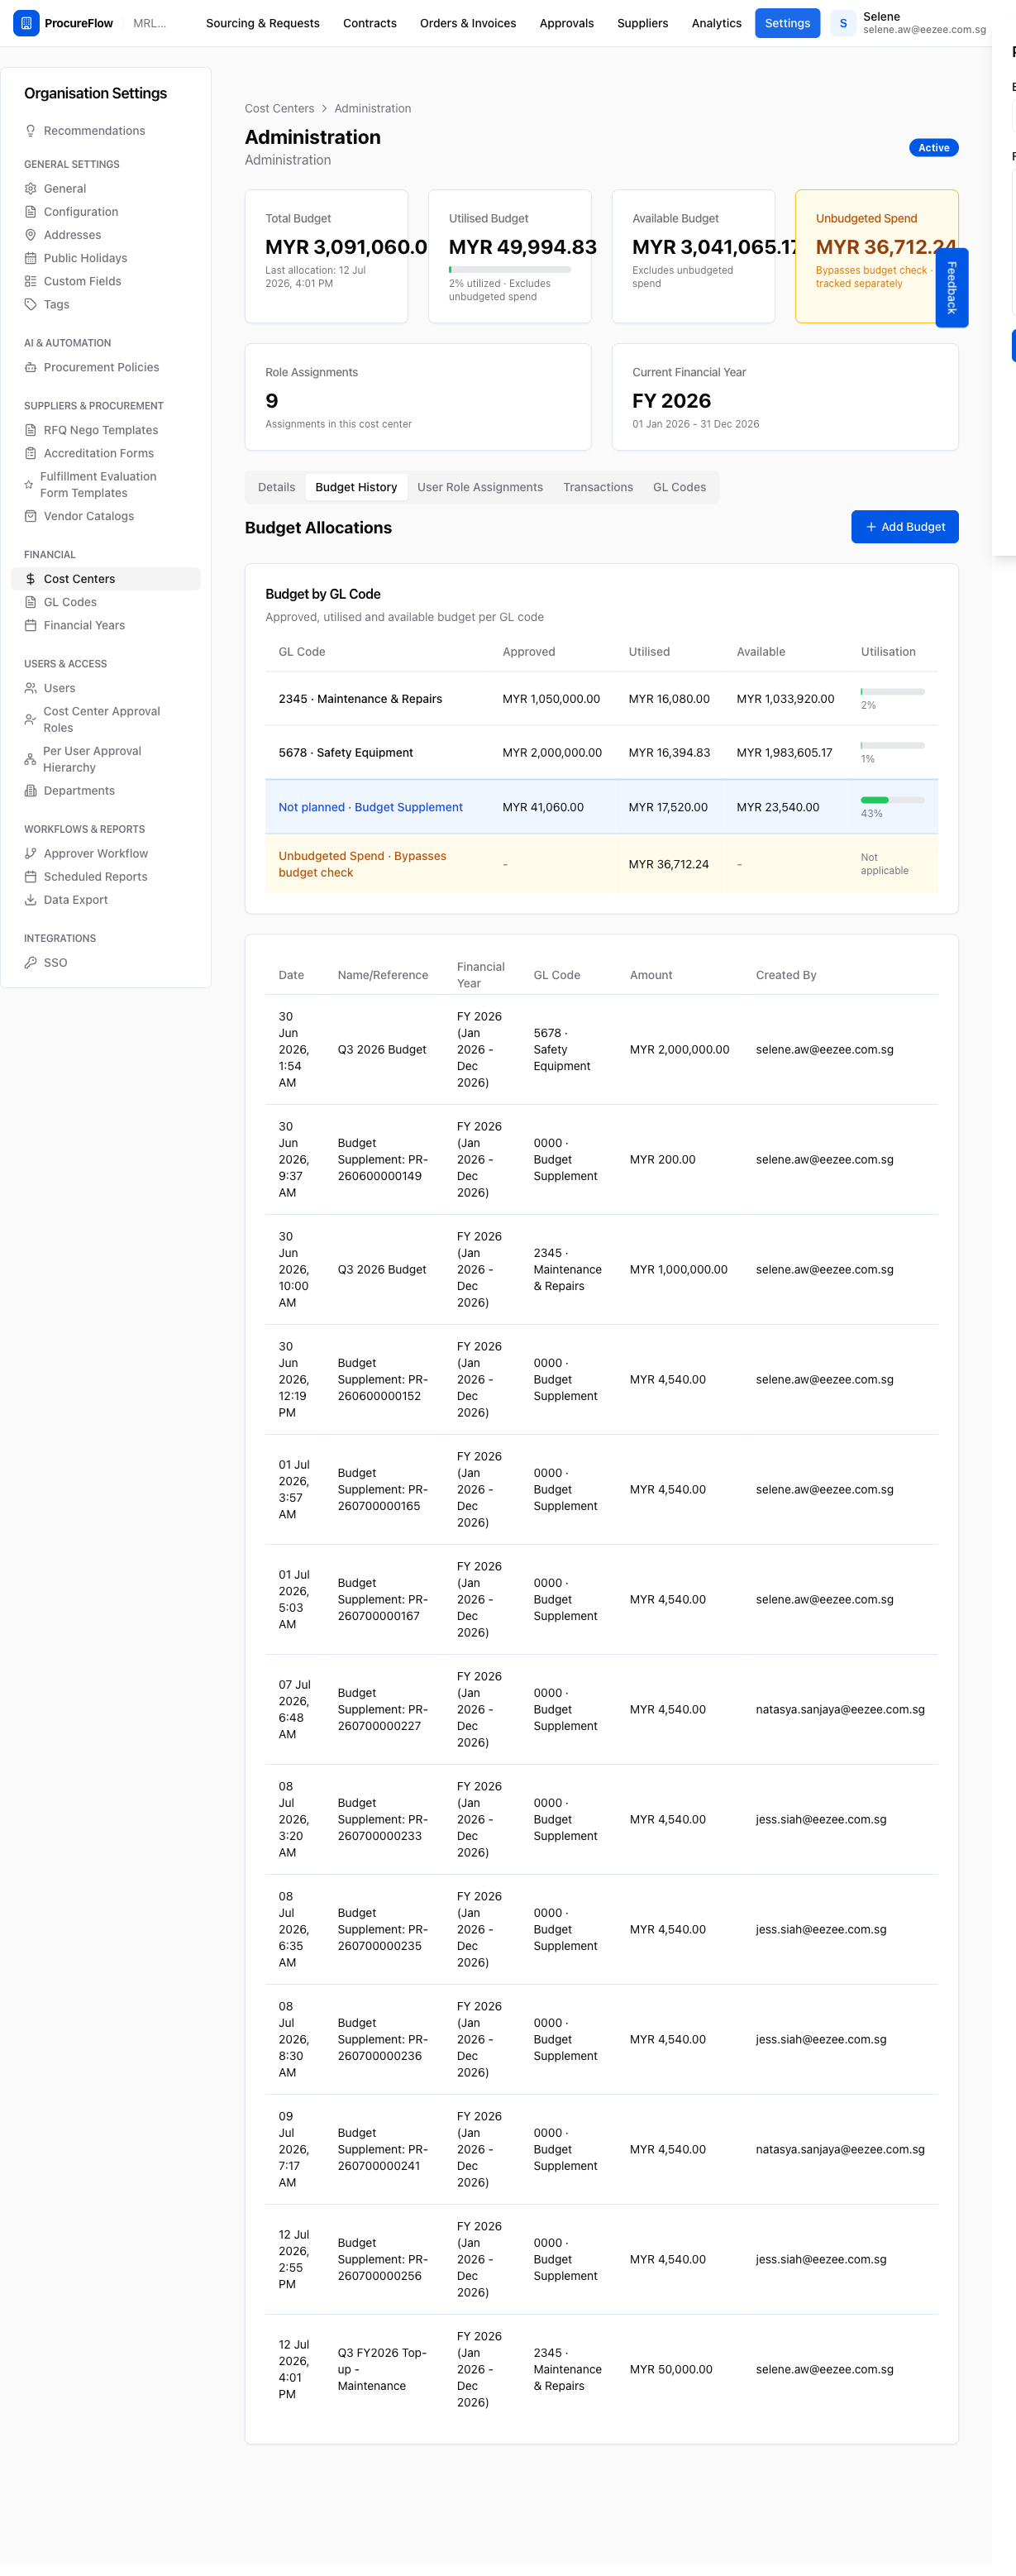
The dialog closes and the page refreshes automatically. The summary cards at the top update immediately to reflect the new allocation:
- Total Budget increases by the amount just allocated.
- Available Budget updates to match (since no spending has occurred yet).
The new entry also appears in the Budget Allocations table below, showing:
- the date
- reference name
- financial year (if applicable)
- GL code (if applicable)
- amount
- the user who created it
GL Codes & Cost Centers
Step-by-step guide for setting up your organisation's financial structure in ProcureFlow.
Top Up a Cost Center
Add a new budget allocation to an existing cost center. This guide walks an admin through navigating to a cost center and recording a budget top-up with a reference name, amount, and financial year.