Create from a Catalog
Use this guide when purchasing items from a pre-negotiated Term Contract or Punchout catalog with agreed pricing and approved vendors.
Last updated 12 October 2026
Who can use this?
Available to all authenticated users. Any user in the organisation can create a Purchase Request.
Start a Purchase Request
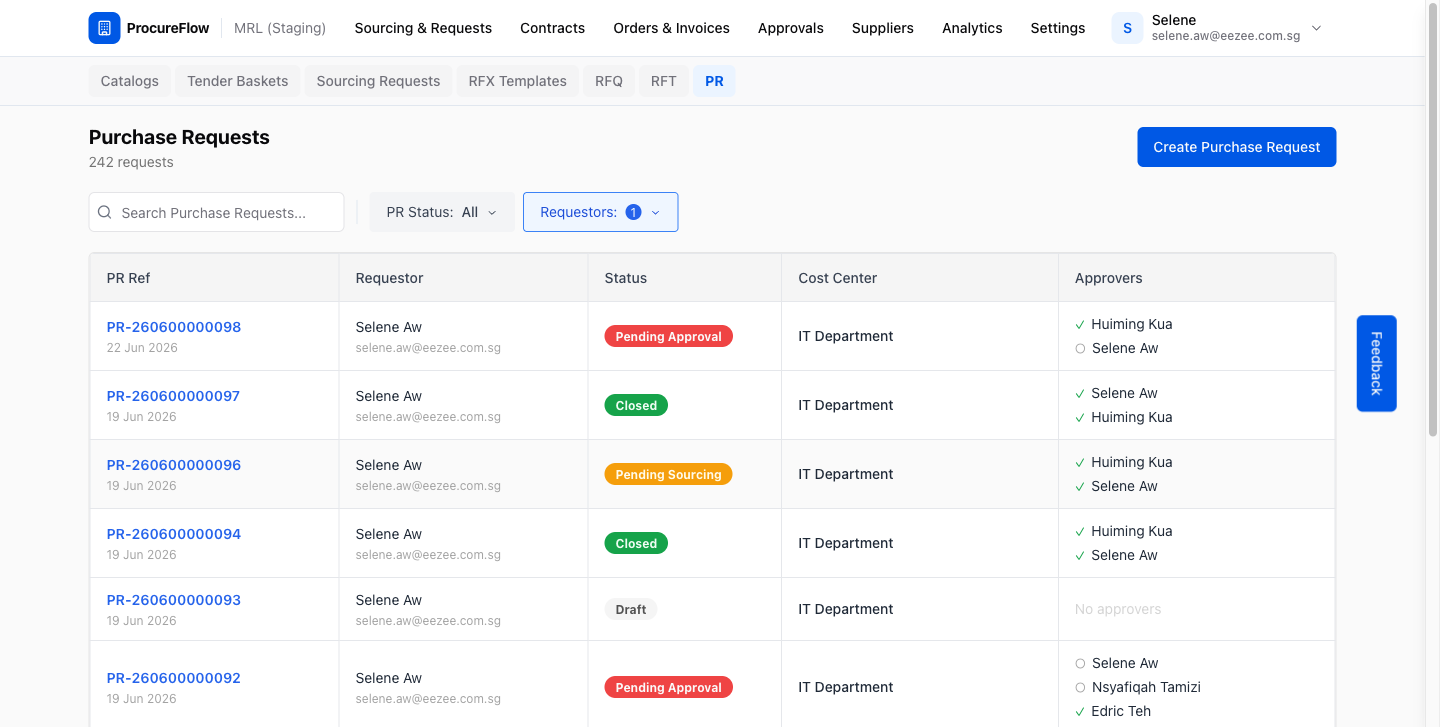
Click New Purchase Request under Quick Actions on the Dashboard.
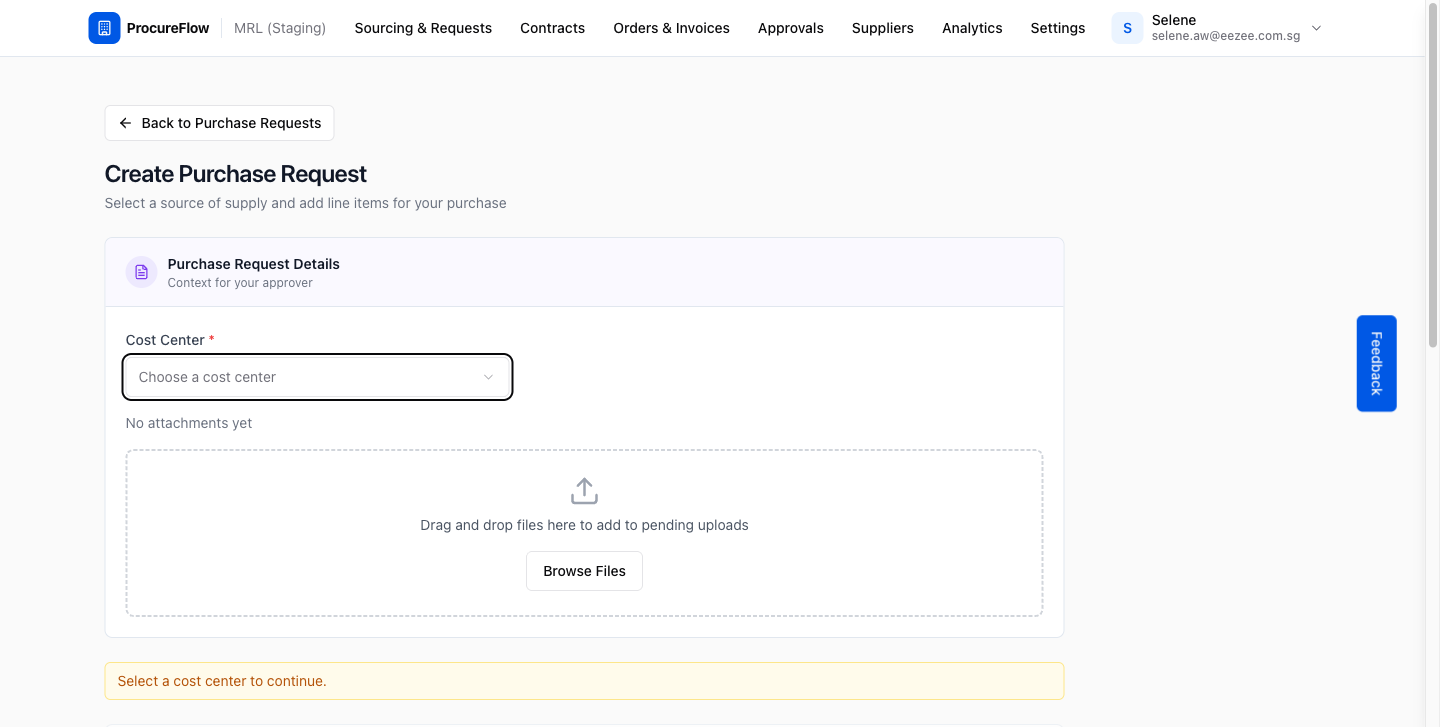
Fill In the Form and Select a Cost Center
- Choose a Cost Center from the dropdown. The rest of the form unlocks.
- Enter a short title in Subject (required).
- Add optional context for your approver in Description.
- If Budget Category is enabled for your organisation, choose how the purchase is funded:
| Budget Category | Meaning |
|---|---|
| Budgeted | Draws from the cost center's allocated budget pool. |
| Unbudgeted (Pre-Approved) | Skips the cost center budget check. Counted against the org's unbudgeted spend cap. Requires an approved memo attachment. |
| Unbudgeted | Skips the cost center budget check. Counted against the org's unbudgeted spend cap. May route to additional approvers, depending on your organisation's approval workflow. |
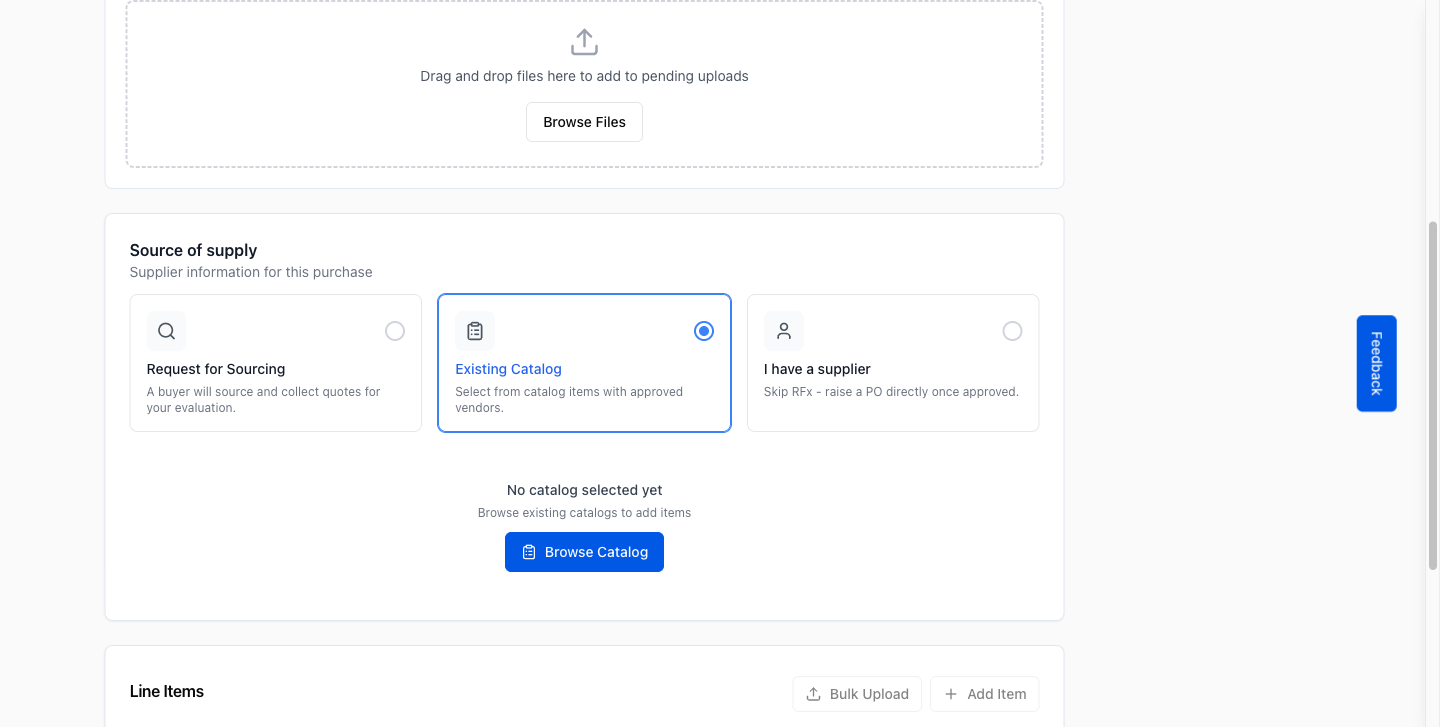
Choose Existing Catalog
Click Existing Catalog under Source of Supply.
Tip: Use this option when your organisation already has agreed pricing with a supplier through a Term Contract.
Note: Already have a supplier in mind? See Create for a Known Supplier. Want a buyer to collect quotes instead? See Create for Sourcing.
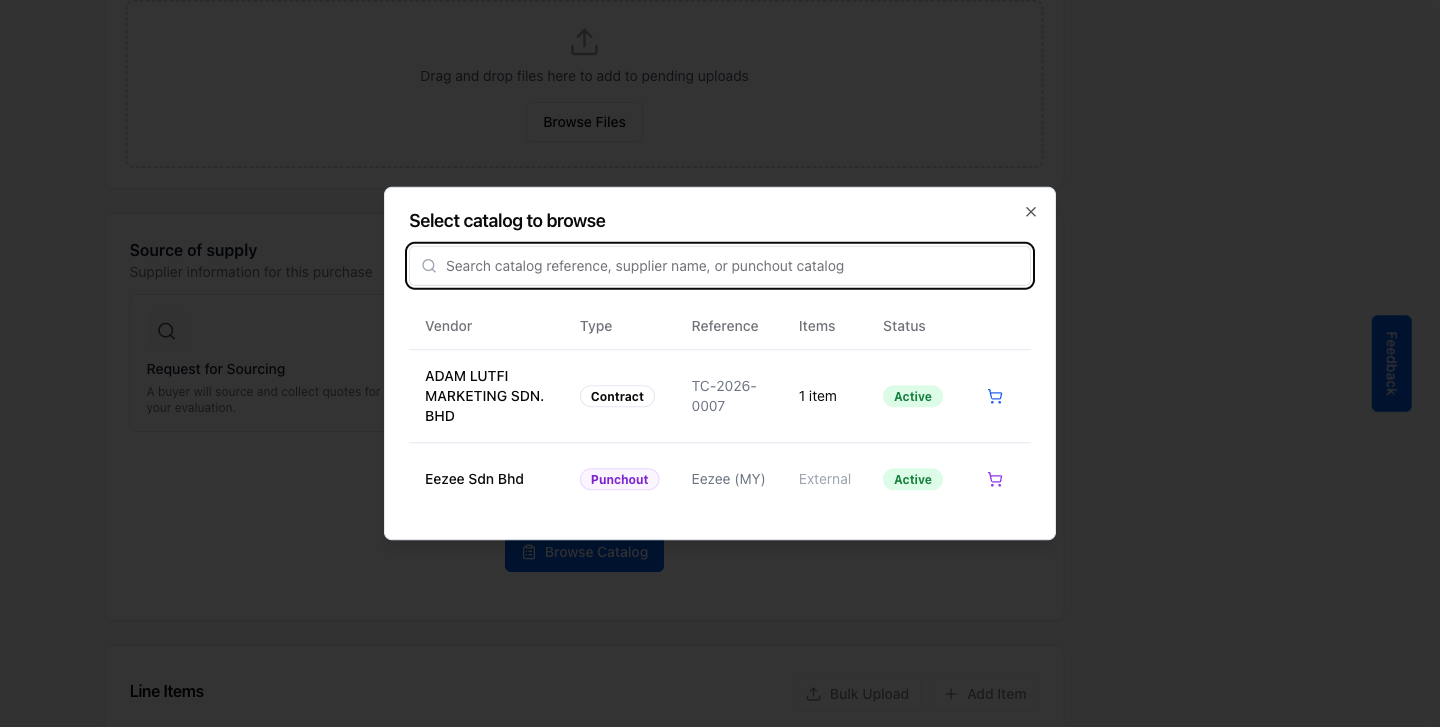
Select a Term Contract
- Click the cart icon on a Term Contract row to start shopping from it.
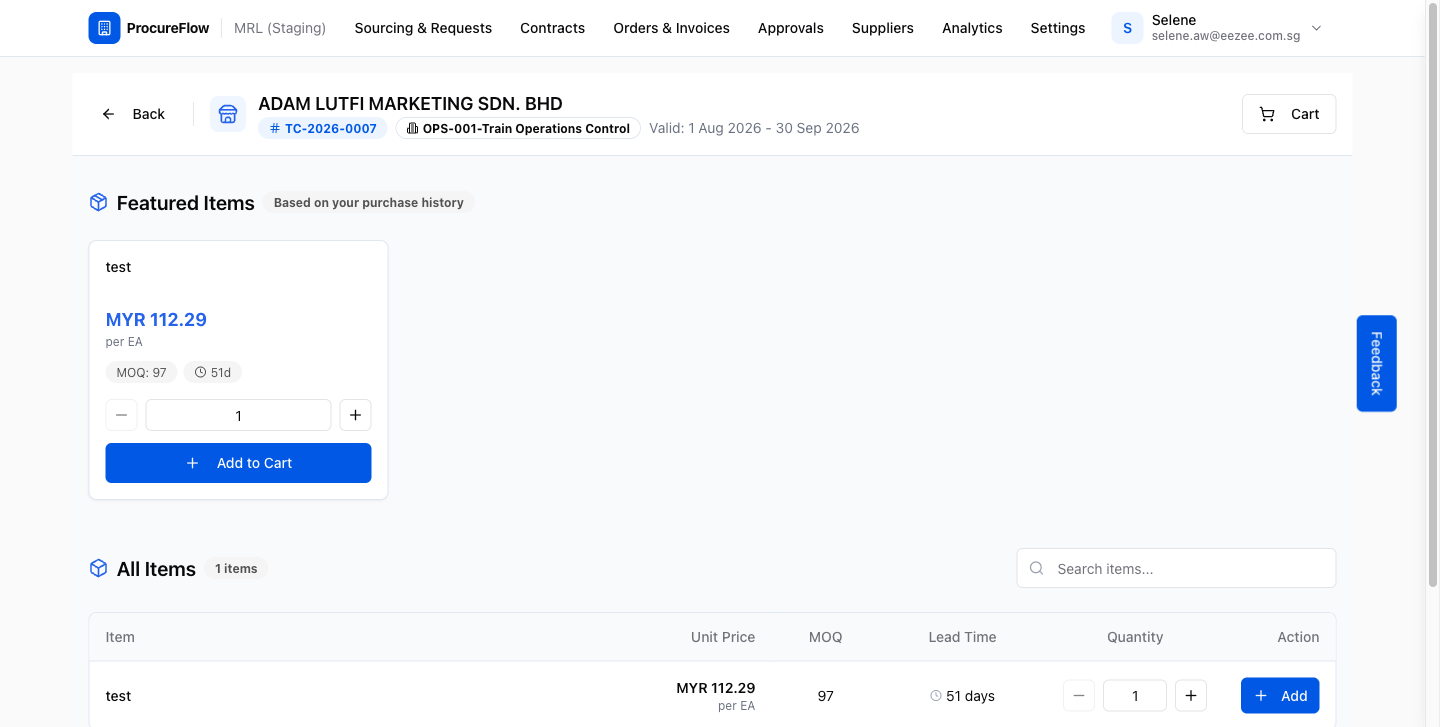
Add the Item to Your Cart
- Find the item you want to buy in Featured Items or the All Items table.
- Set quantity to at least the item's MOQ, then click Add.
- The cart badge updates with your item count.
Note: You cannot add fewer units than an item's MOQ to your cart.
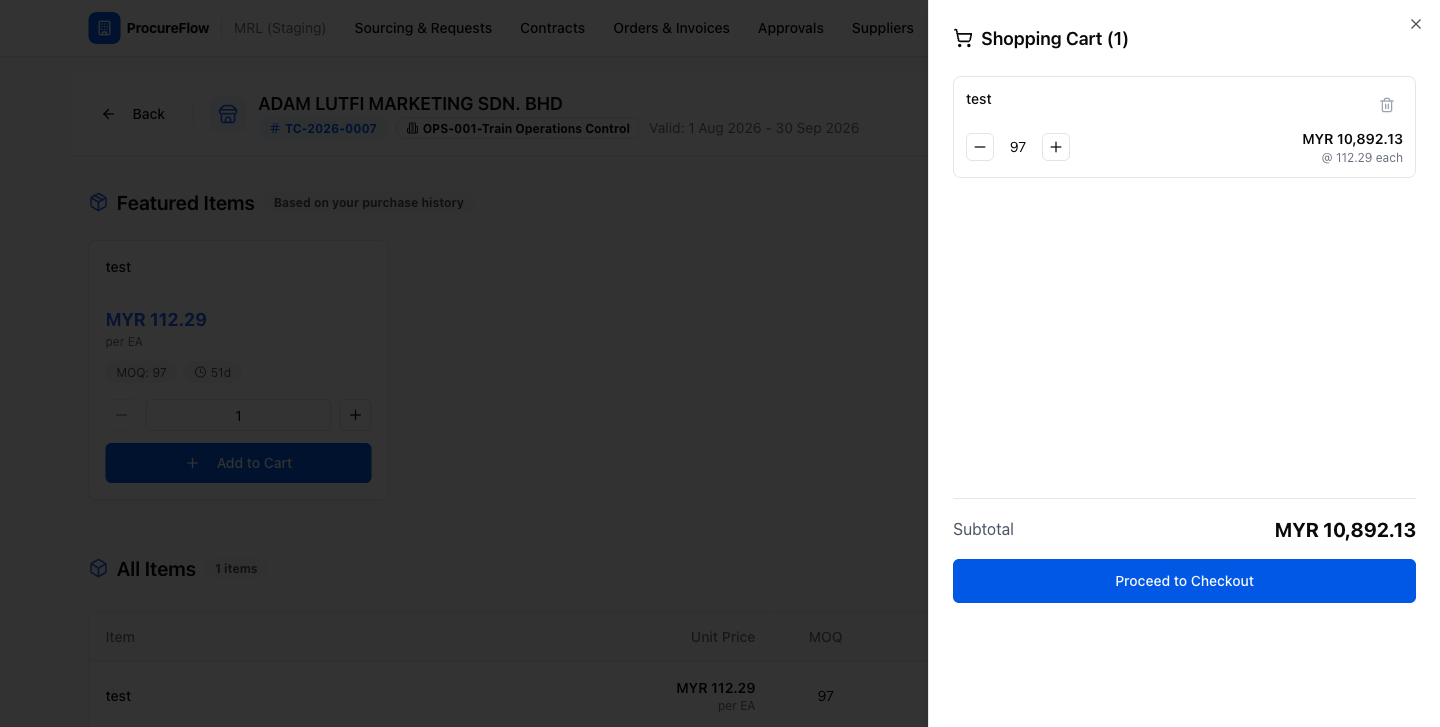
Review Your Cart and Checkout
- Click Cart to review your items, quantities, and subtotal.
- Click Proceed to Checkout to continue.
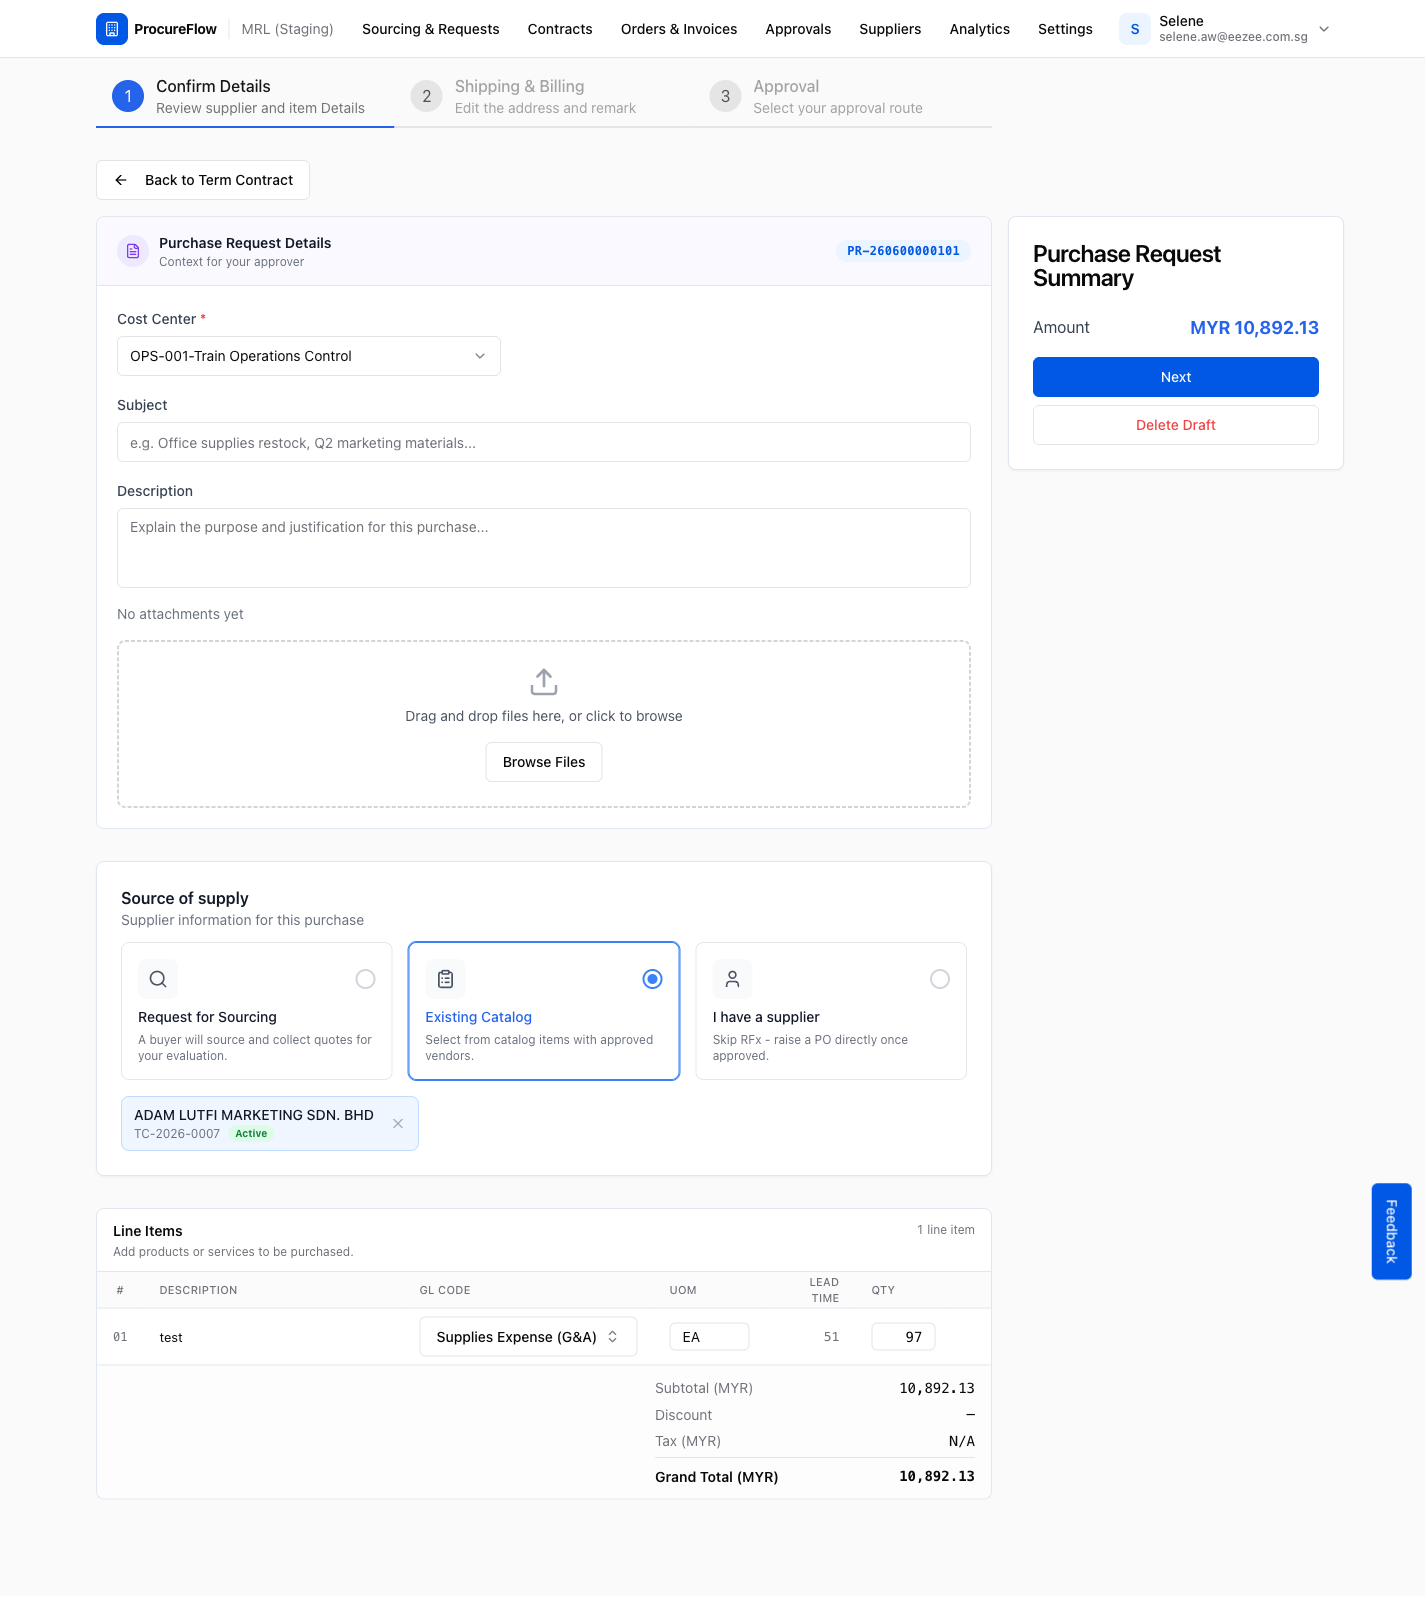
Assign a GL Code to the Line Item
- Assign a GL Code if required.
- Adjust quantities if needed.
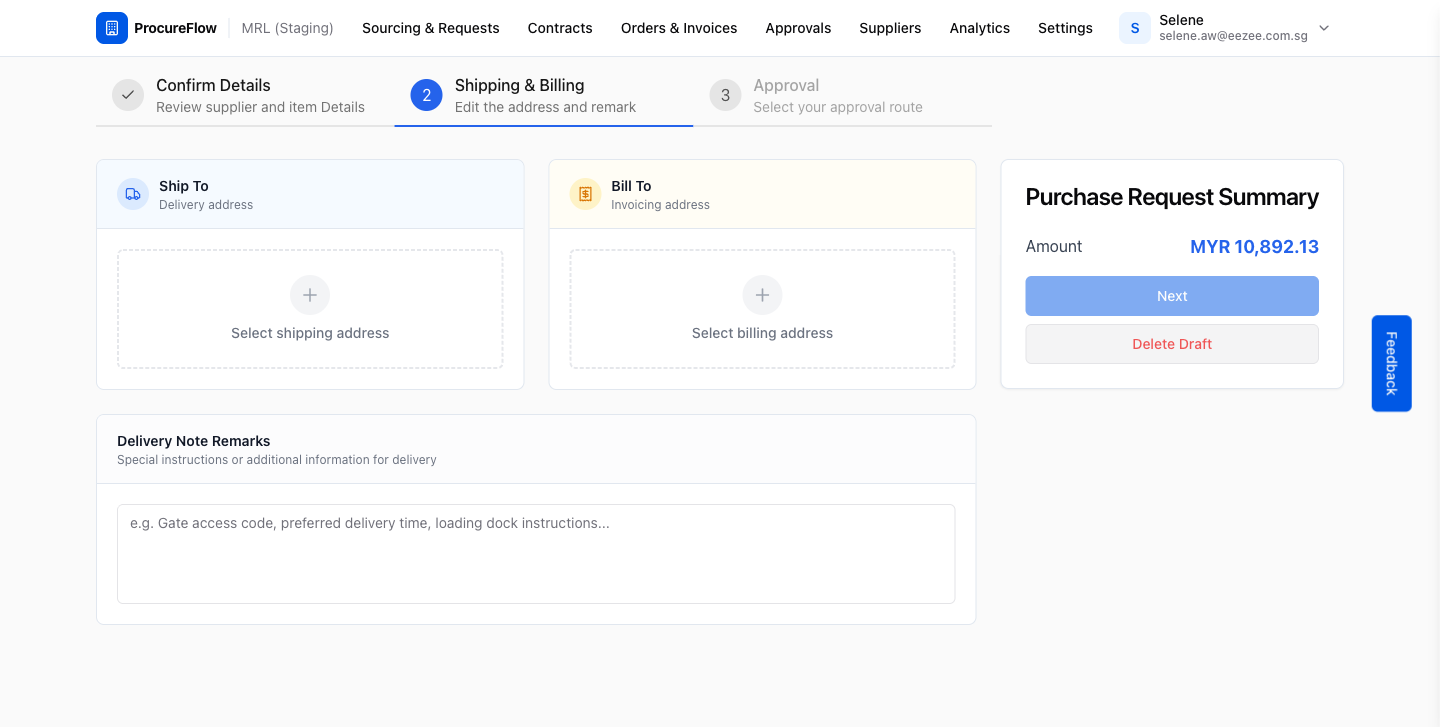
Set Shipping and Billing Addresses
- Select Ship To and Bill To addresses.
- Click Next.
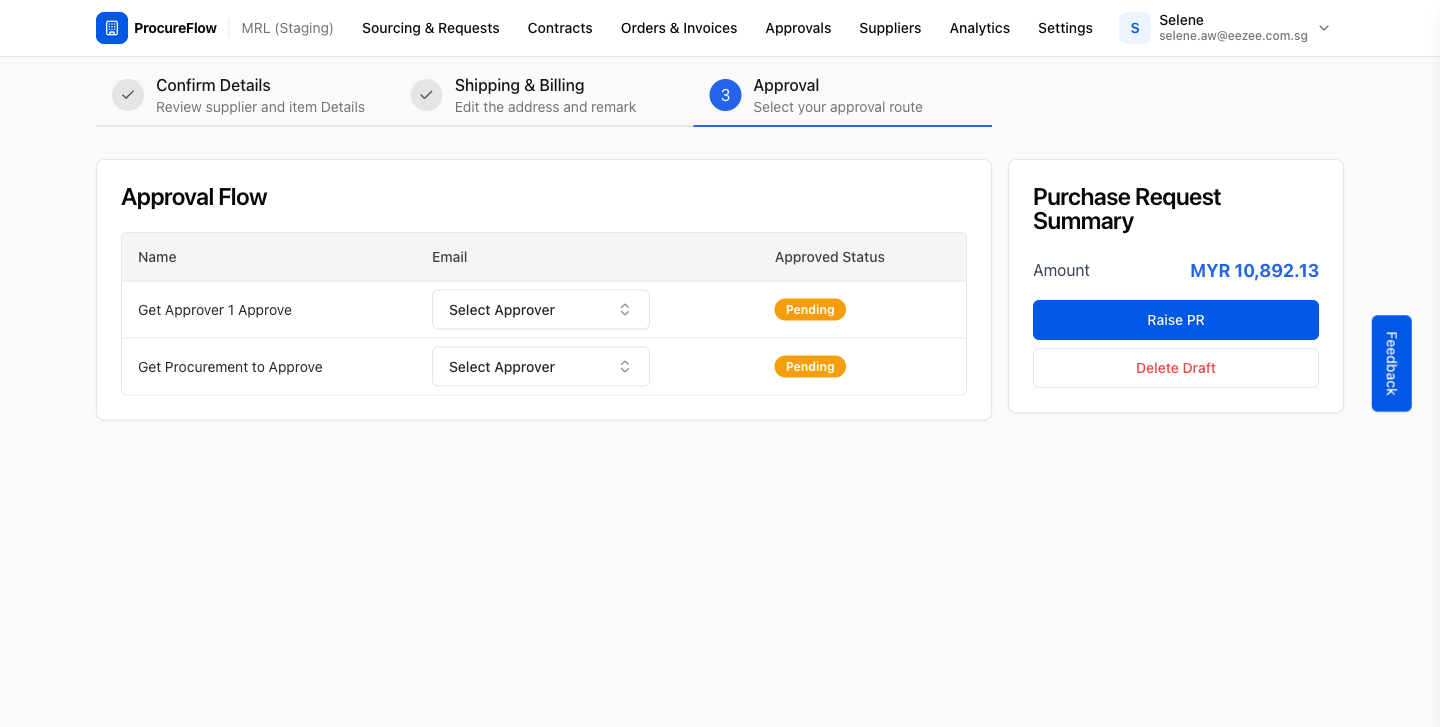
Assign Approvers and Raise the PR
- Review the auto-derived Approval Flow.
- Assign an approver to each stage.
- Click Raise PR to submit.
Important: Submitting notifies all selected approvers by email. The PR cannot be edited once submitted.
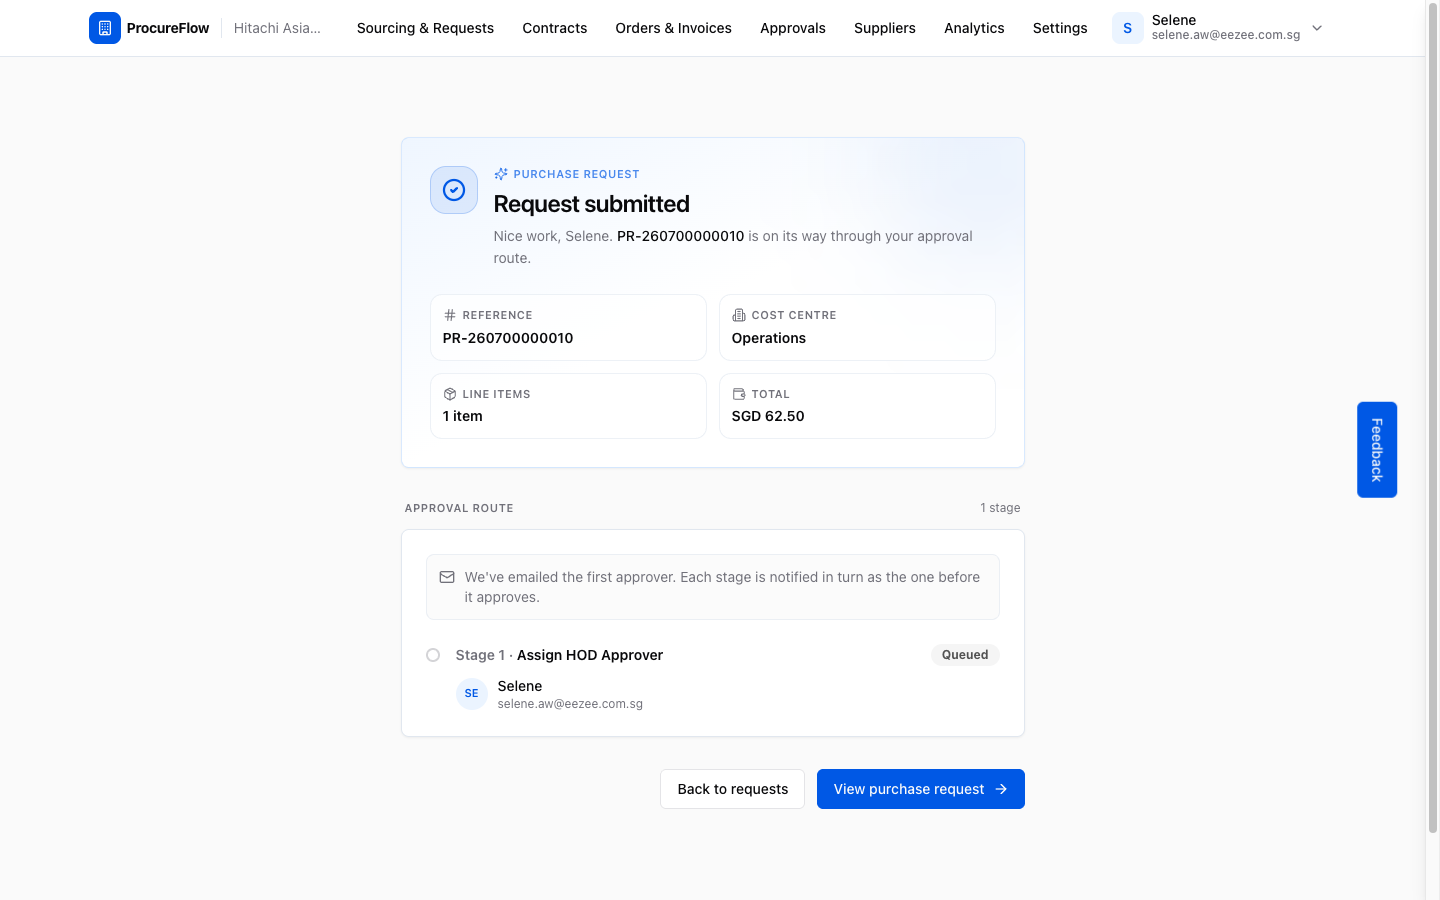
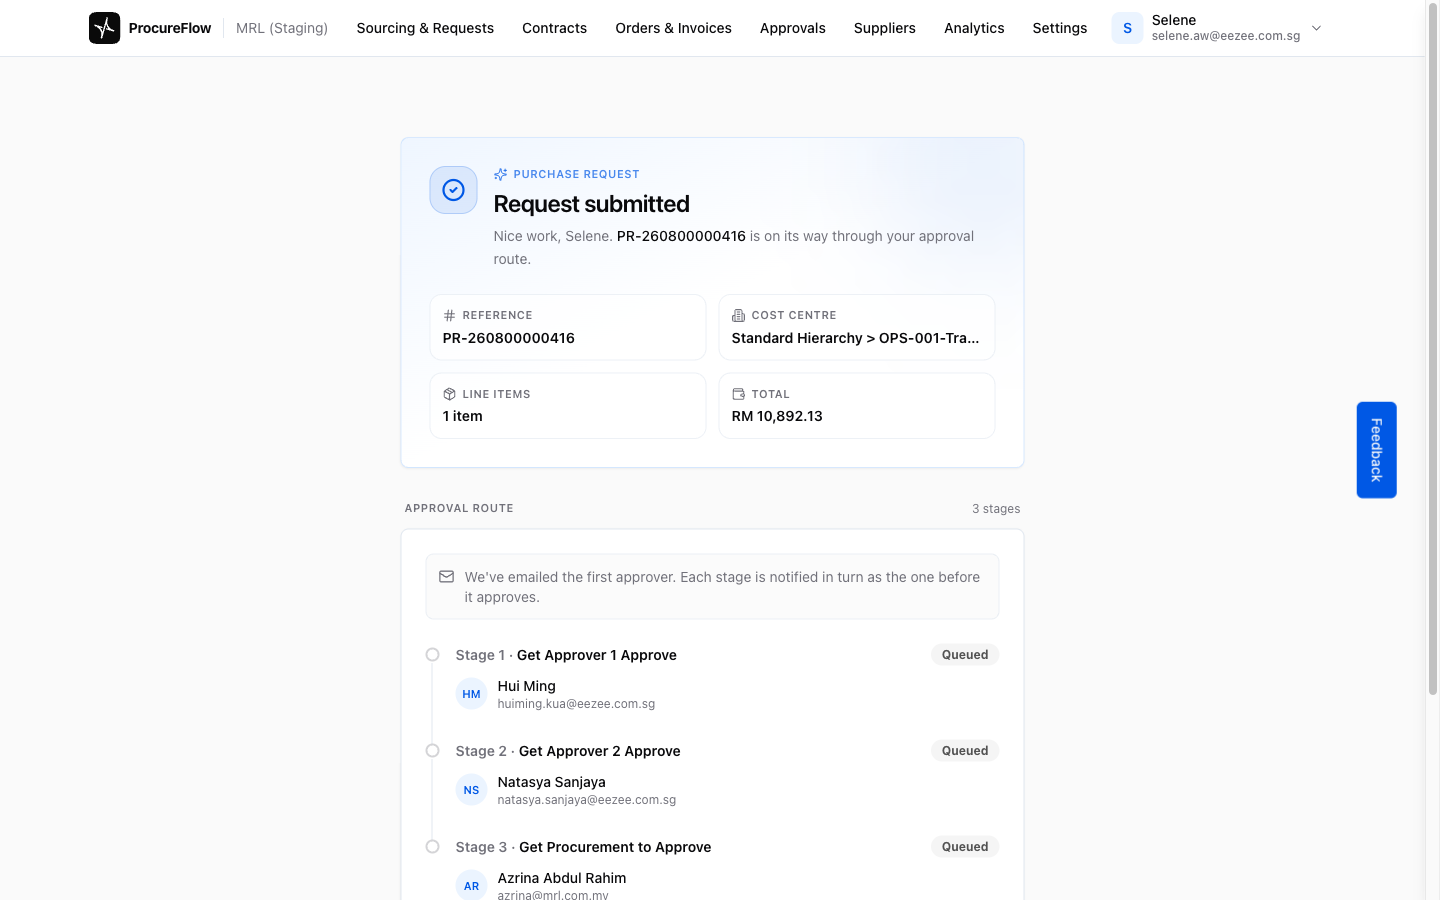
Confirm the Purchase Request Was Submitted
- Confirmation screen shows your PR number and full approval chain.
- Track status anytime from the Purchase Requests list.
Purchase Requests
Raise and approve requests to buy, the entry point to every procurement.
Create for a Known Supplier
Raise a direct-sourcing purchase request when you already know which supplier you want to use. The request goes through your organisation’s approval workflow before a Purchase Order is issued.