Create via Punchout
How to create a Purchase Request by shopping from the Eezee Punchout catalog, for organisations with the Eezee integration enabled.
Last updated 12 October 2026
Organisation-specific feature
This guide uses the Eezee Punchout integration. It only applies to organisations that have Eezee Punchout enabled.
Who can use this?
Available to Requestor users whose organisation has the Eezee Punchout catalog integration enabled.
Navigate to Catalogs
From the main dashboard:
- Click Sourcing & Requests in the top navigation.
- Select Catalogs.
You will see a list of catalog integrations available to your organisation.
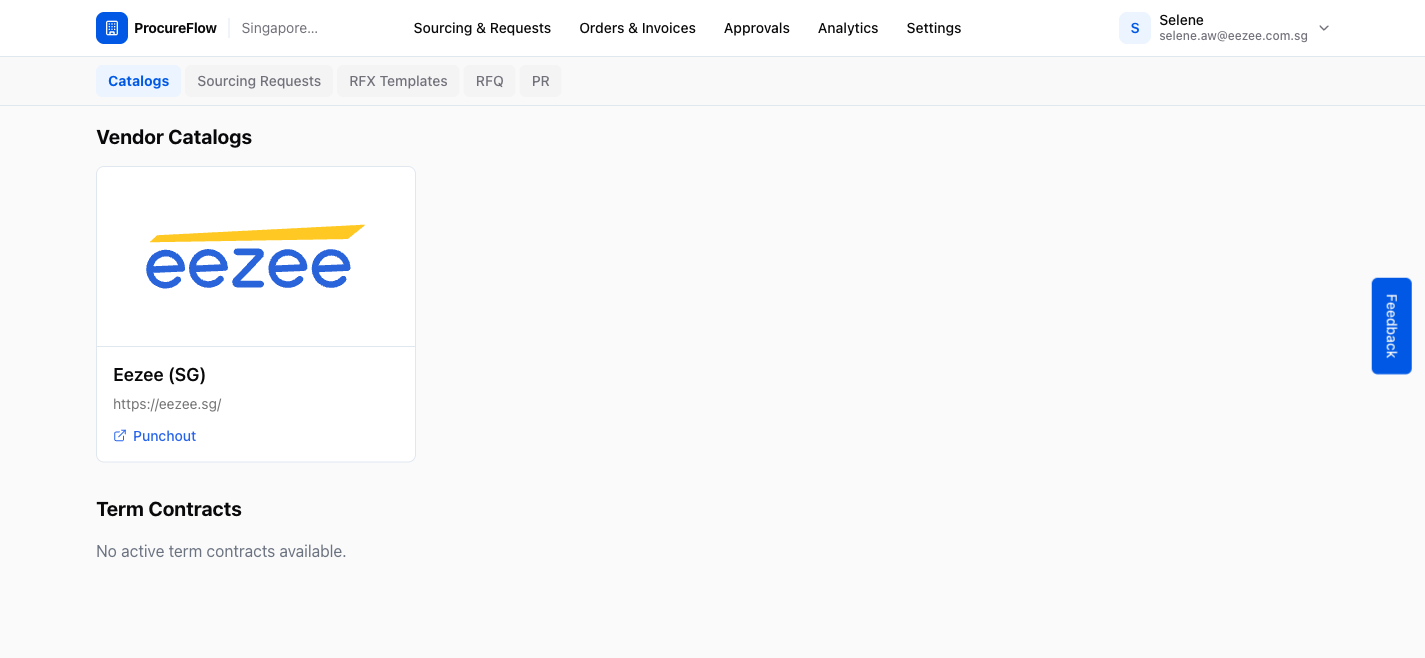
Click the Eezee Catalog Card
Click on the Eezee PTE LTD catalog card.
A Punchout Setup dialog will appear, asking you to configure your session before launching the Eezee catalog.
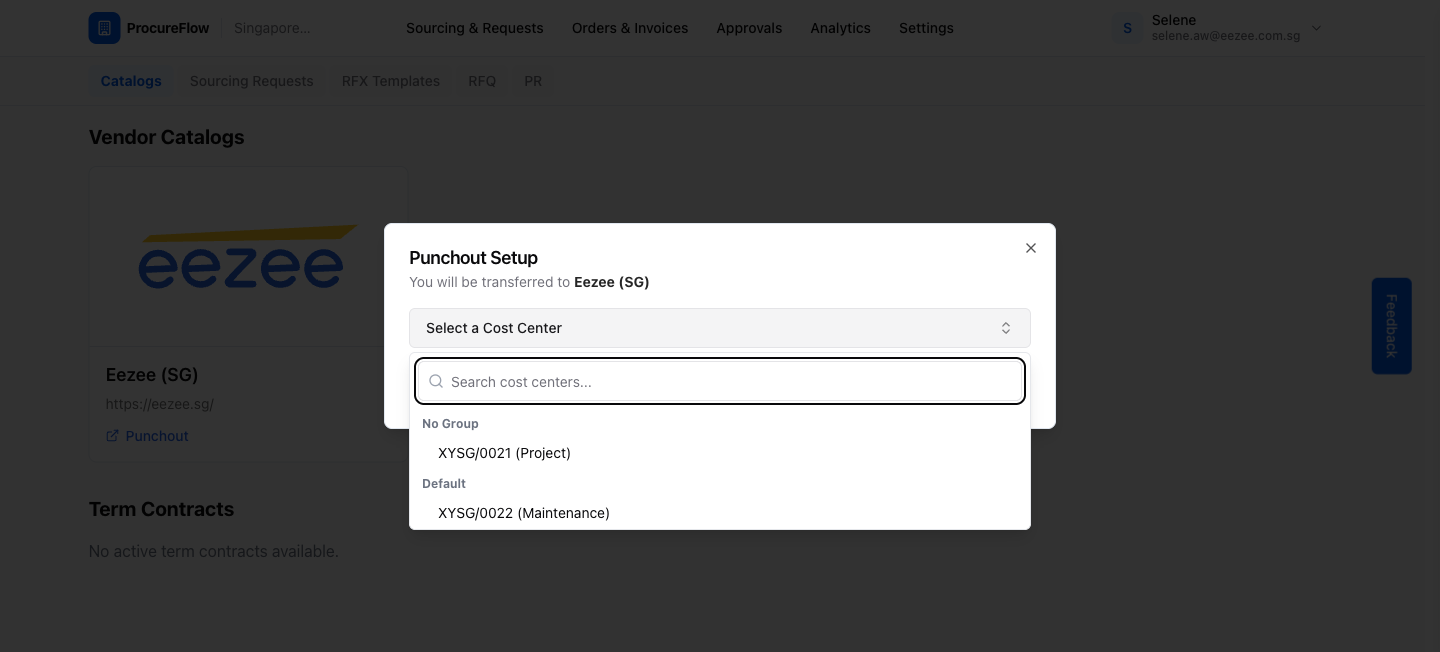
Select Your Cost Center and Launch Punchout
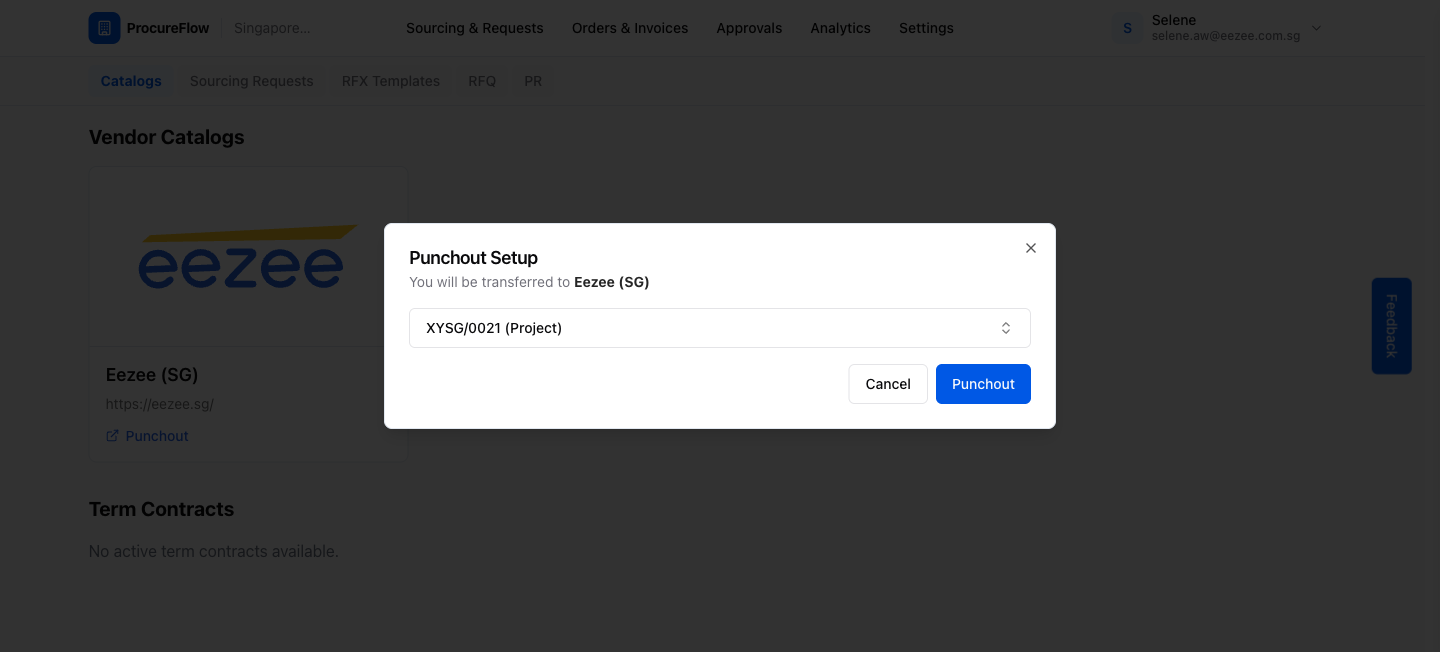
In the Punchout Setup dialog:
- Select the appropriate Cost Center from the dropdown (e.g. XYSG/0021 – Project). The cost center links the purchase request to the correct budget.
- Click Punchout to open the Eezee catalog.
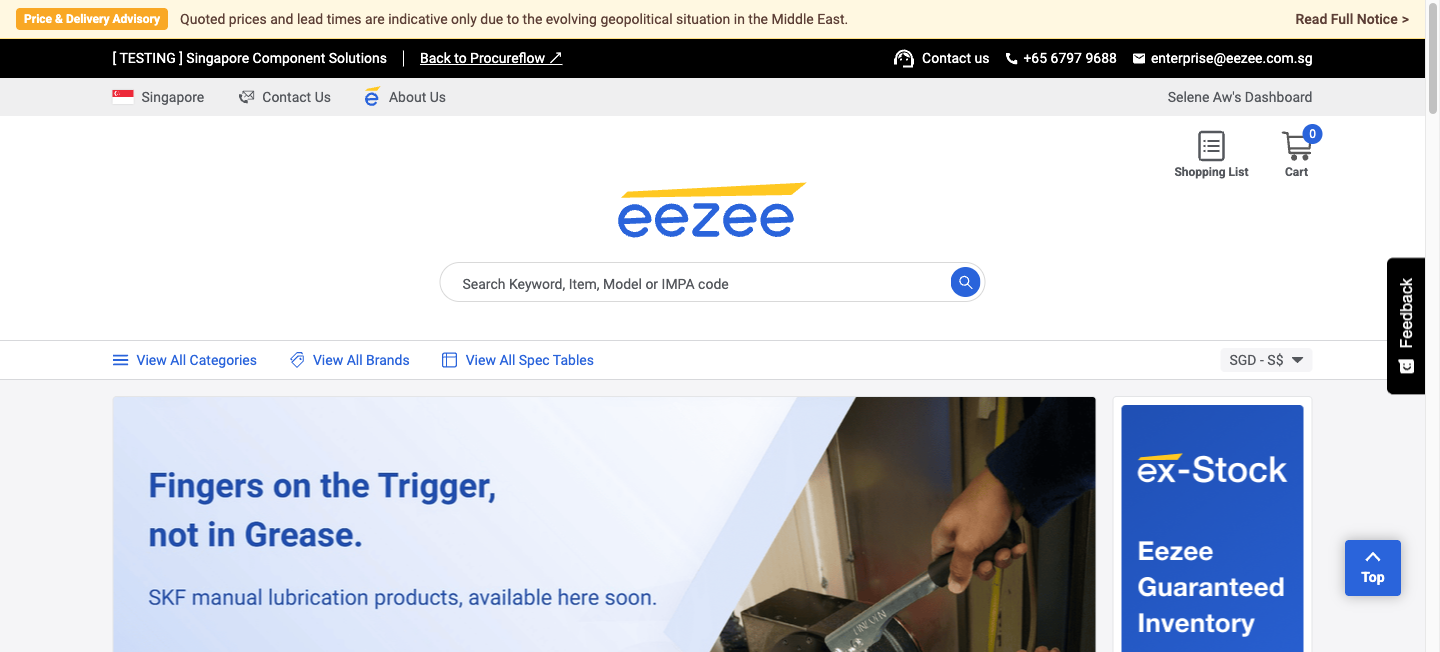
Browse the Eezee Catalog
The Eezee catalog opens in the same window, branded with your organisation's name at the top.
You can:
- Browse categories.
- View brands.
- Use the search bar to find specific items.
Search for a Product
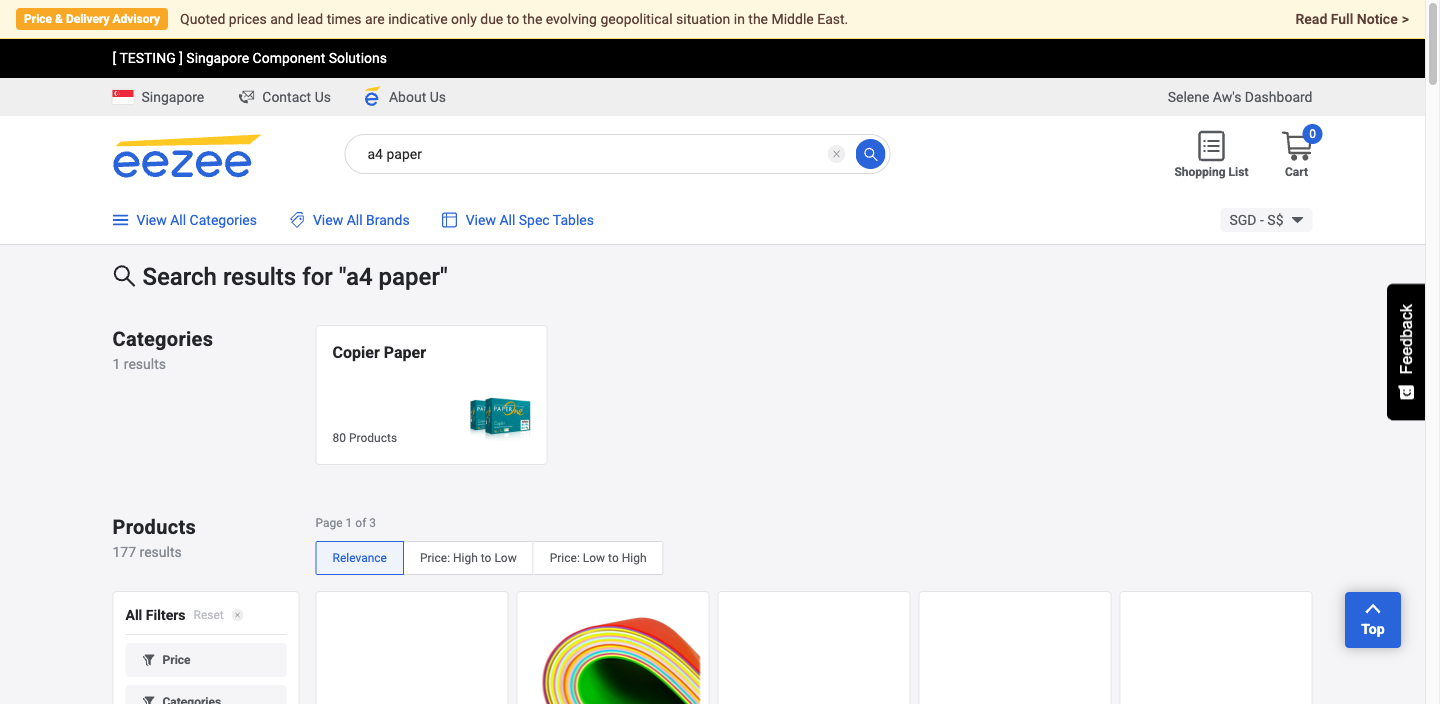
Type the product name or keyword in the search bar (e.g. a4 paper) and press Enter.
The results page shows matching products with categories, pricing, and availability.
Open a Product Detail Page
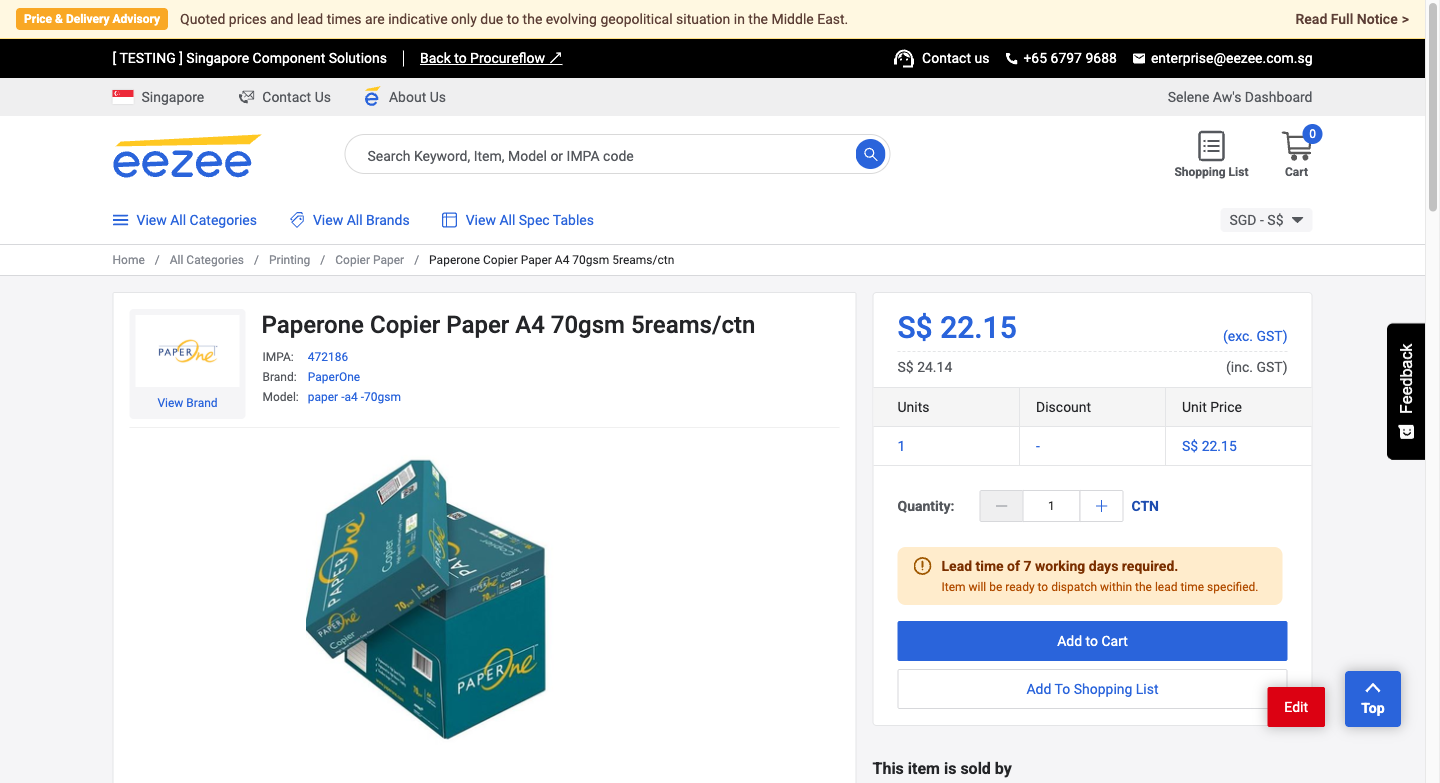
Click on any product in the results list to open its detail page.
Review these details before adding it to your cart:
- Product specifications
- Brand
- IMPA code
- Unit price
- Available quantity discounts
Set Quantity and Add to Cart
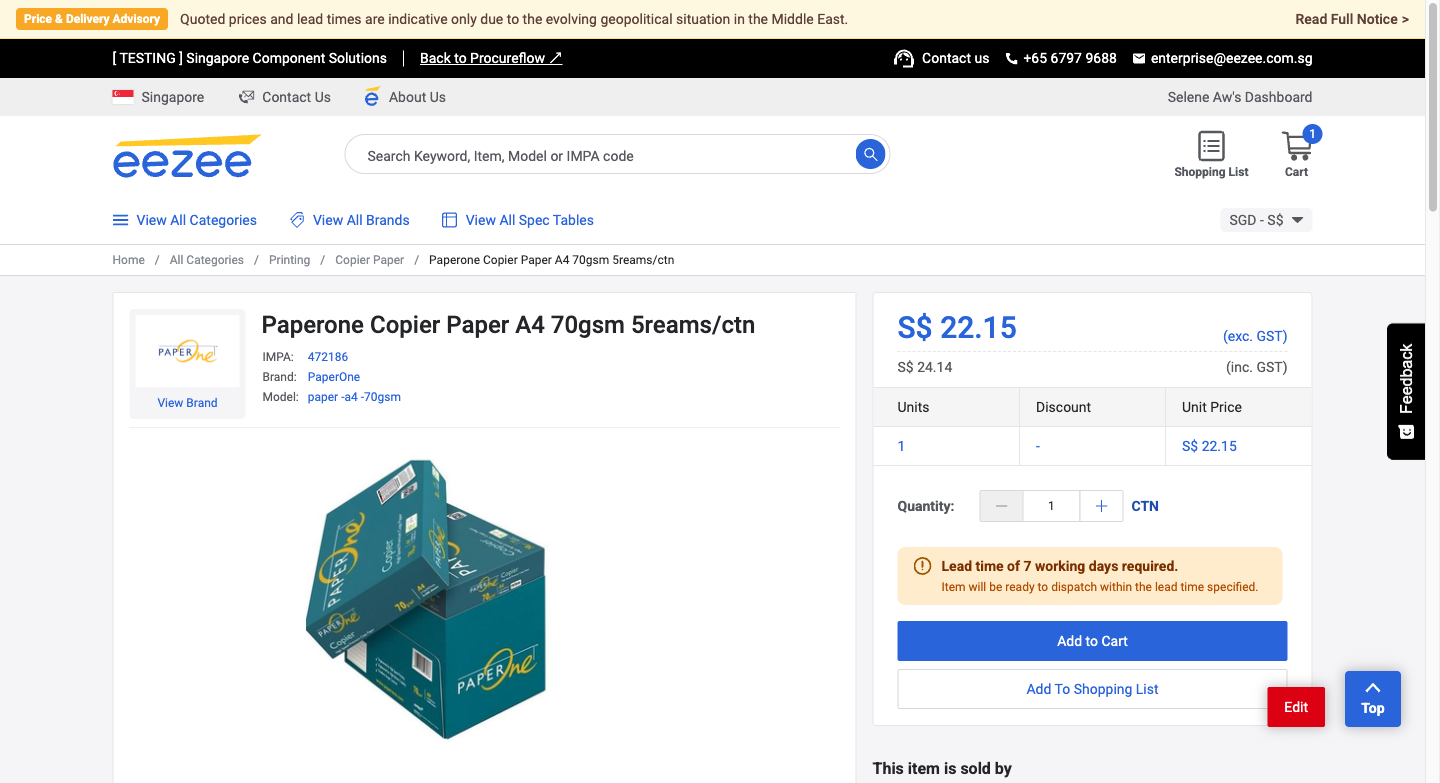
On the product detail page:
- Adjust the Quantity using the + and − buttons.
- Click the blue Add to Cart button.
The cart icon in the top-right corner will update to show the number of items added.
Go to the Shopping Cart
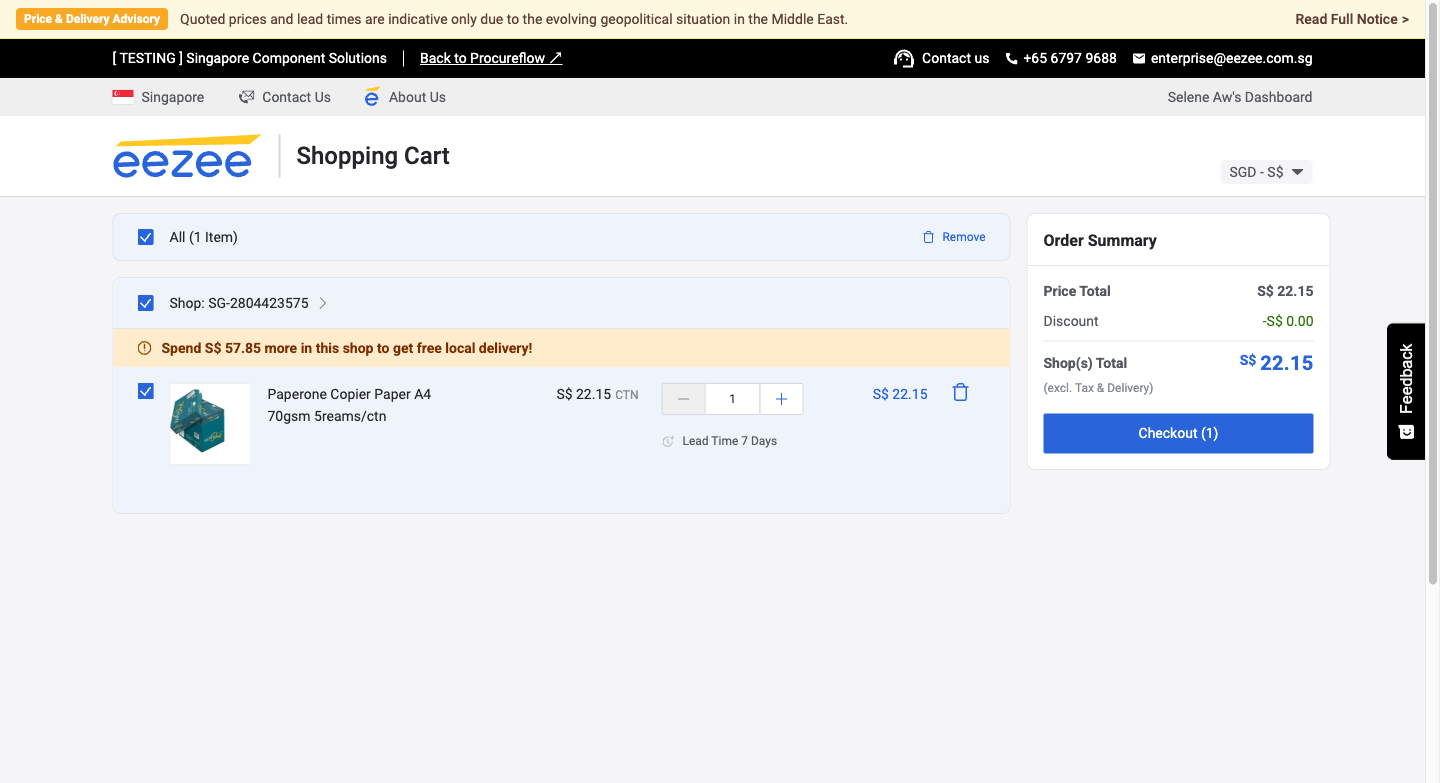
Click the Cart icon in the top-right corner of the page to open the Shopping Cart.
The cart shows:
- All items you have added
- Their quantities and line totals
- An Order Summary
You can adjust quantities or remove items here.
Click Checkout
When you are satisfied with the cart contents, click the blue Checkout (1) button on the right.
A Select Shipping Address dialog will appear, listing the delivery addresses configured for your organisation.
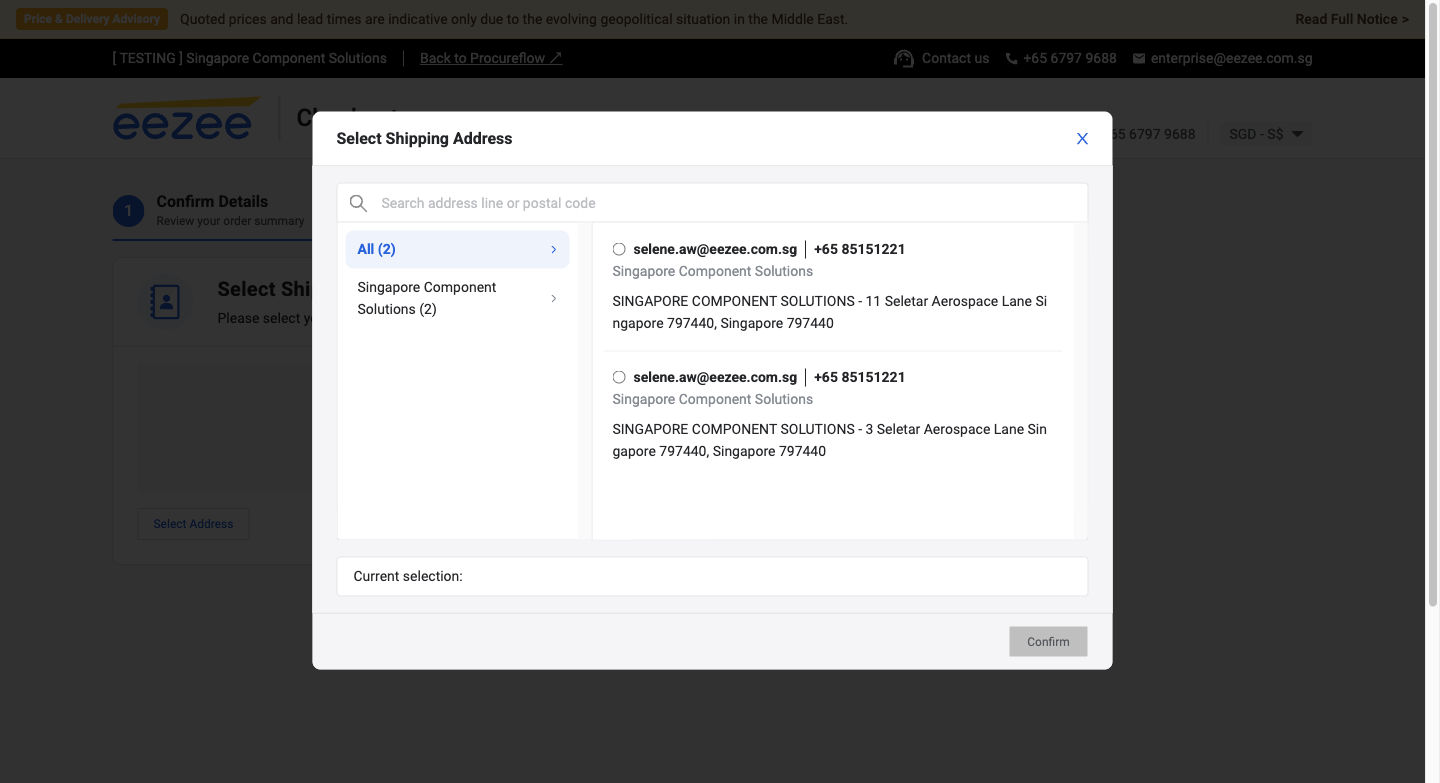
Select Your Shipping Address
- Click the radio button next to the correct delivery address for this order (e.g. 11 Seletar Aerospace Lane, Singapore 797440). The selected address will be highlighted in blue and shown in the Current selection field at the bottom.
- Click Confirm to proceed.
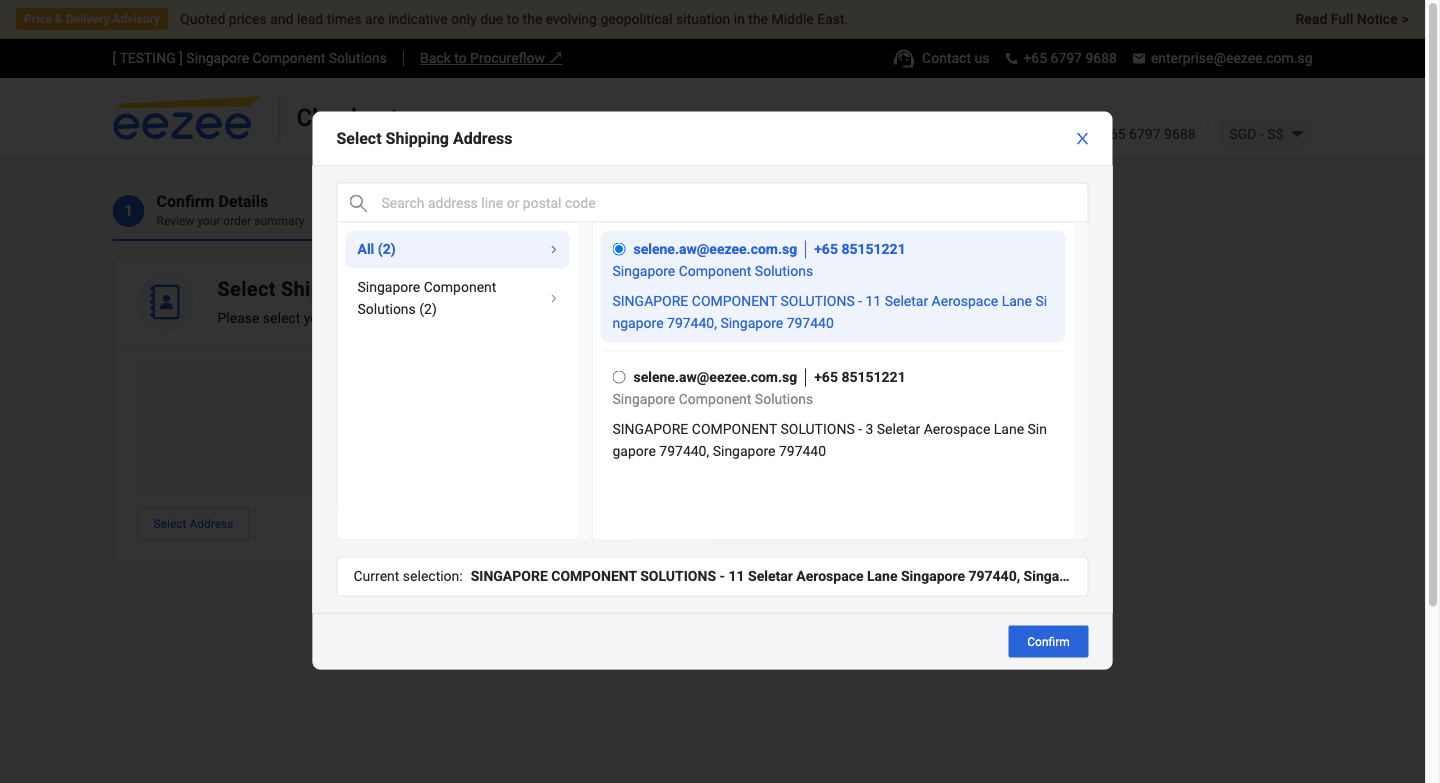
Review Checkout Summary and Send to ProcureFlow
The Checkout page shows the confirmed shipping address, the delivery option (Standard Delivery 5–7 Days), and the order total.
Review the Order Summary on the right. It shows the price, any delivery waiver, and the amount you pay.
When ready, click Send to Procureflow (Excl. Tax) to transfer your cart back to ProcureFlow as a Purchase Request.
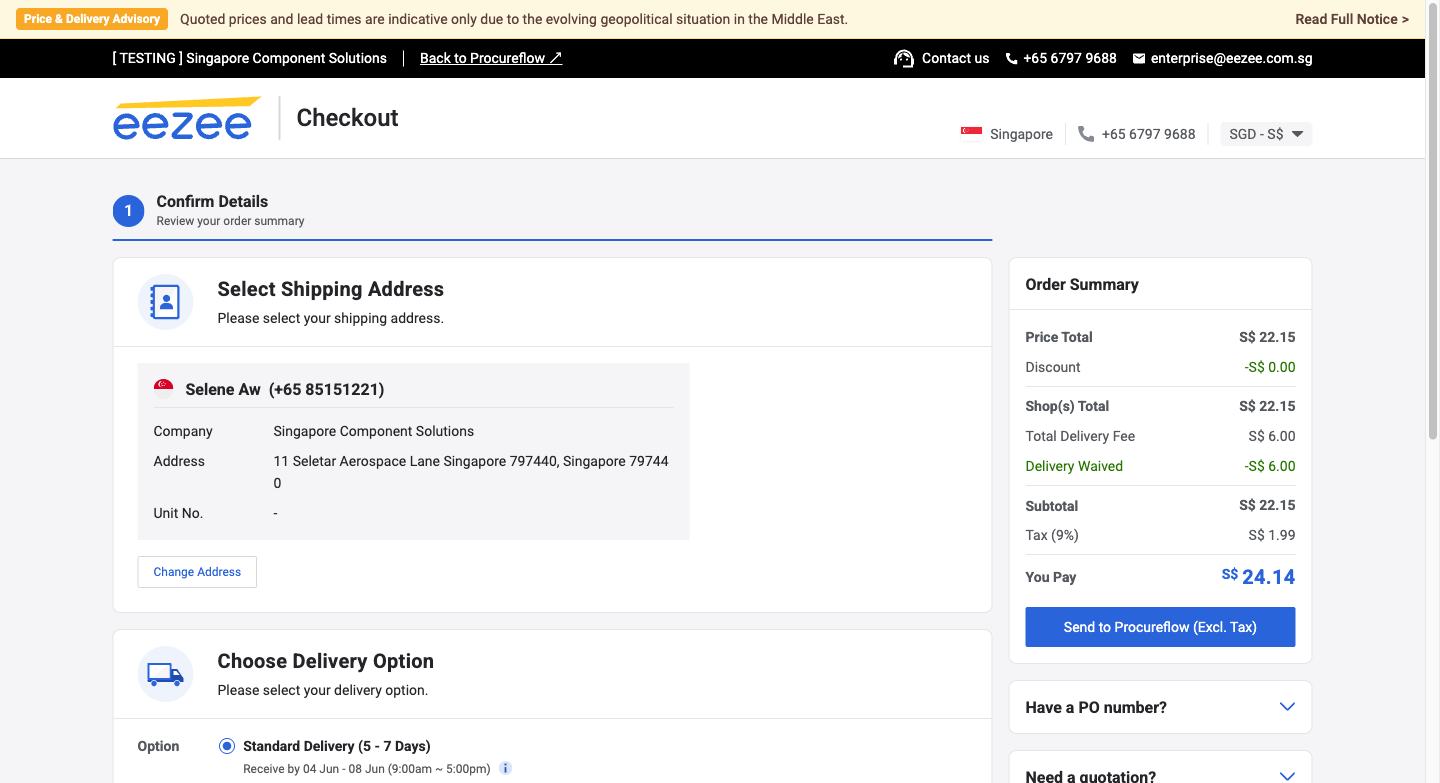
PR Created in ProcureFlow: Fill in PR Details
ProcureFlow automatically creates a new Purchase Request (PR) and redirects you to the PR creation wizard (Step 1: Confirm Details). The Cost Center is pre-filled from your punchout session.
Fill in the following to give your approver context for this purchase:
- Subject (e.g. A4 Paper restock – Q2 2026)
- Description (optional)
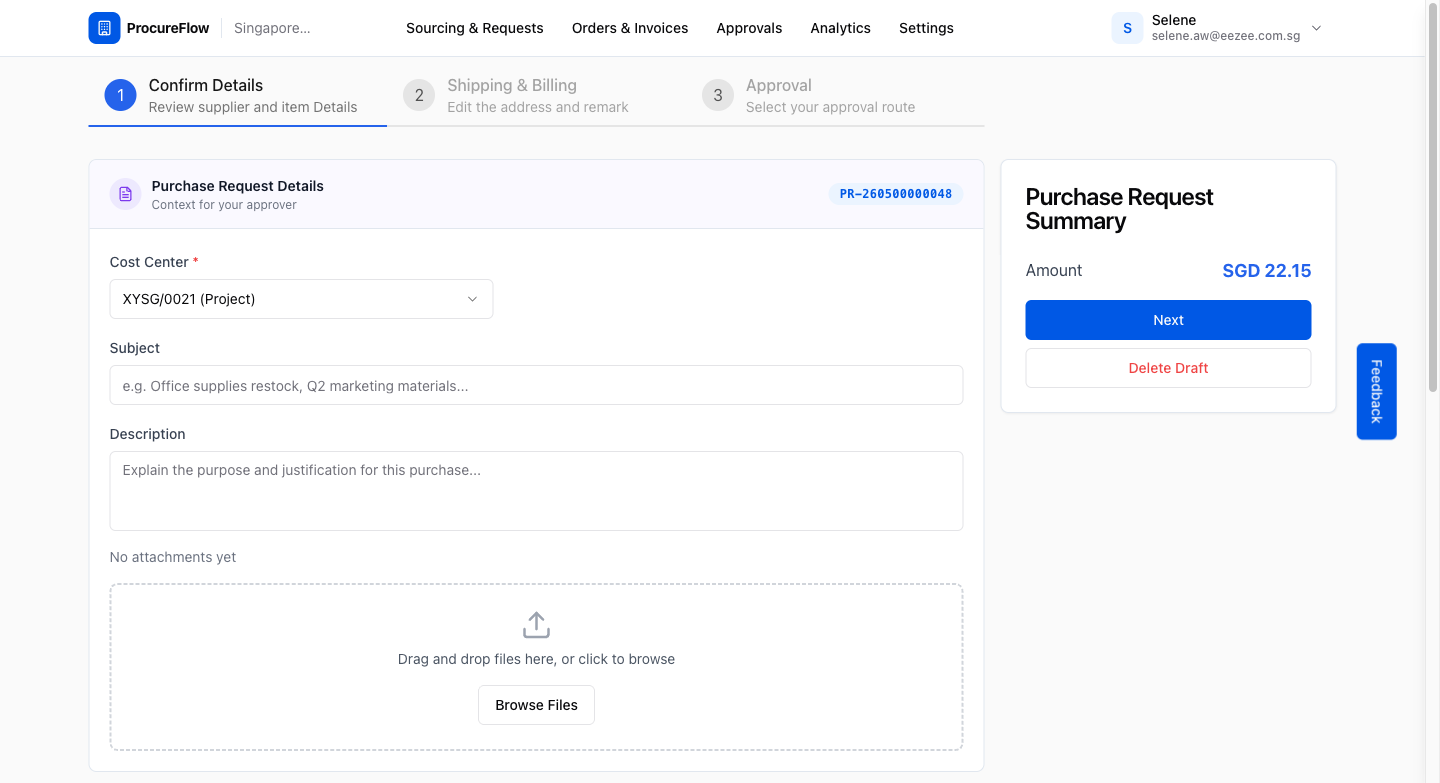
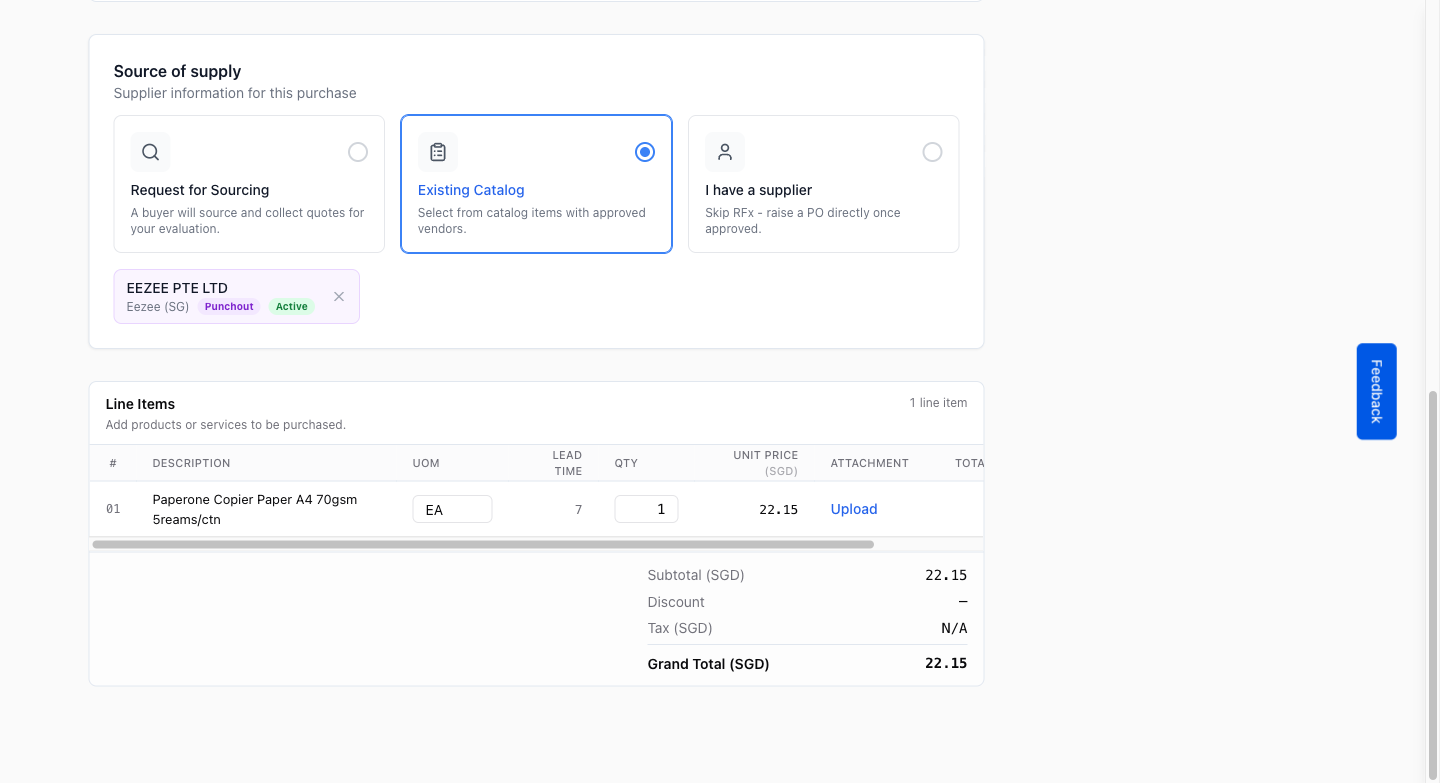
Verify Line Items Pre-filled from Eezee
Scroll down on the same page to the Line Items section.
All items from your Eezee cart have been automatically imported as line items, with these details pre-populated:
- Product name
- UOM
- Lead time
- Quantity
- Unit price
The supplier is set to EEZEE PTE LTD (Punchout). Verify the details are correct before proceeding.
Step 2: Confirm Shipping & Billing Addresses
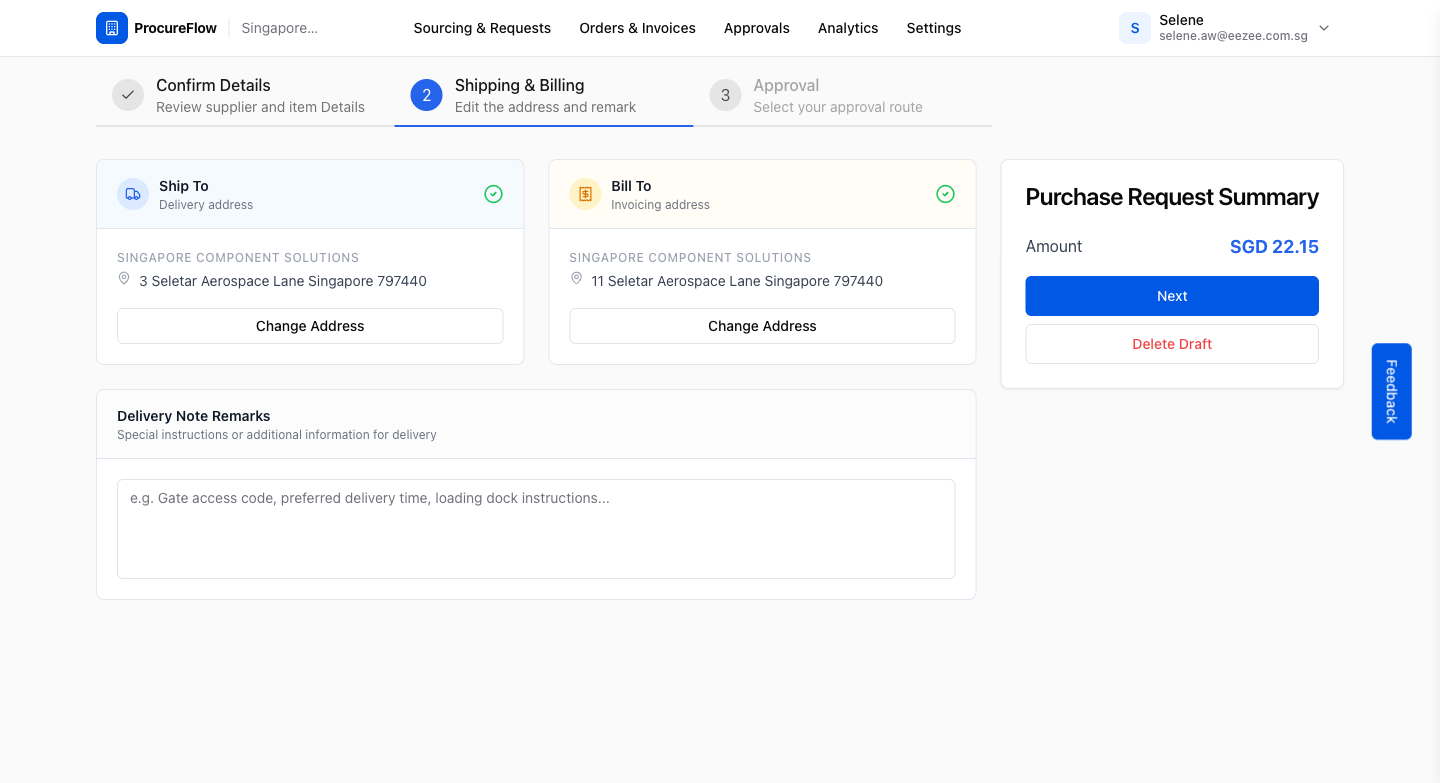
Click Next on the Confirm Details page. You will land on Step 2 – Shipping & Billing.
Review the two addresses, both pre-populated from your organisation's configured addresses:
- Ship To: delivery address
- Bill To: invoicing address
Optionally, you can:
- Click Change Address to select a different one.
- Add Delivery Note Remarks (e.g. gate access code, preferred delivery time).
When ready, click Next.
Step 3: Select Approver and Raise PR
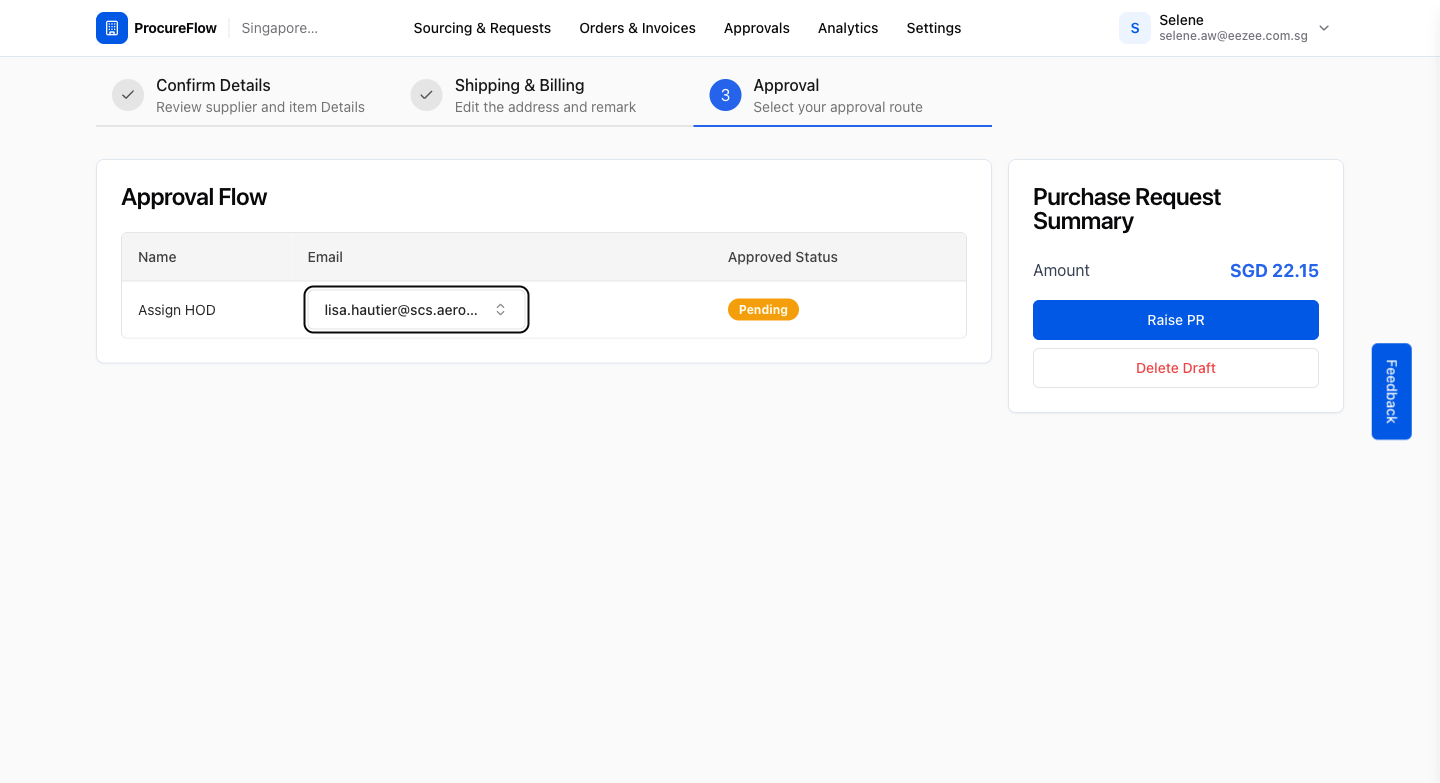
On Step 3 – Approval, you will see the Approval Flow table with an Assign approver row.
- Click the Select Approver dropdown and choose your approver from the list. Once selected, the approver's email appears in the field.
- Click the blue Raise PR button on the right to submit the Purchase Request for approval.
PR Submitted: What Happens Next
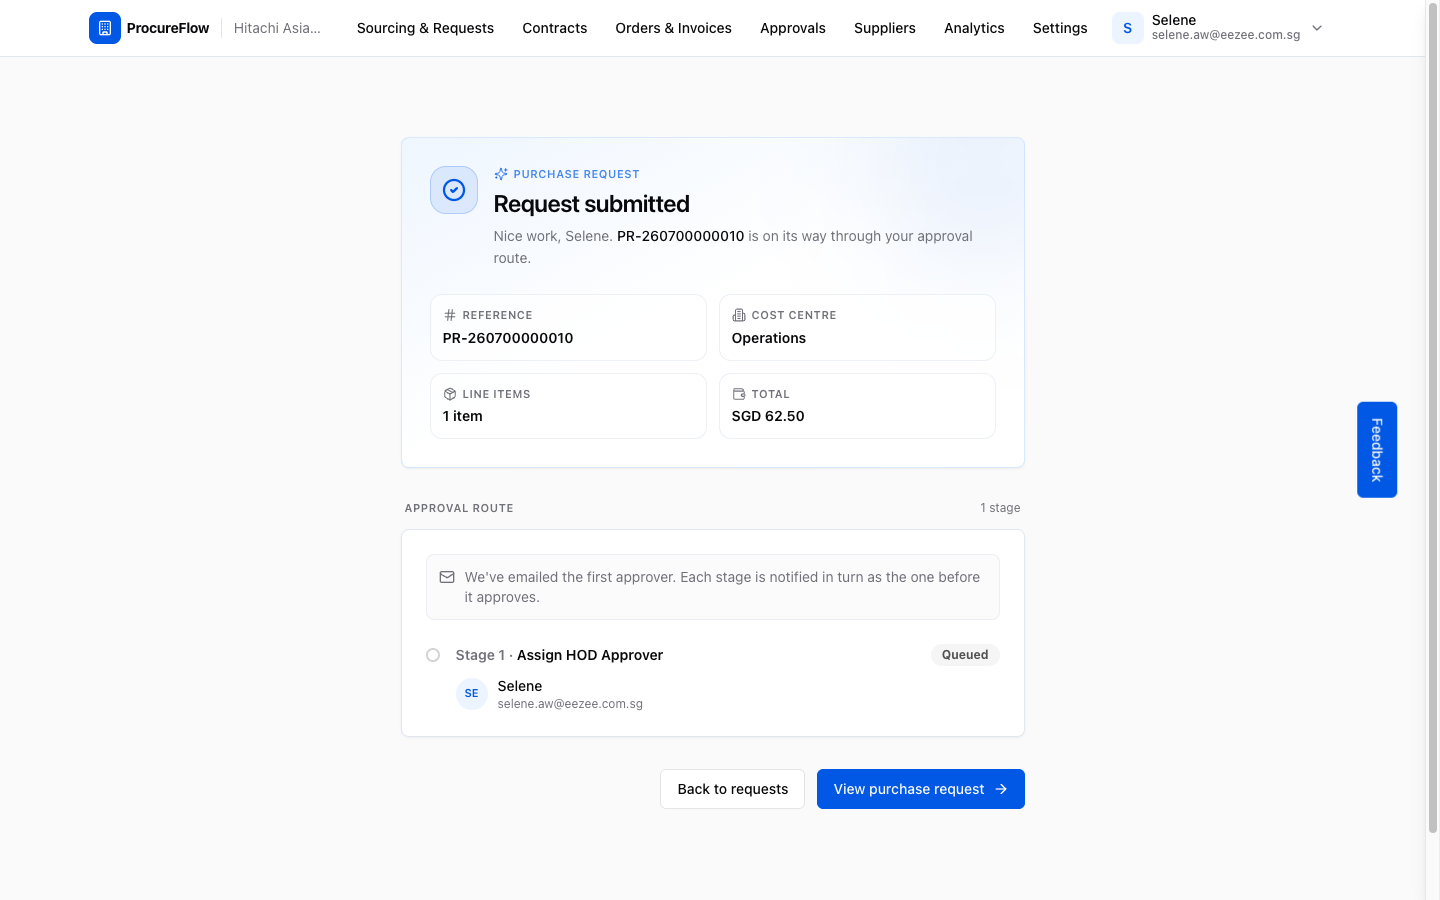
A Purchase Request Submitted! confirmation page appears.
Here is what happens next:
- ProcureFlow has sent an email notification to your assigned approver.
- The PR status changes to Pending Approval.
- The approver will review and either approve or reject the request.
- You will receive an email notification once a decision is made.
Create for Sourcing
Use this guide when you need goods or services and want the procurement team to source competitive quotes from multiple suppliers.
Review a Purchase Request
When a Purchase Request is submitted and the approver has approved it, the PR moves to the Procurement Approval step. You will be assigned as the approver and receive an email notification. This guide walks you through acting on that notification and approving the PR.