Create for Sourcing
Use this guide when you need goods or services and want the procurement team to source competitive quotes from multiple suppliers.
Last updated 12 October 2026
Who can use this?
Available to all authenticated users with a valid session. Any user in the organisation can create a Purchase Request.
Start a Purchase Request
Click New Purchase Request under Quick Actions on the Dashboard.
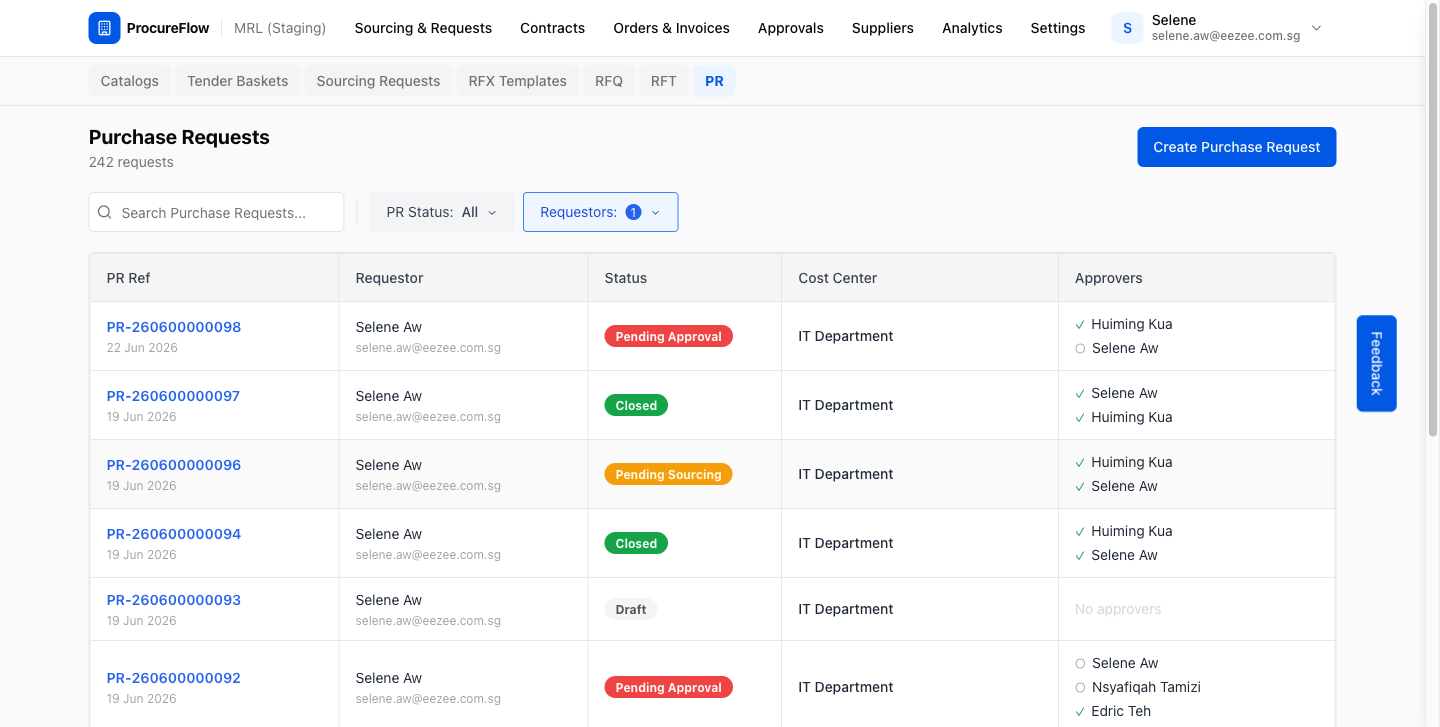
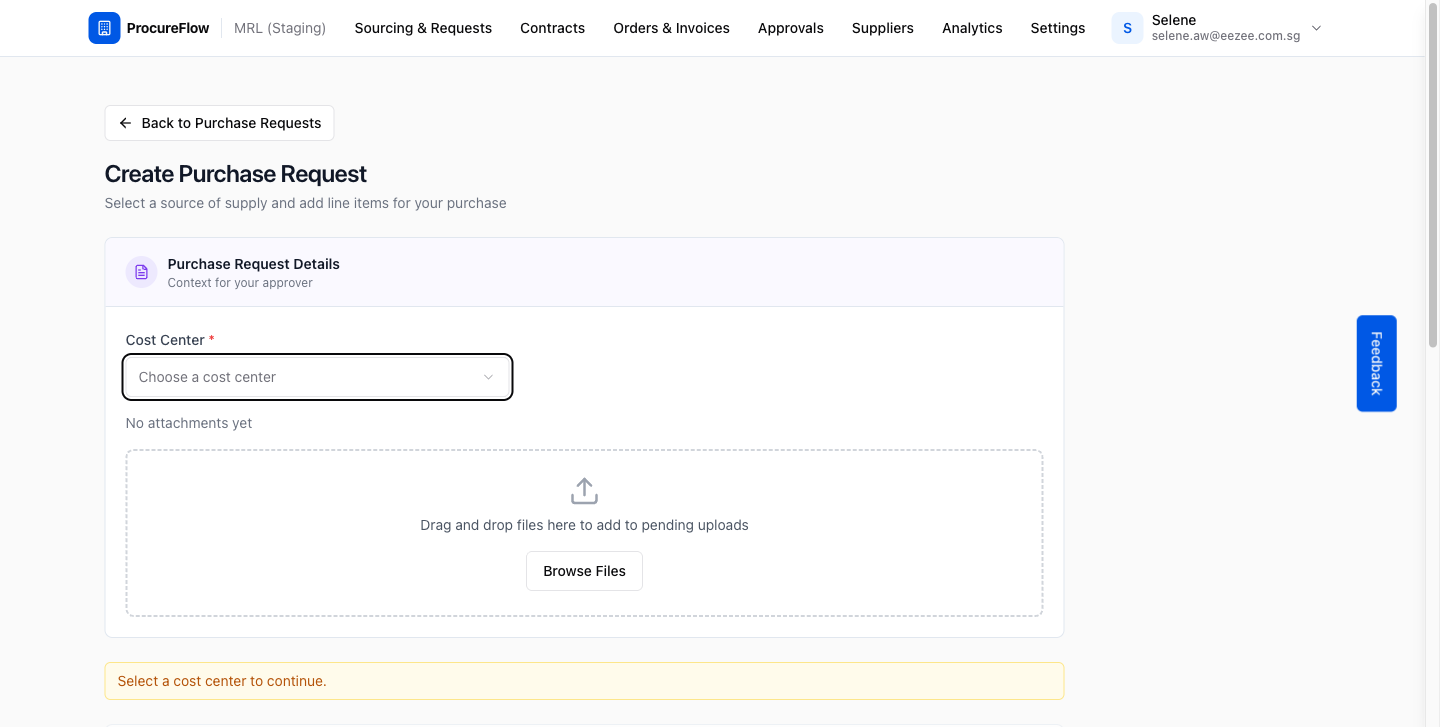
Fill In the Form and Select a Cost Center
- Choose a Cost Center from the dropdown. The rest of the form unlocks.
- Enter a short title in Subject (required).
- Add optional context for your approver in Description.
- If Budget Category is enabled for your organisation, choose how the purchase is funded:
| Budget Category | Meaning |
|---|---|
| Budgeted | Draws from the cost center's allocated budget pool. |
| Unbudgeted (Pre-Approved) | Skips the cost center budget check. Counted against the org's unbudgeted spend cap. Requires an approved memo attachment. |
| Unbudgeted | Skips the cost center budget check. Counted against the org's unbudgeted spend cap. May route to additional approvers, depending on your organisation's approval workflow. |
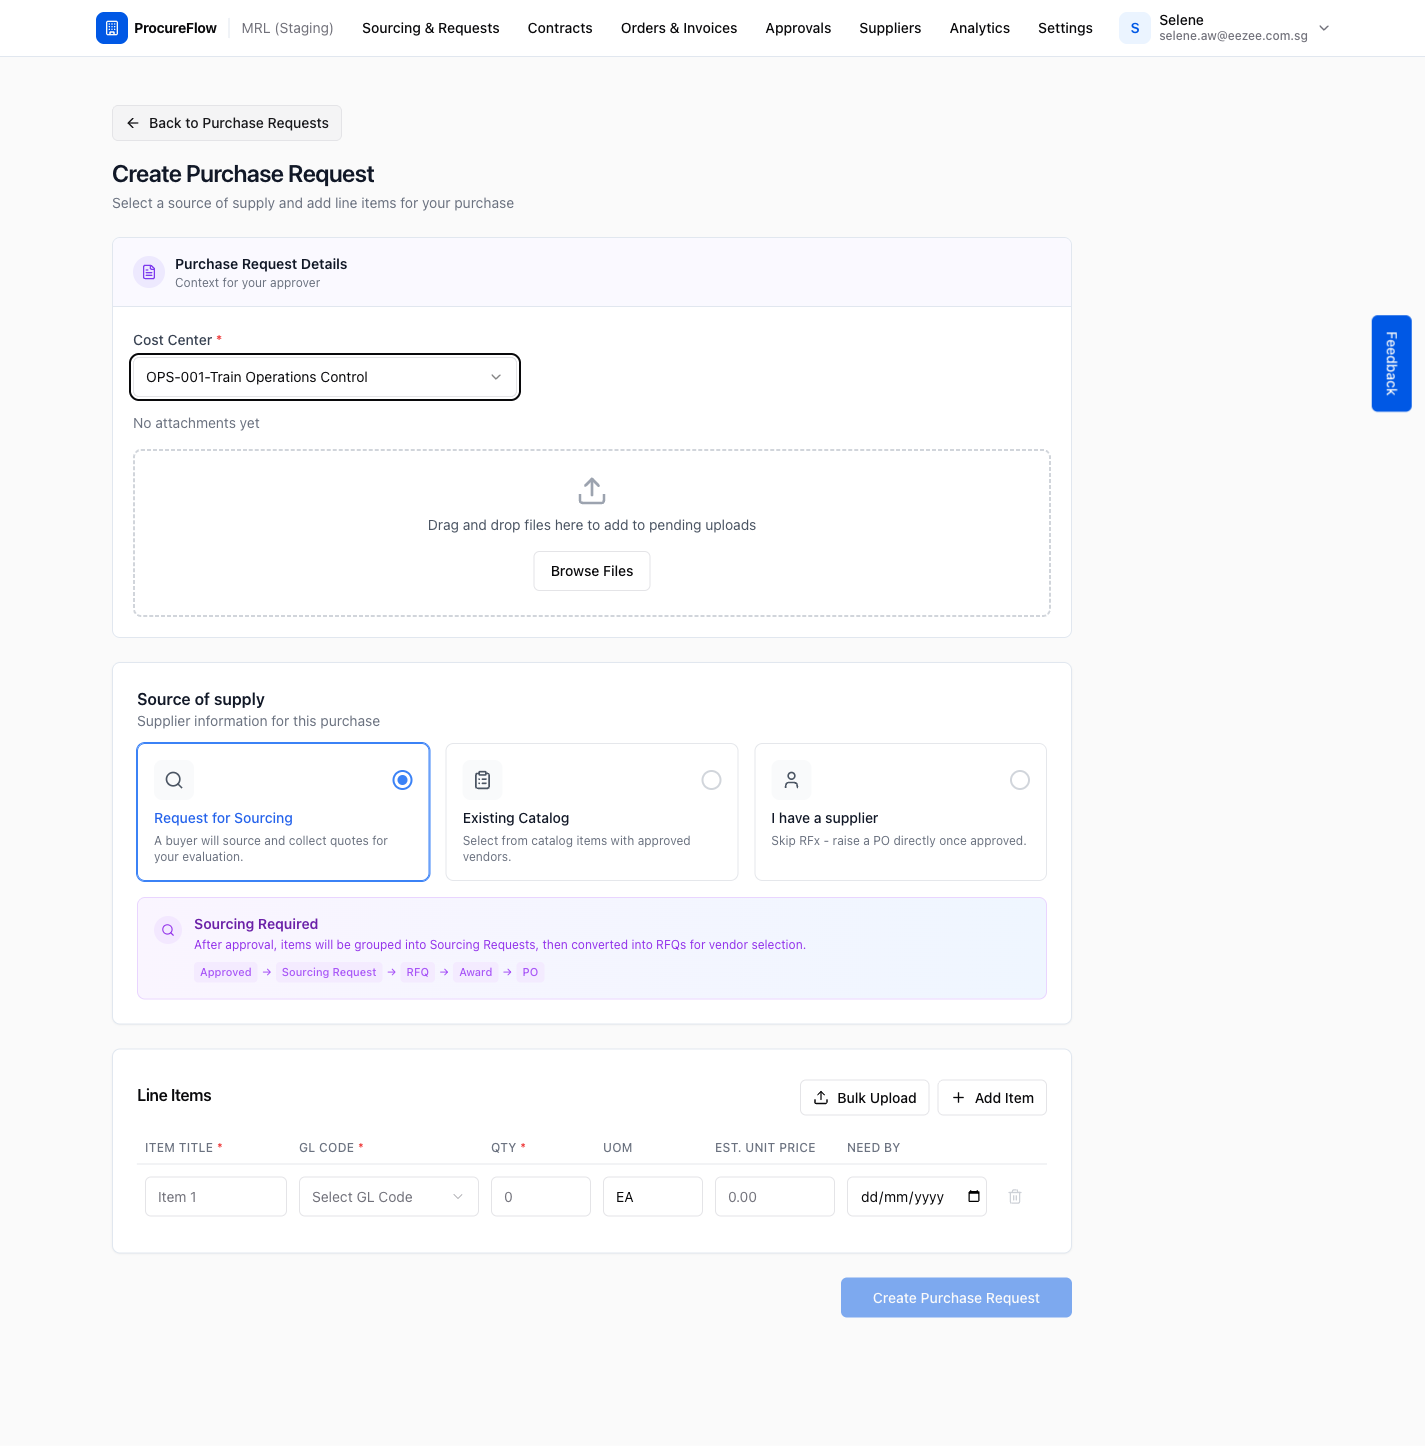
Confirm Request for Sourcing is Selected
Click Request for Sourcing under Source of Supply (selected by default).
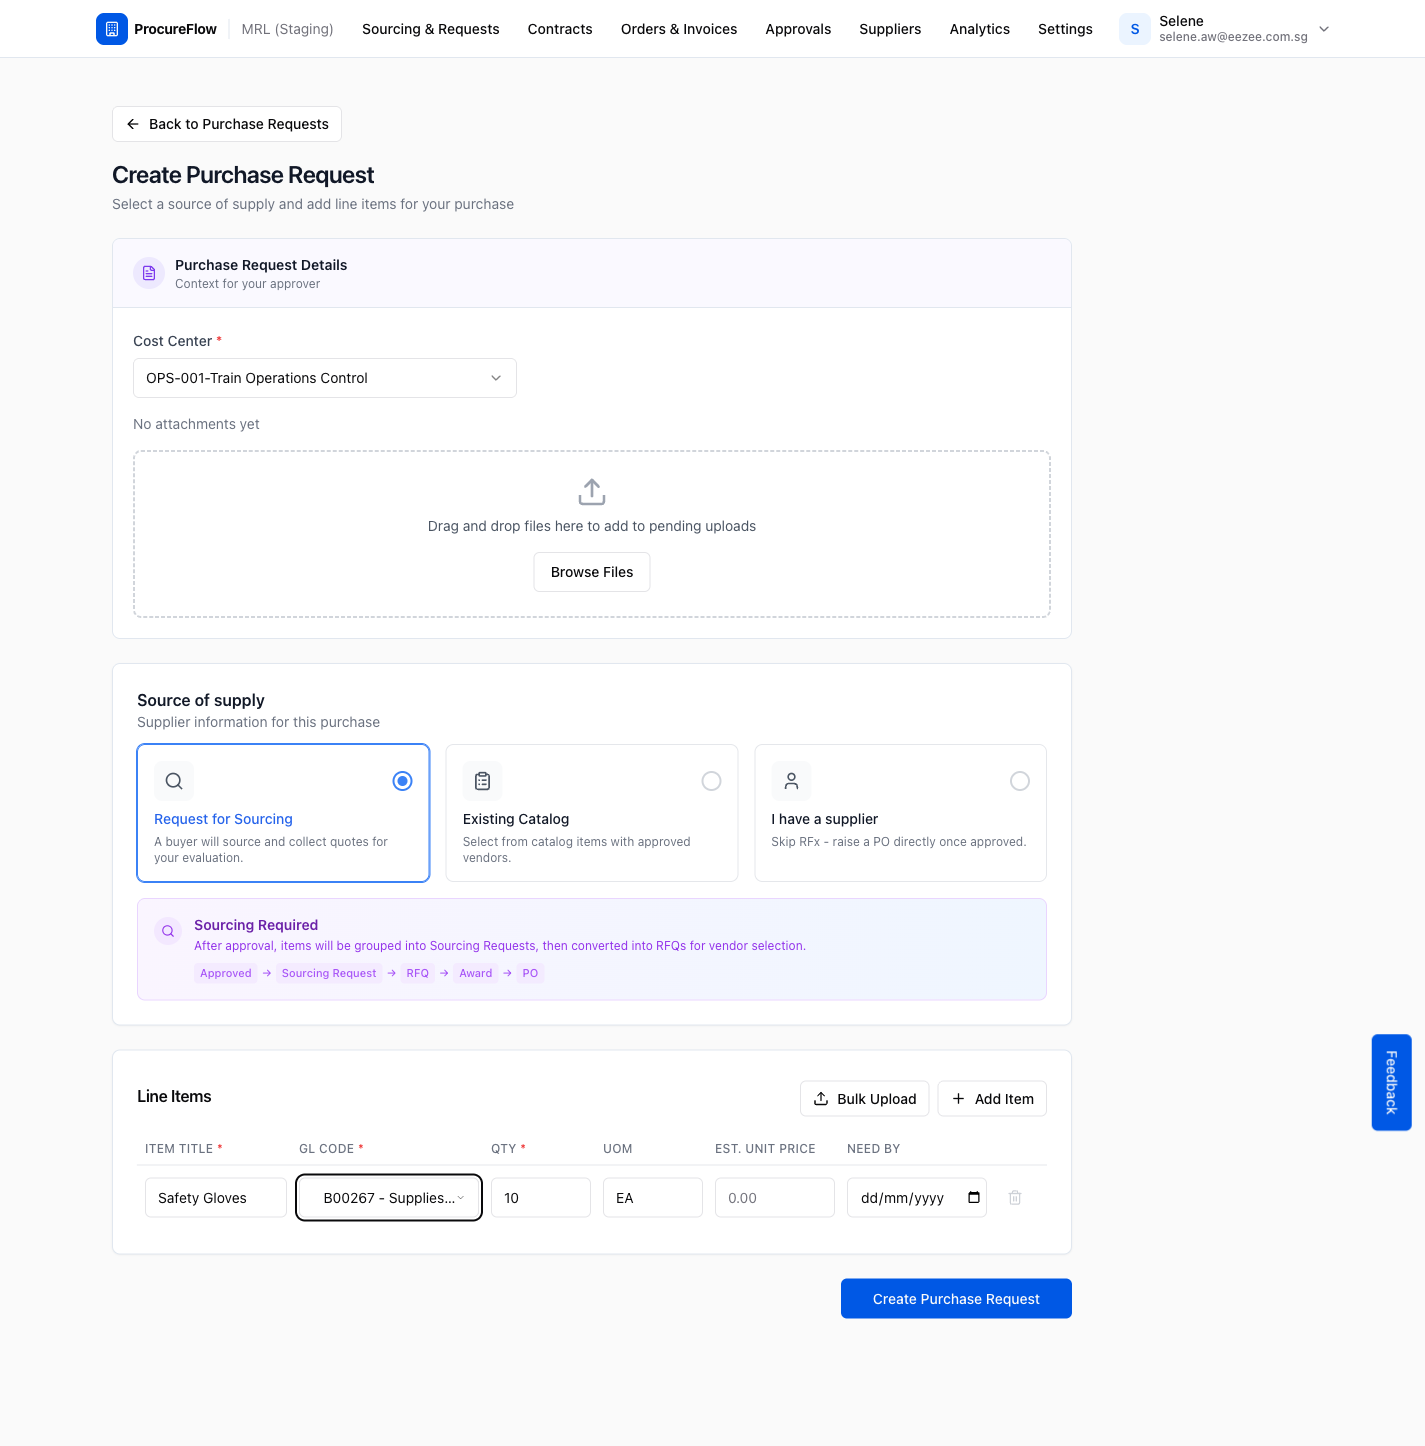
Add a Line Item and Submit
- Enter Item Title, GL Code (if required), and Qty.
- Fill in Est. Unit Price if known (optional); a buyer will collect quotes.
- Click Create Purchase Request once required fields are filled.
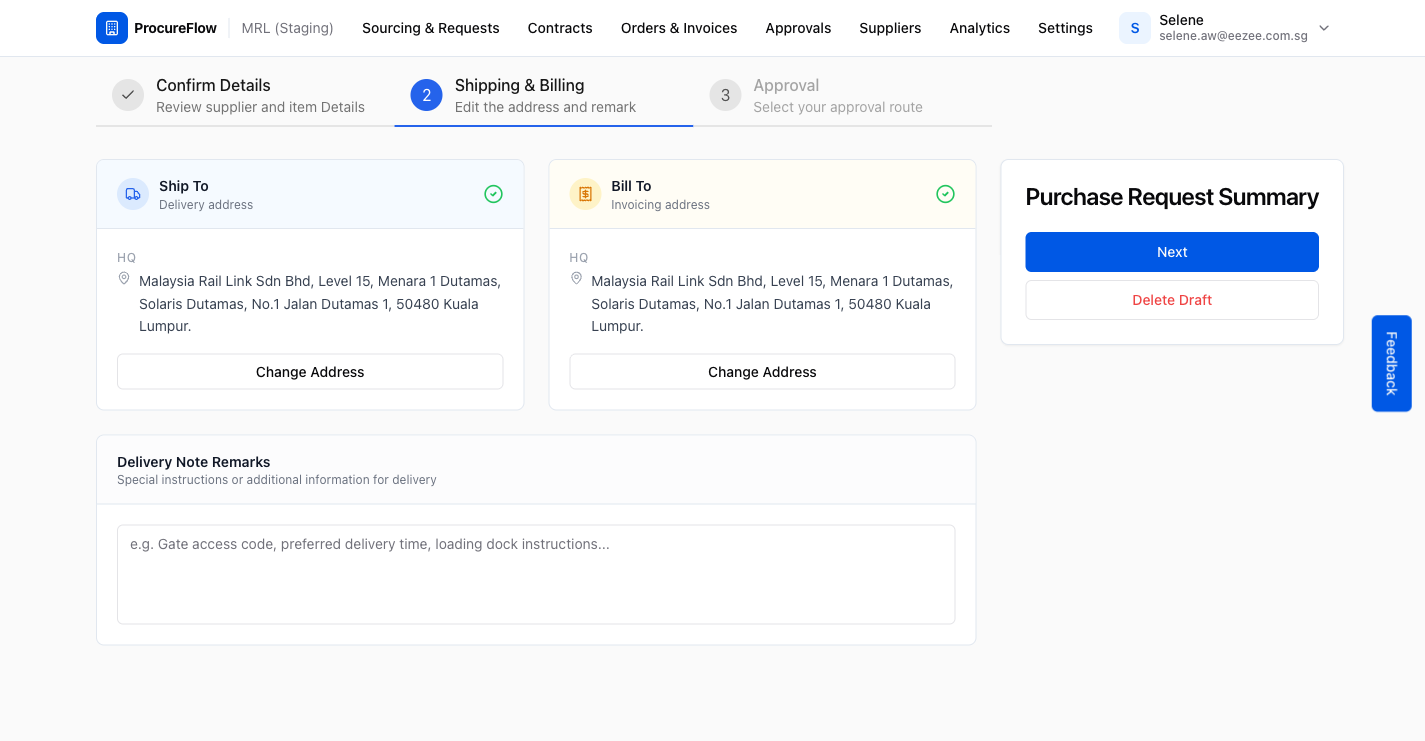
Set Shipping and Billing Addresses
- Select Ship To and Bill To addresses.
- Click Next.
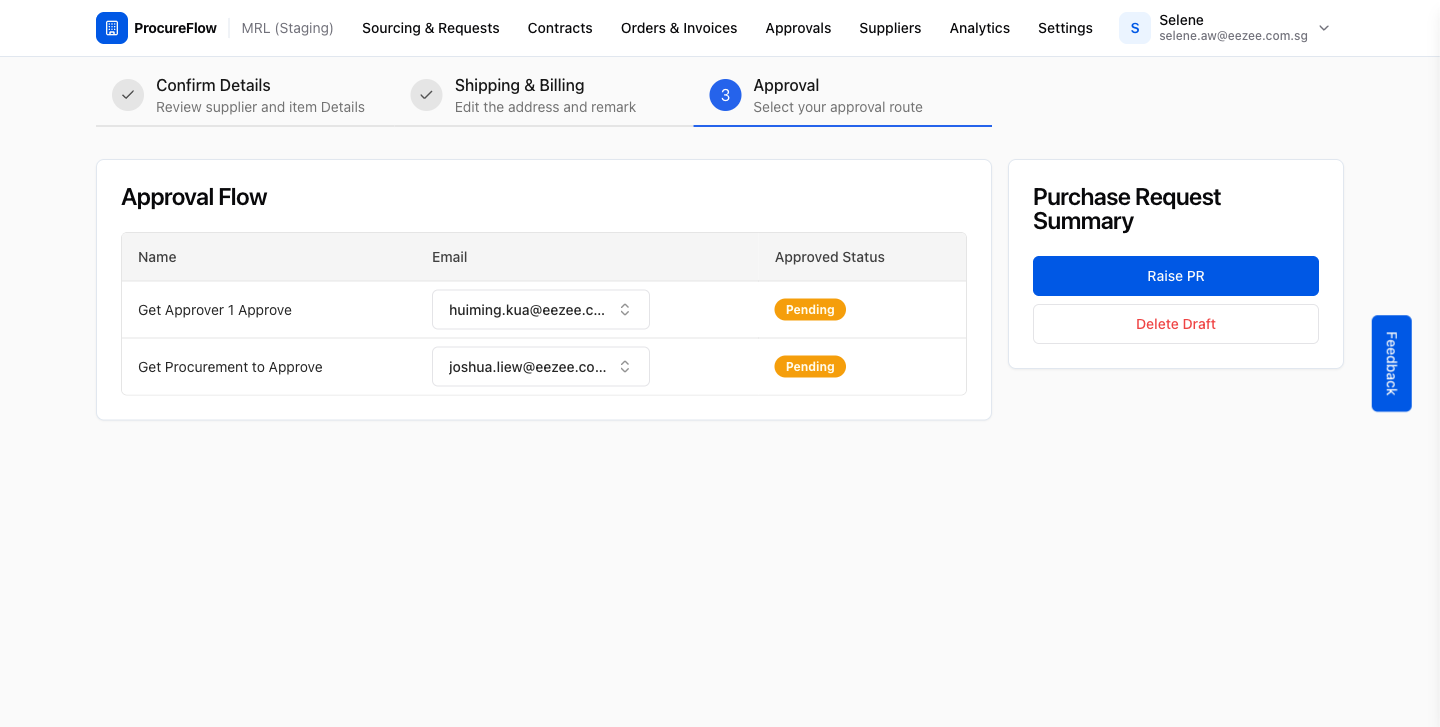
Assign Approvers and Raise the PR
- Review the auto-derived Approval Flow.
- Assign an approver to each stage.
- Click Raise PR to submit.
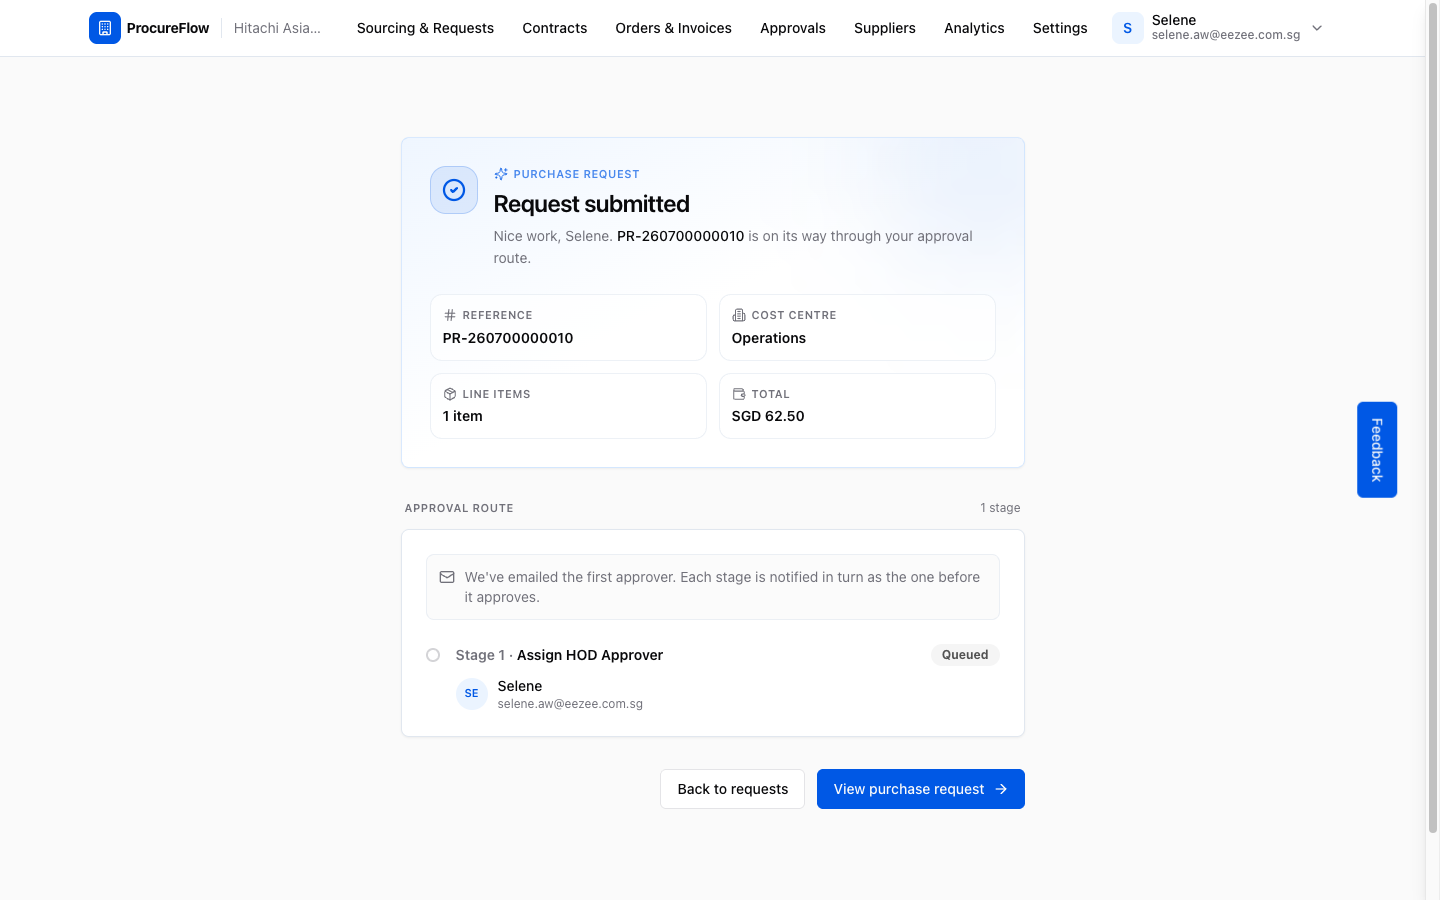
Confirm the Purchase Request Was Submitted
- Confirmation screen shows your PR number and full approval chain.
- Once approved, items convert into a Sourcing Request, then an RFQ for vendor selection.
- Track status anytime from the Purchase Requests list.
Create for a Known Supplier
Raise a direct-sourcing purchase request when you already know which supplier you want to use. The request goes through your organisation’s approval workflow before a Purchase Order is issued.
Create via Punchout
How to create a Purchase Request by shopping from the Eezee Punchout catalog, for organisations with the Eezee integration enabled.