Create an RFQ
Create a Request for Quotation (RFQ) to invite suppliers to submit their prices and terms for a procurement need.
Last updated 12 October 2026
Who can use this?
Available to Requestor users. Only users with the RFQ creation permission can send RFQs to suppliers.
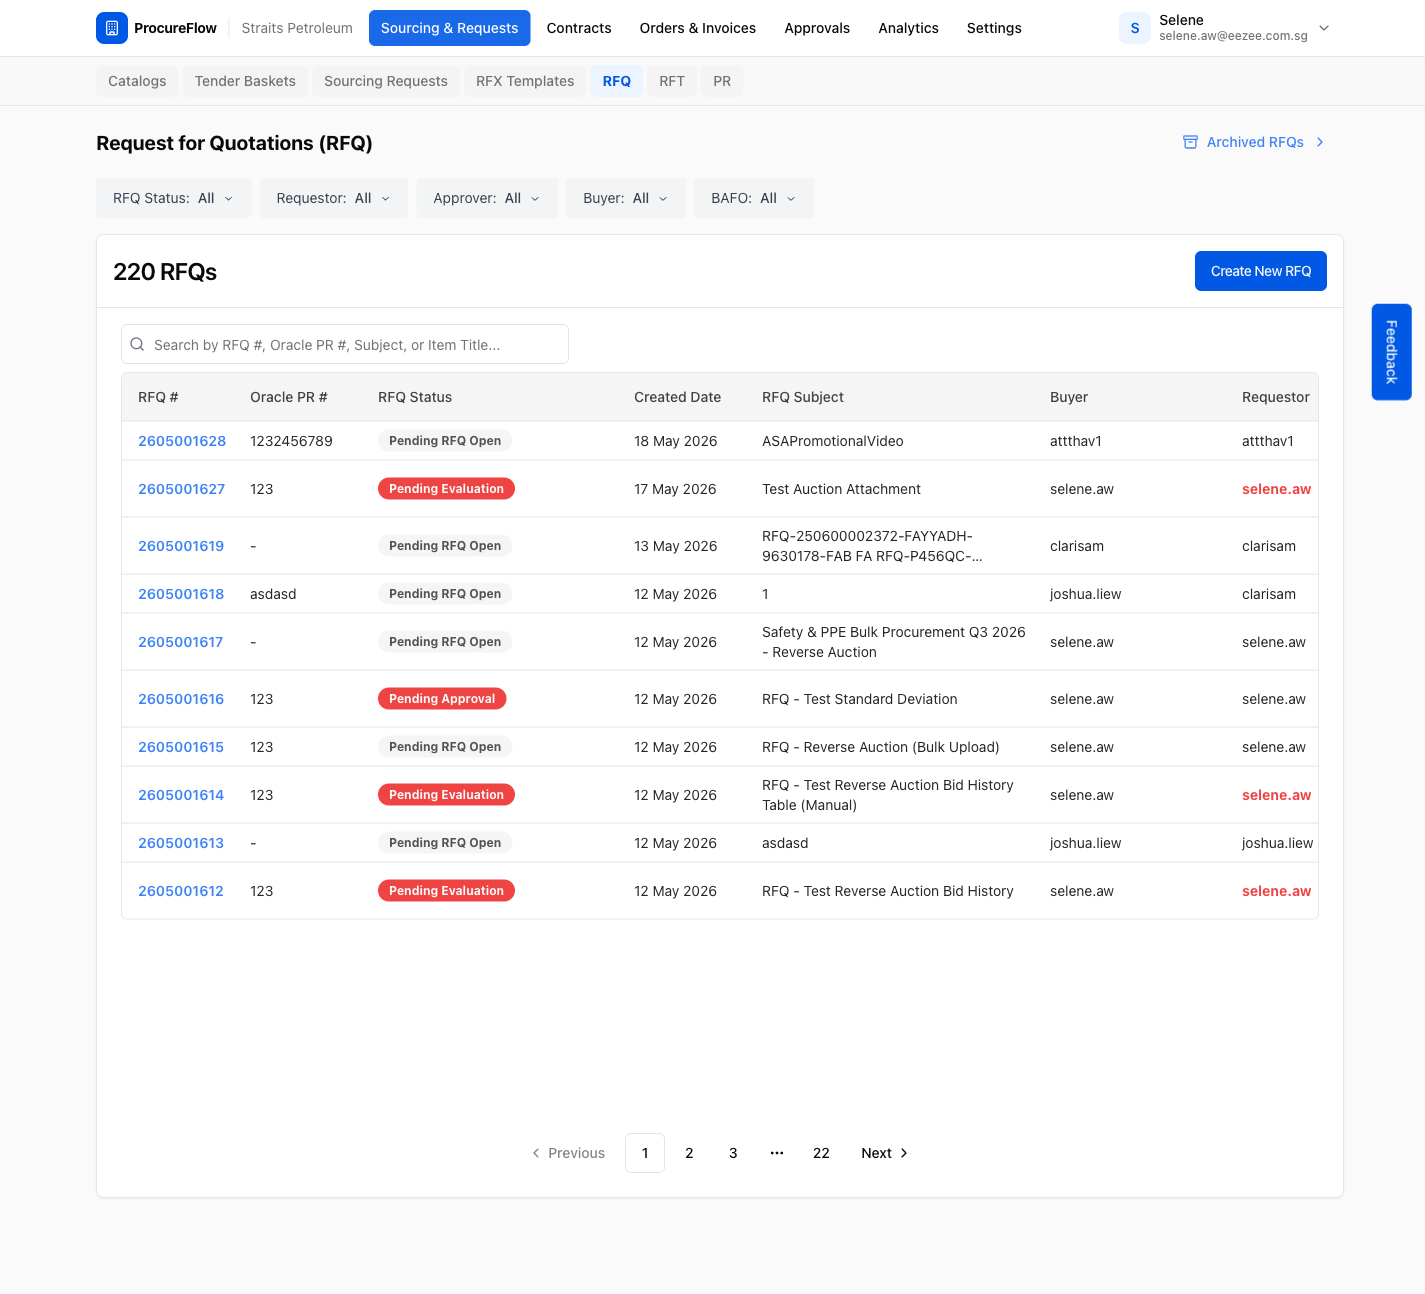
Navigate to the RFQ List
- From the top navigation bar, click Sourcing & Requests.
- Select the RFQ tab to open the Request for Quotations list.
- Click the Create New RFQ button in the top-right corner of the list.
Fill in the Create RFQ Form
The Create New Request for Quotation form will open. Fill in the following fields:
- Subject (required): A short, descriptive title for the RFQ (e.g. "Office Supplies Q3 2026").
- Description: Optional details about the procurement scope and requirements.
- Category: The category of goods or services (e.g. "Office Supplies", "IT Equipment").
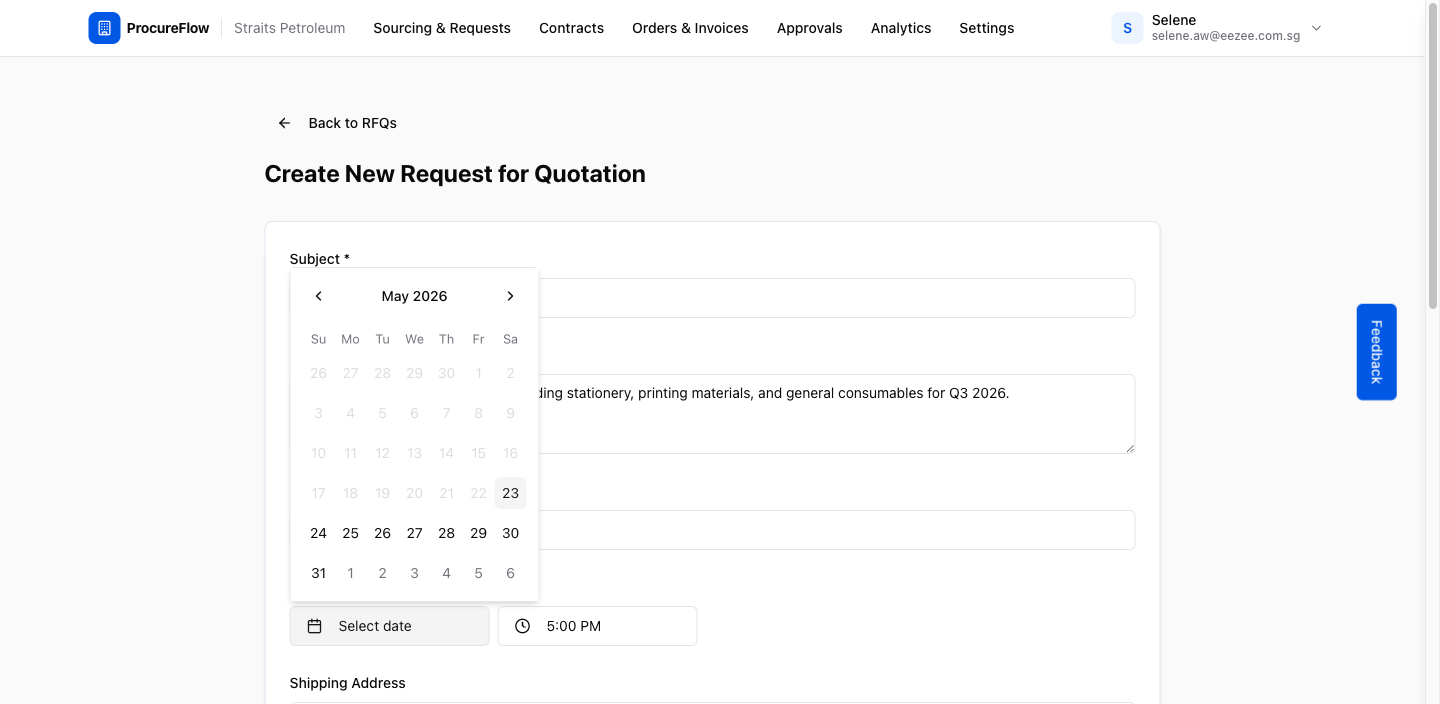
- Bid Closing Date & Time (required): The deadline for suppliers to submit their quotations. Click the calendar to select a date, then set the time.
- Shipping Address: Where the goods should be delivered.
- Attachments: Upload any relevant documents (specs, drawings, T&Cs). A default General Terms & Conditions PDF is pre-loaded.
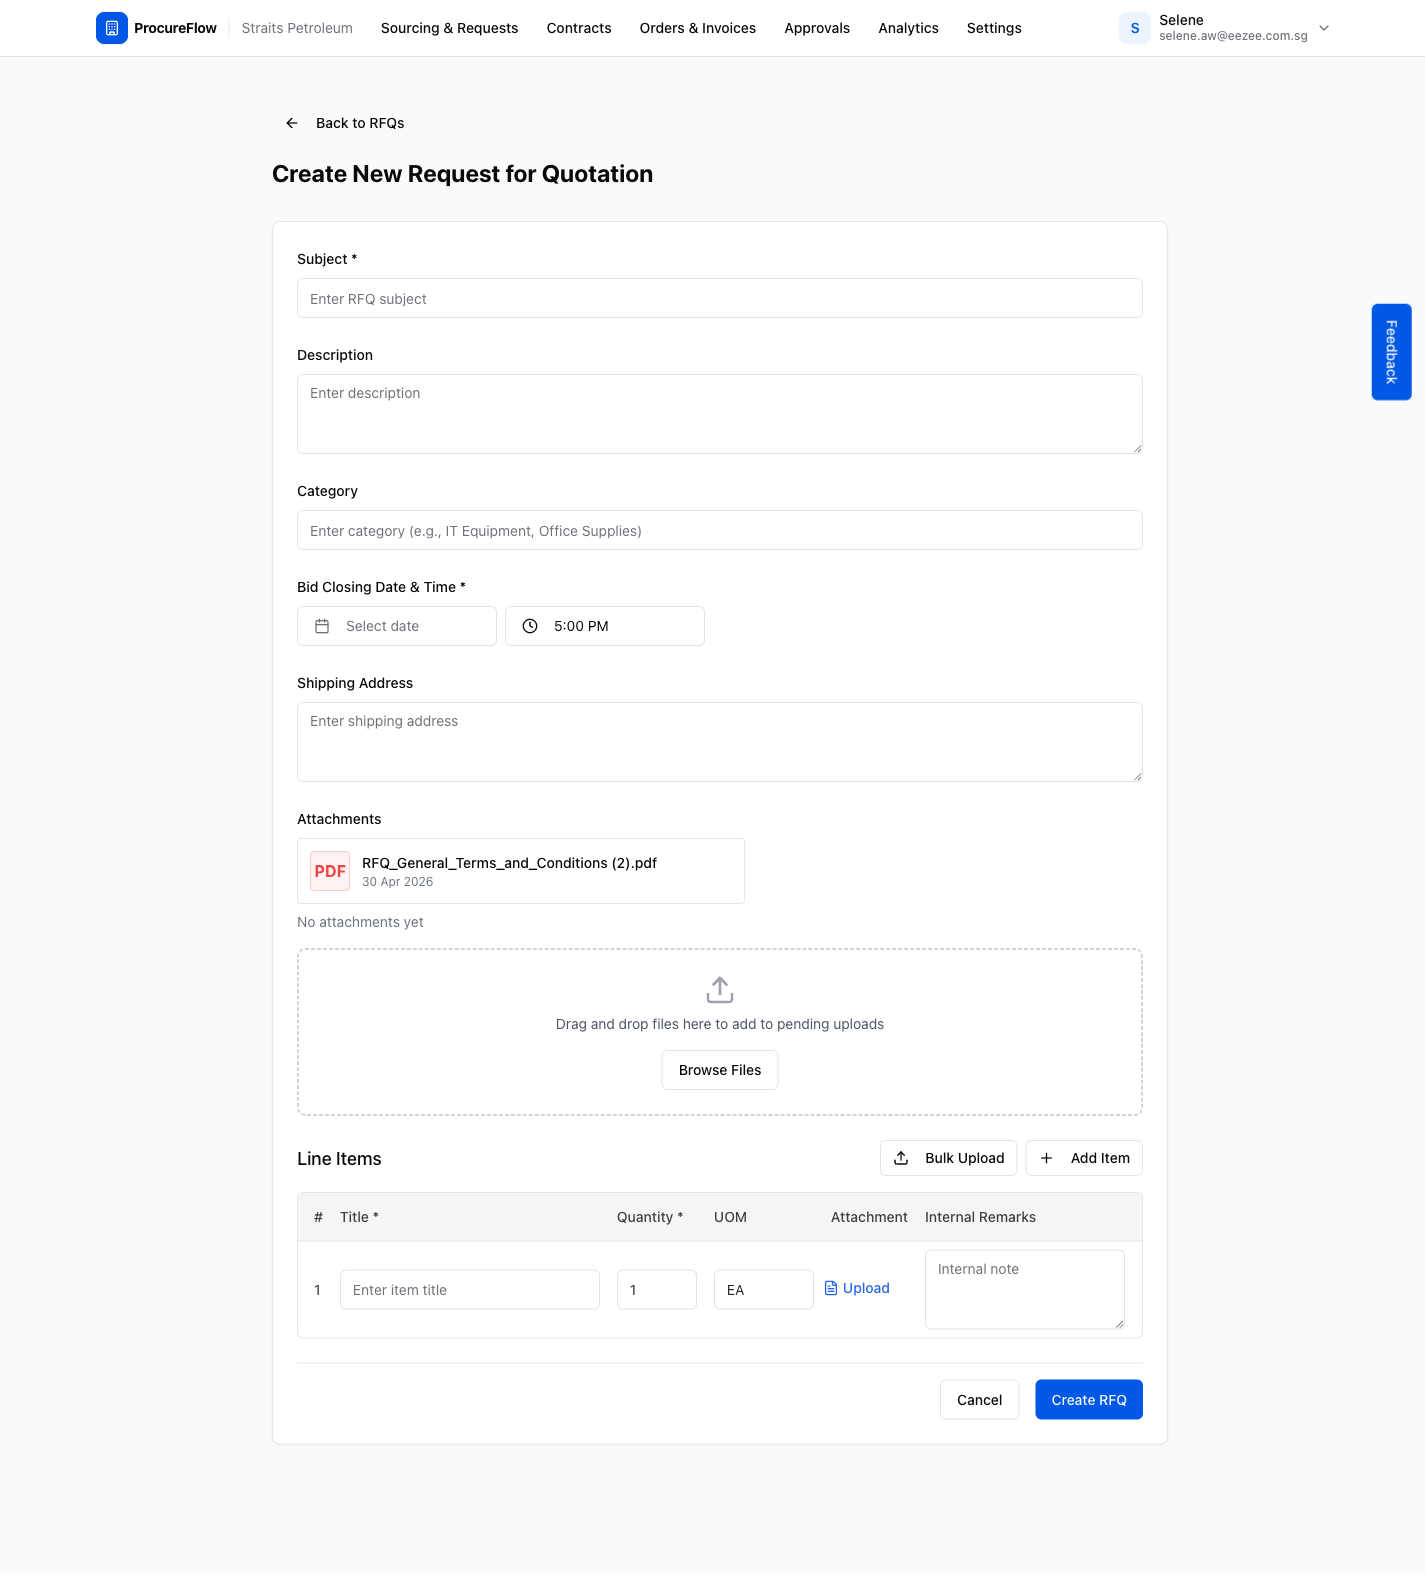
Line Items: Under the Line Items section, enter at least one item:
- Title: The name or description of the item (e.g. "A4 Paper (80gsm, 500 sheets/ream)").
- Quantity: How many units you need.
- UOM: Unit of measure (defaults to EA for each).
- Attachment: Optional file attachment per line item.
- Internal Remarks: Notes visible only to your team, not to suppliers.
Add more items one of two ways:
- Use the + Add Item button to add more line items.
- Use Bulk Upload to import multiple items from a spreadsheet.
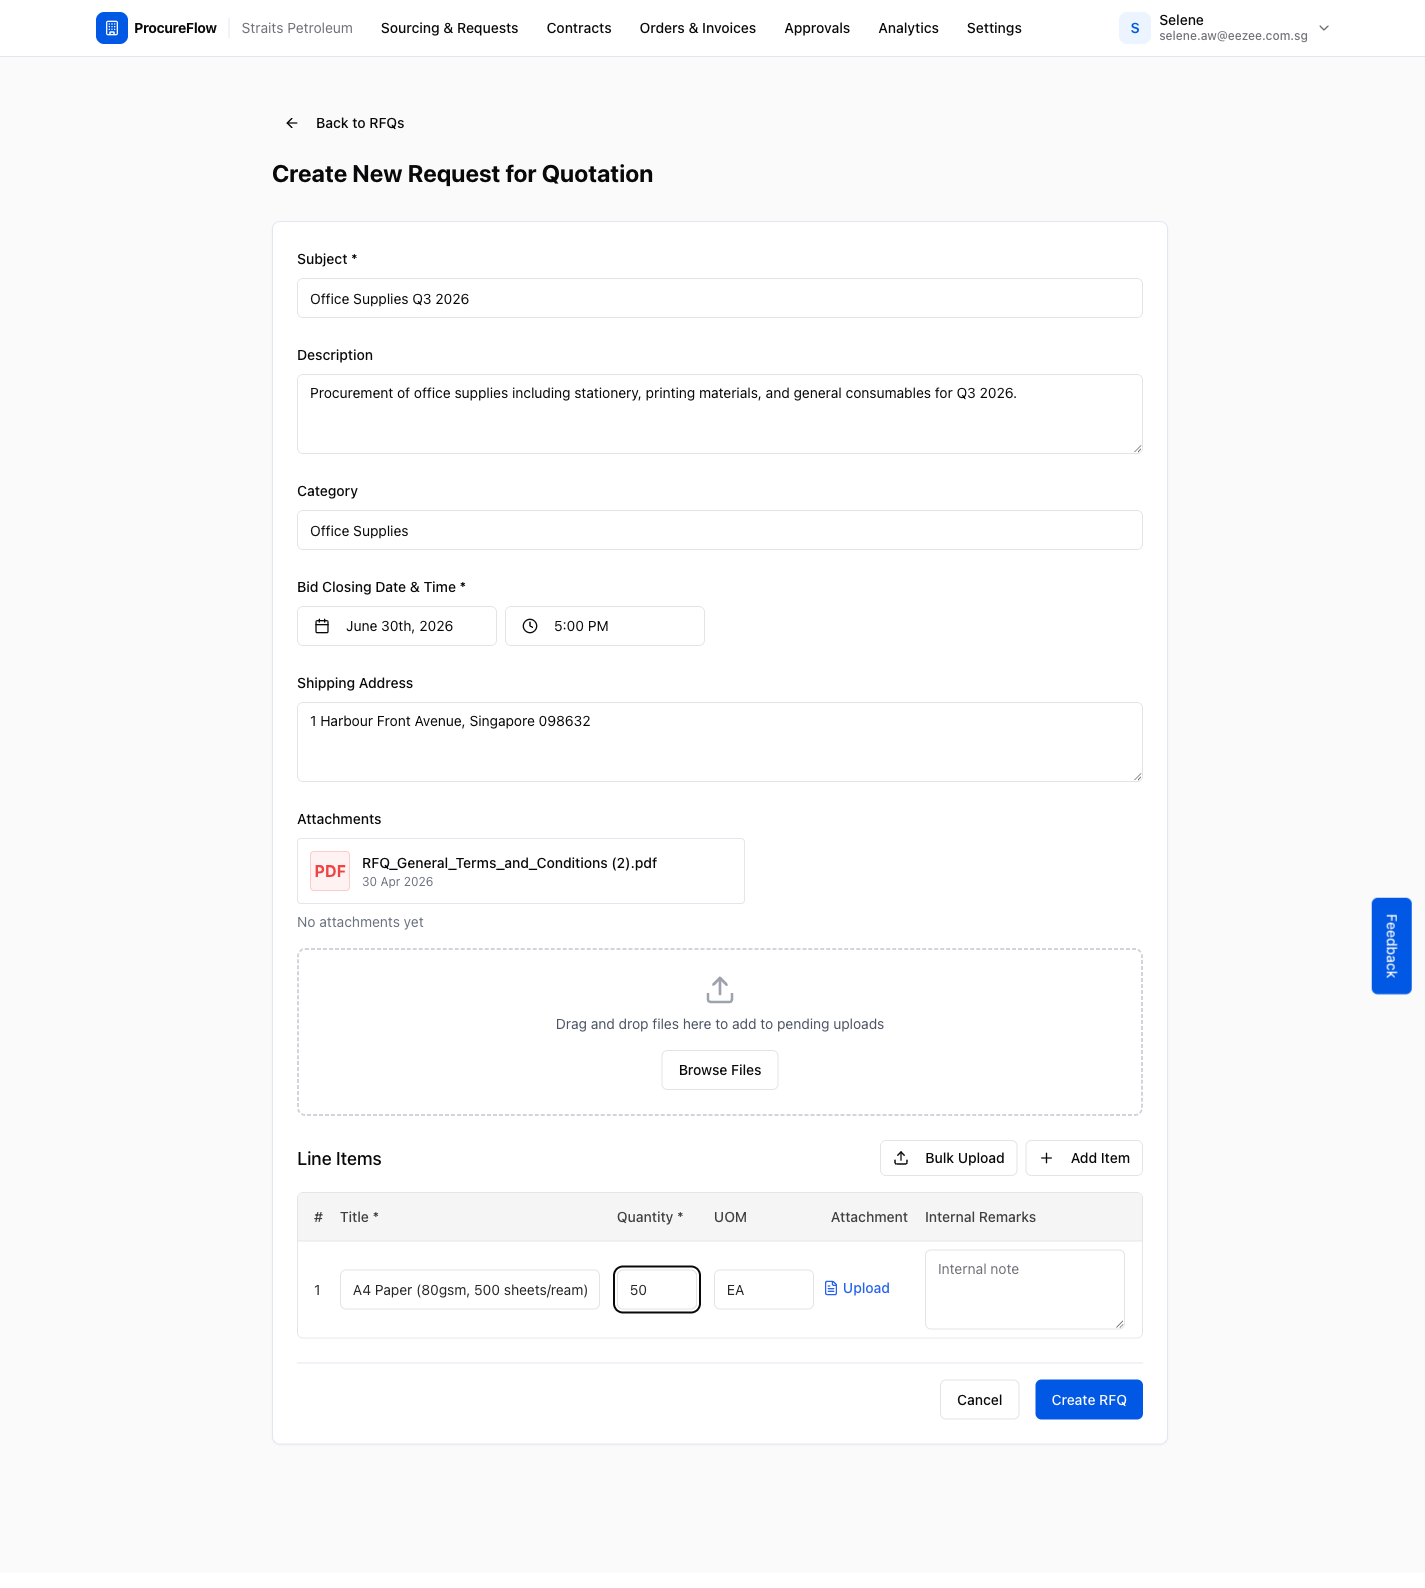
When all fields are complete, click the blue Create RFQ button at the bottom right of the form.
Confirm RFQ Details (Step 1 of 2)
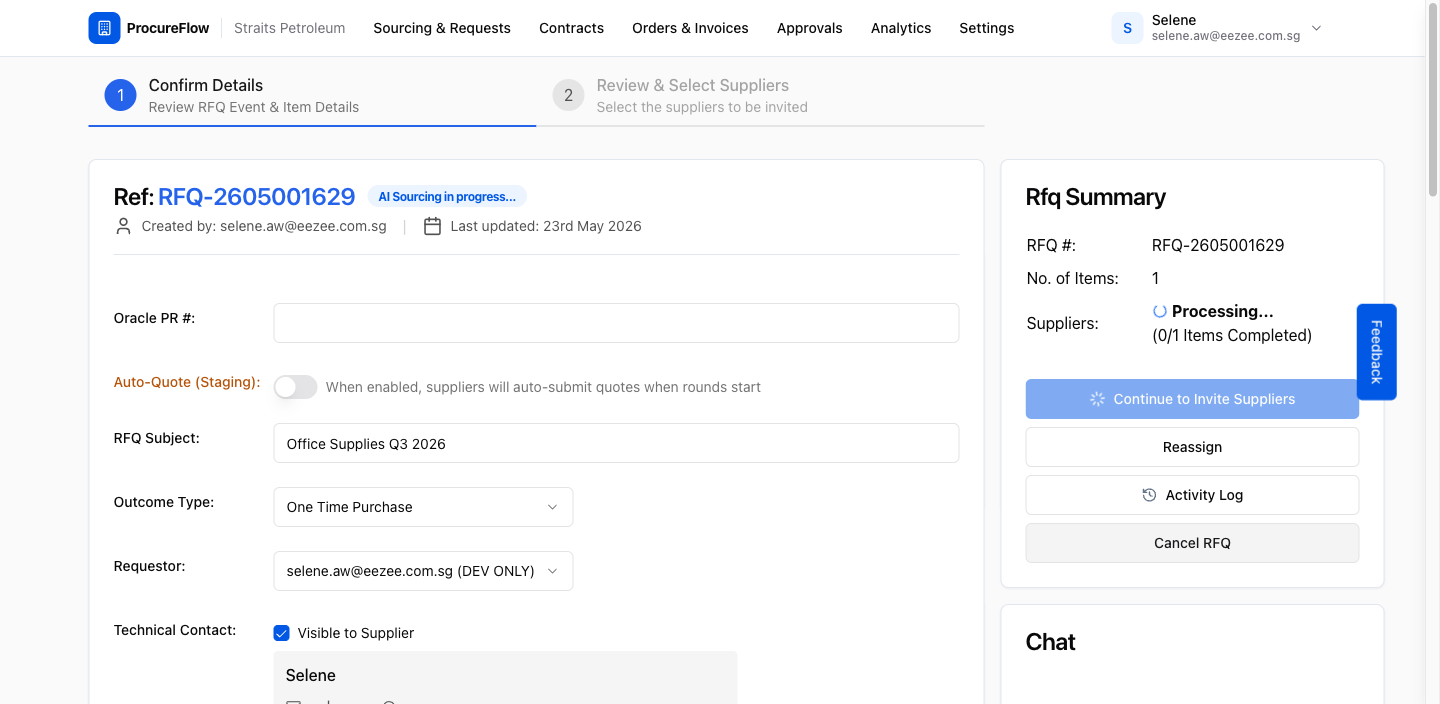
After creating the RFQ, you are taken to Step 1: Confirm Details. This page shows a full summary of your RFQ and allows you to make final adjustments before inviting suppliers.
On the right side you will see the RFQ Summary panel. While AI sourcing is running, it shows "Processing...".
Wait a moment for it to complete.
Once the AI has finished sourcing, the panel updates to show the number of suggested suppliers found.
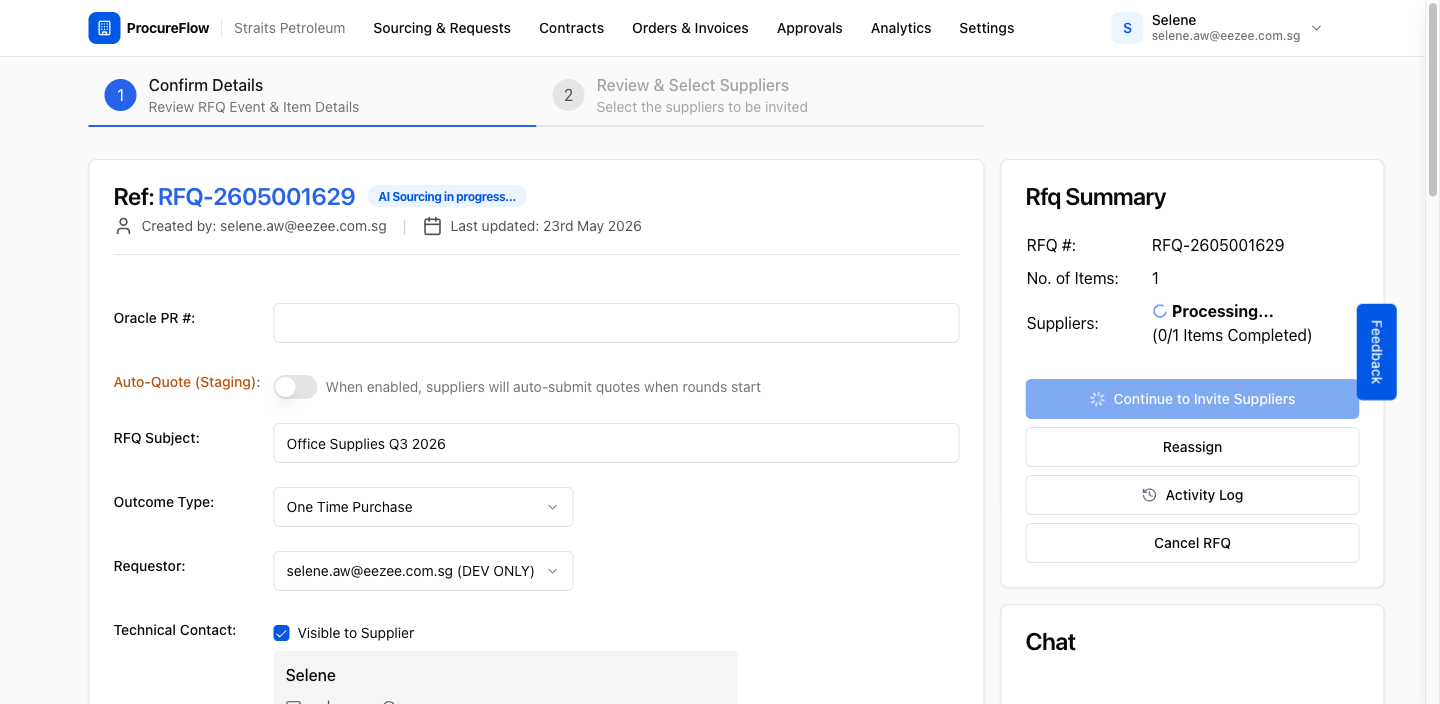
When you are satisfied with the details, click Continue to Invite Suppliers in the RFQ Summary panel on the right.
Review and Select Suppliers (Step 2 of 2)
You are now on Step 2: Review & Select Suppliers. The top of the page shows your line items, and below is the Review Suggested Suppliers table.
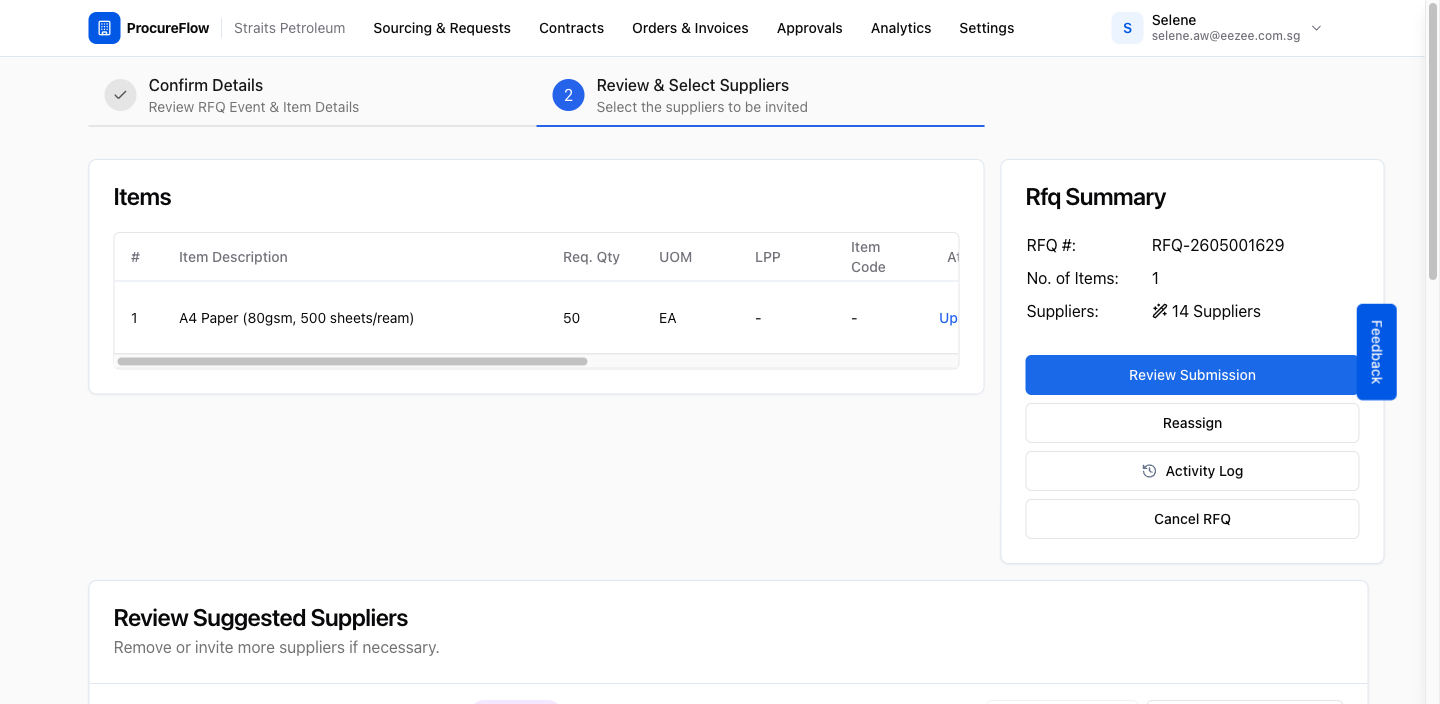
The supplier table shows each AI-suggested supplier along with key metrics to help you decide:
- Supplier Relevancy: AI-calculated relevancy score based on past RFX data.
- Matched Items: Number of line items this supplier can supply.
- Match Strategy: How the match was determined (Exact or Adjacent category).
- Last Participated: The most recent date this supplier responded to an RFQ.
- Invited / Participated / Awarded: Historical performance statistics.
Check the checkbox on the left of each row to select suppliers you want to invite.
You must select at least the minimum number of suppliers required by your organisation's policy.
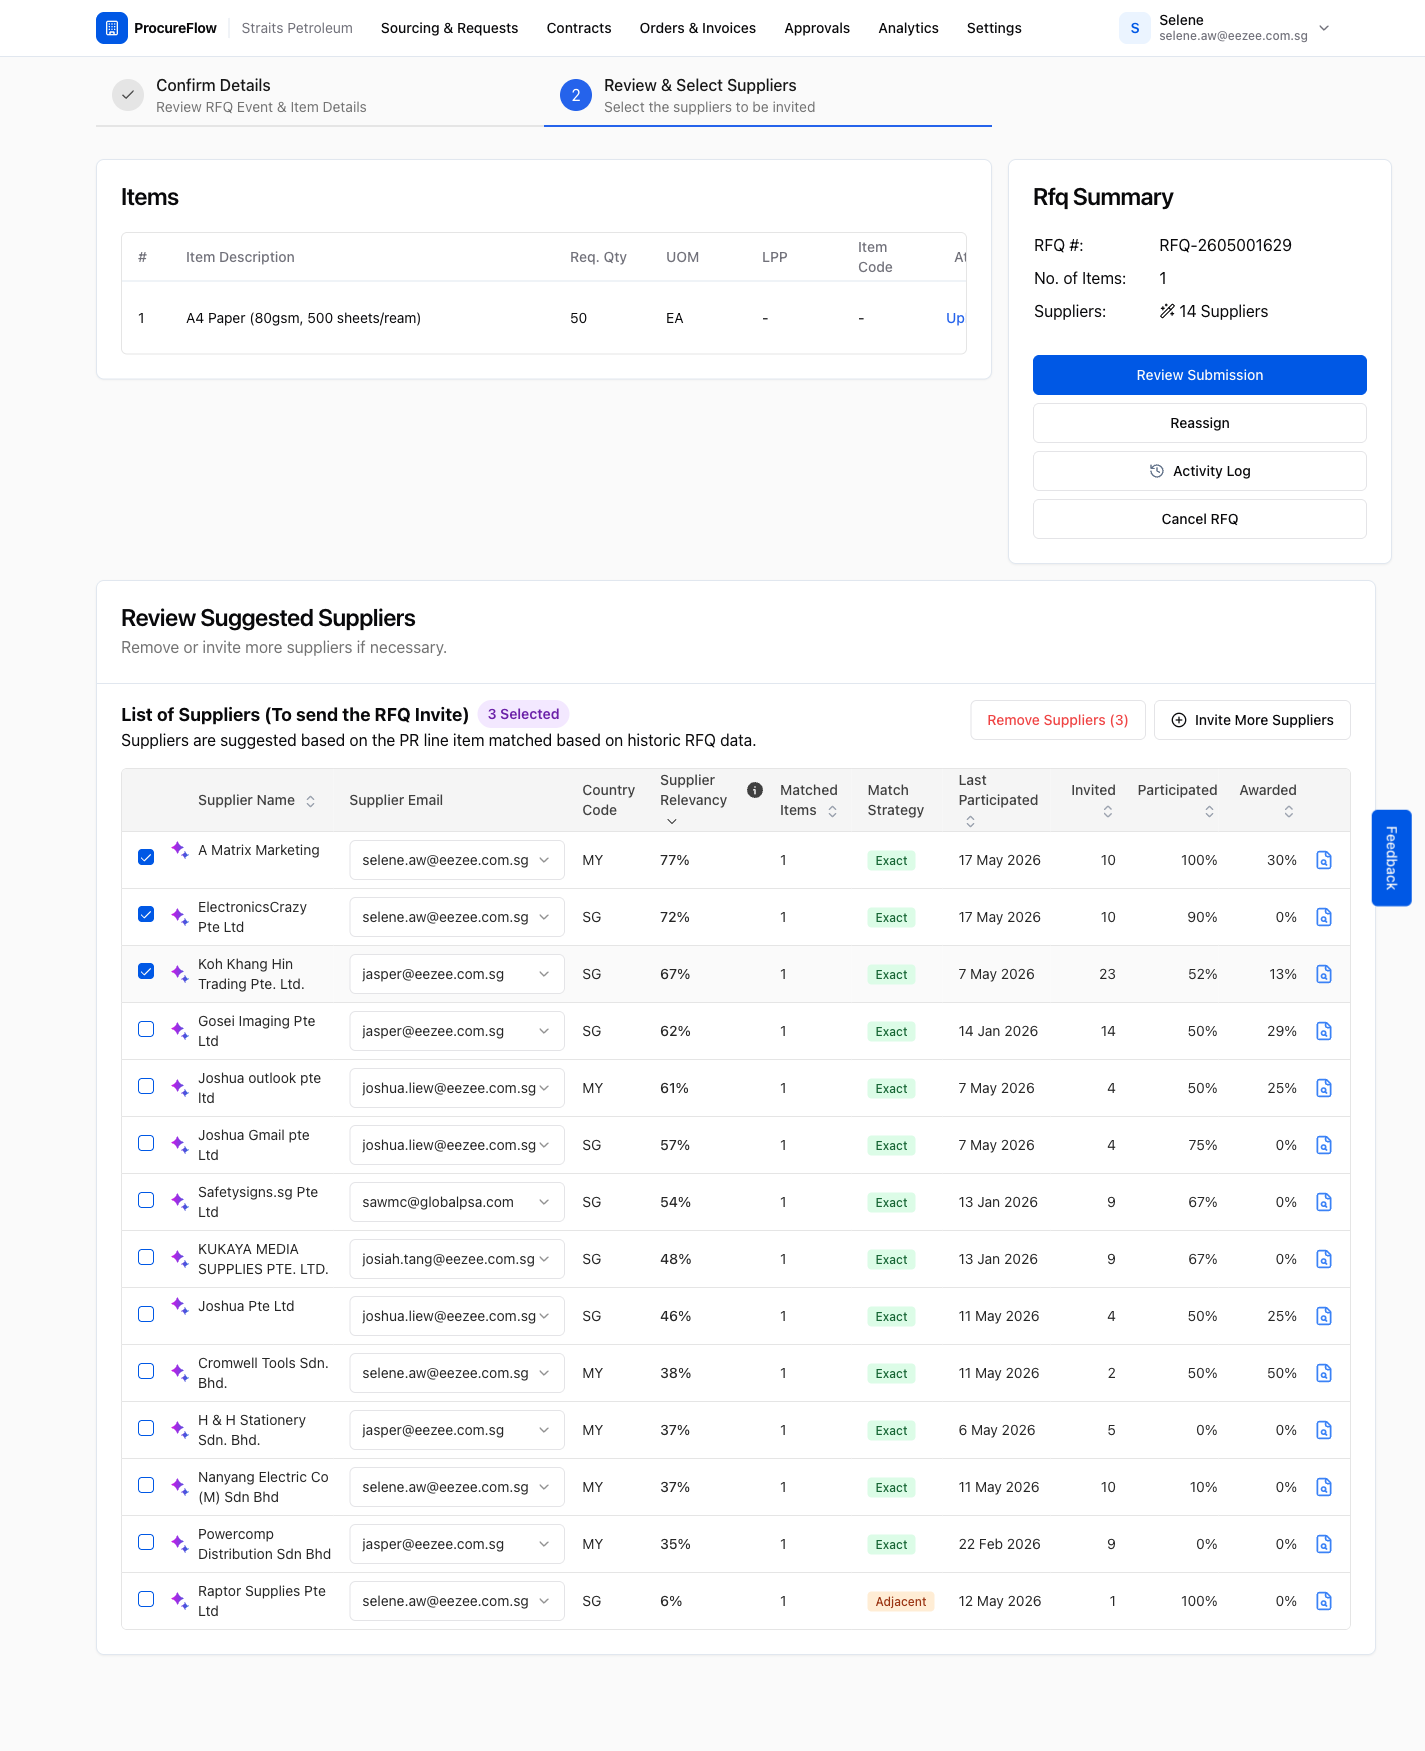
Once you have selected your suppliers, click Review Submission in the RFQ Summary panel on the right.
Send RFQ Invitations
A Send RFQ Emails confirmation dialog appears. Review the summary before sending:
- Subject: The RFQ title that will appear in the supplier's email.
- Closing Date & Time: The bid deadline shown to suppliers.
- Contact Details: Technical and Commercial contacts that suppliers can reach out to.
- Shipping Address: Delivery location shown to suppliers.
- Items: Number of line items included in the RFQ.
- Invited Suppliers: The number of suppliers who will receive the invitation email.
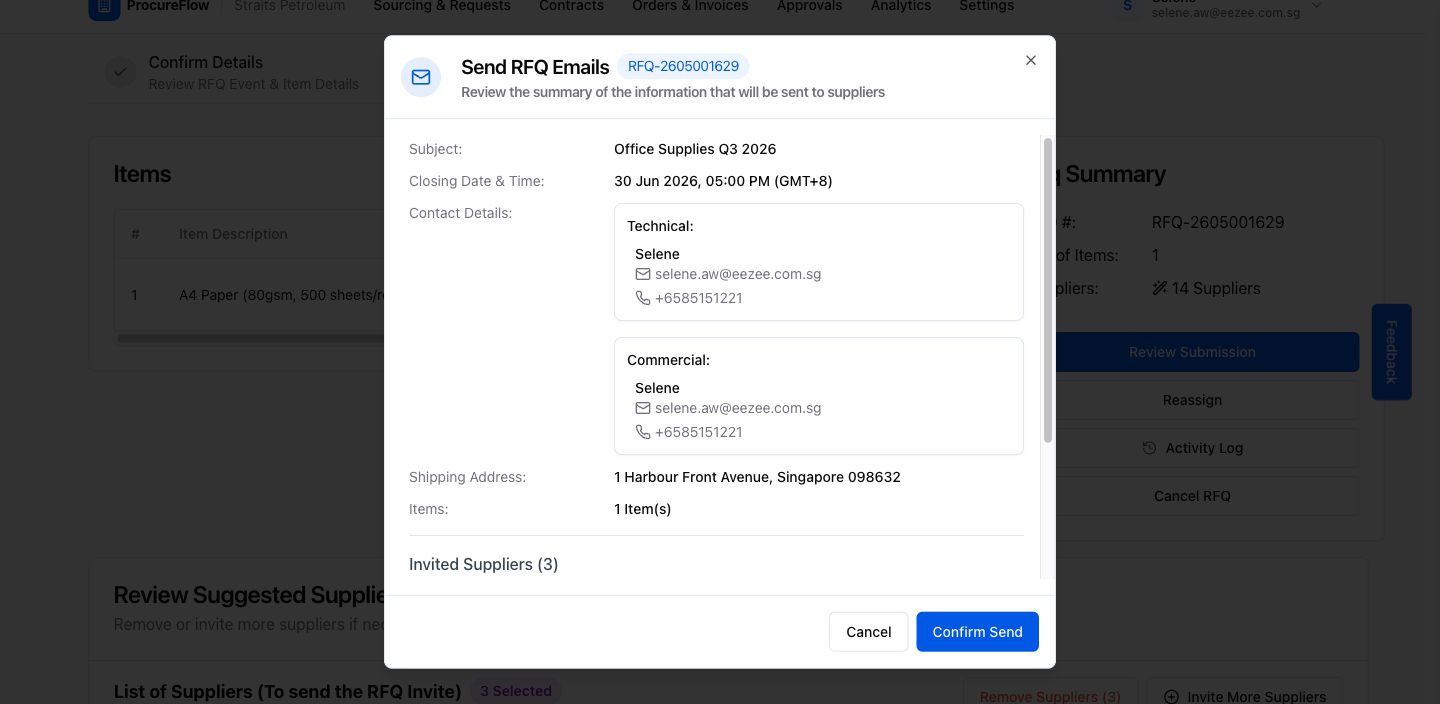
Choose one:
- Click Confirm Send if everything looks correct.
- Click Cancel to go back and make changes.
RFQ Sent Successfully
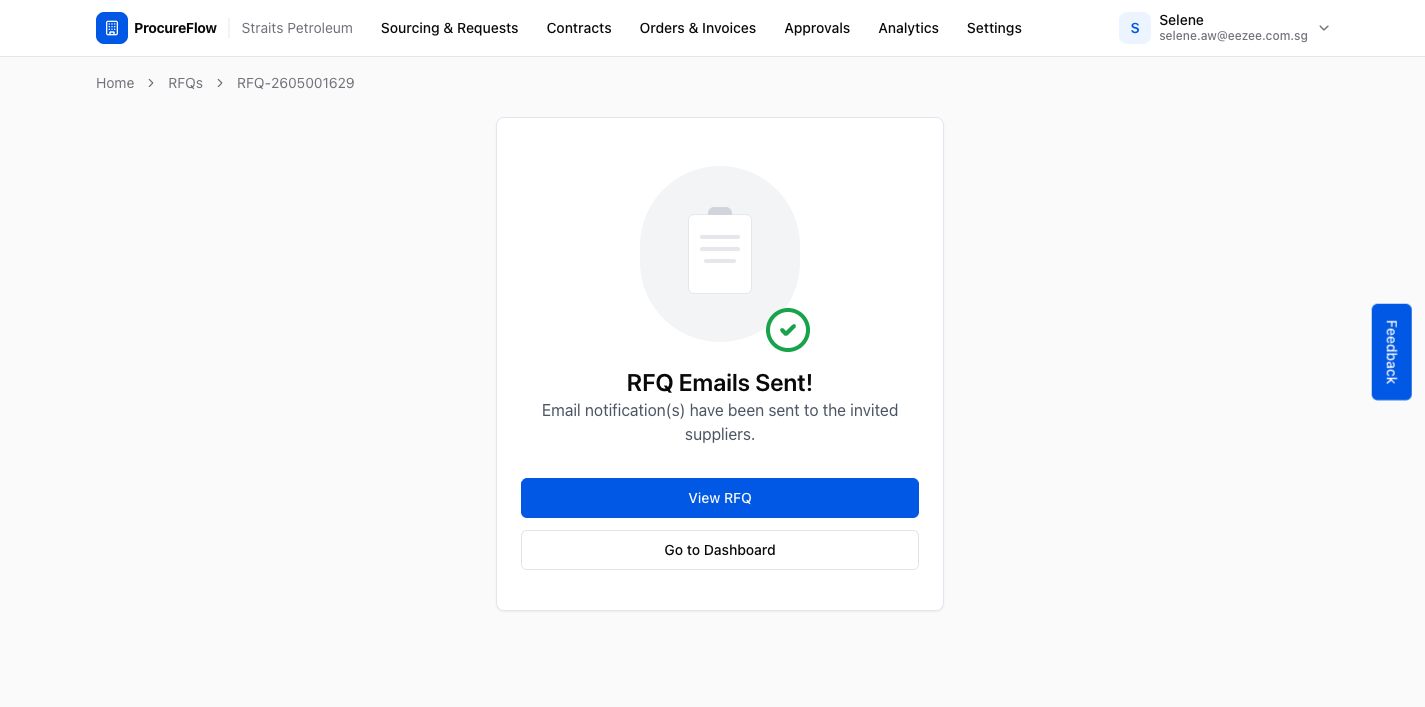
After confirming, you will see a success confirmation screen.
Choose where to go next:
- Click View RFQ to open the RFQ detail page and monitor supplier responses.
- Click Go to Dashboard to return to the main dashboard.
What happens next?
- Suppliers receive an invitation email with a link to submit their quotations.
- You can track bid submissions and status updates from the RFQ detail page.
- Once the bid closing date passes, you can proceed to evaluate and award the RFQ.