Review & Send an RFQ
How to create a Request for Quotation and invite suppliers to submit their quotes.
Last updated 12 October 2026
Who can use this?
Available to Procurement Buyer, Procurement Admin, and Admin.
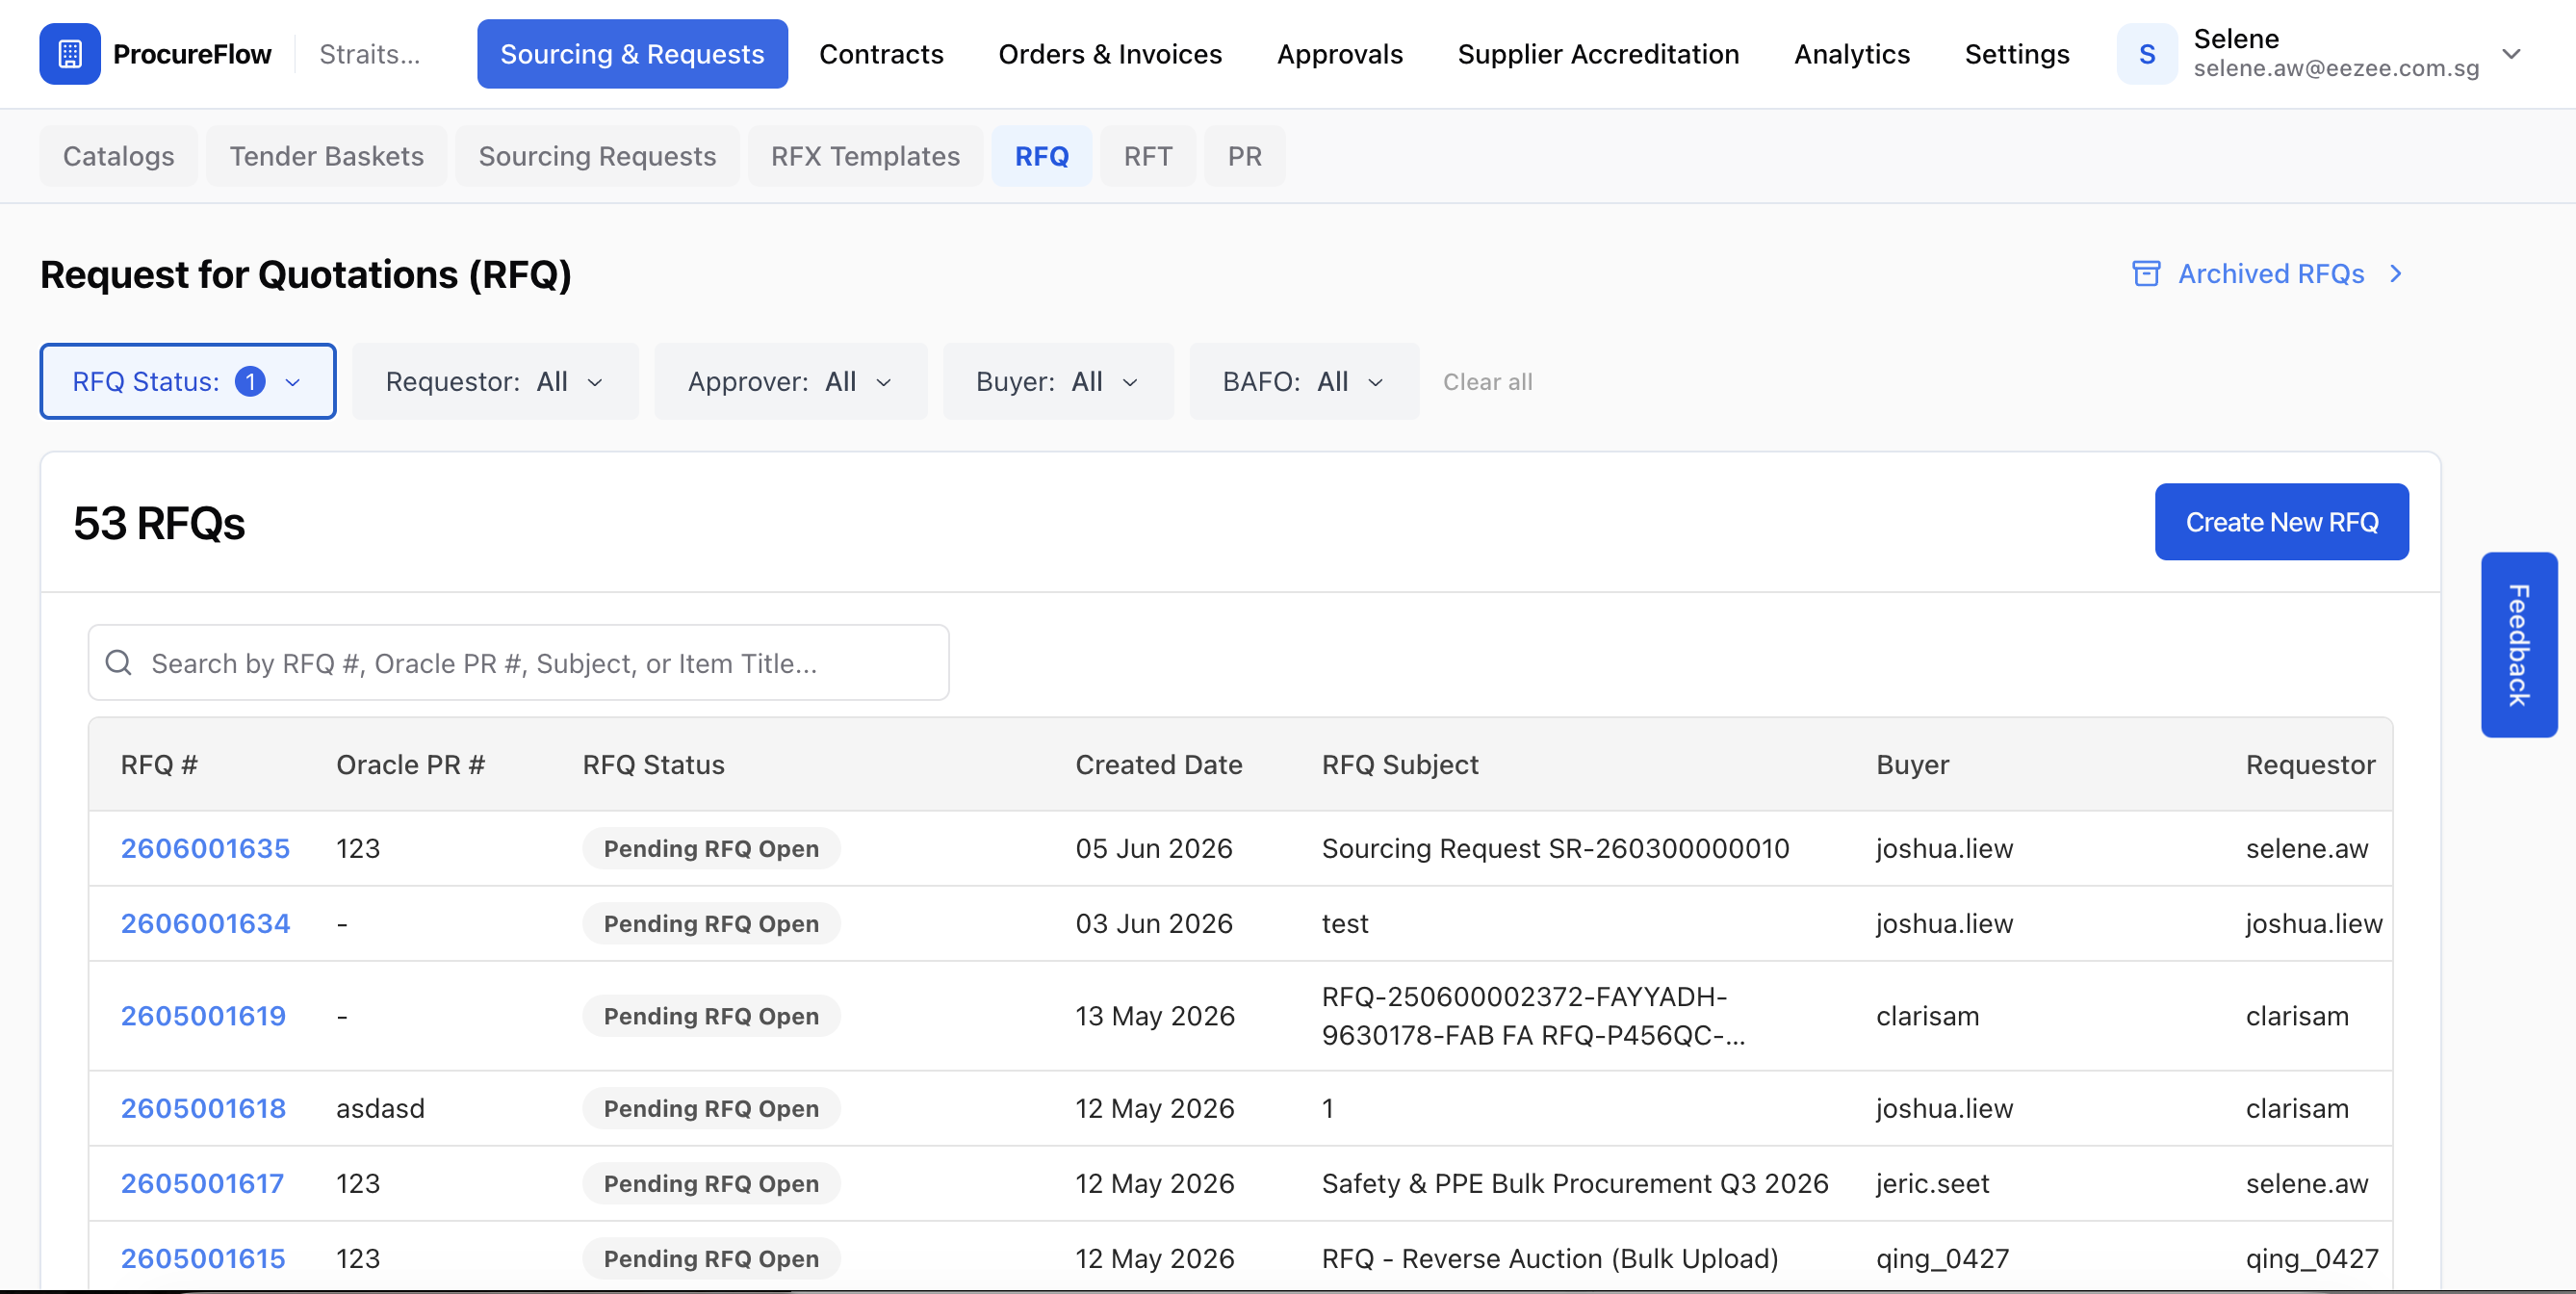
Find and Open Your Draft RFQ
- From the top navigation bar, click Sourcing & Requests.
- Select the RFQ tab.
- Look for your RFQ with the status Pending RFQ Open. This is your auto-created draft, ready for review.
- Click on the RFQ reference number to open it.
Review the Auto-Created RFQ Details
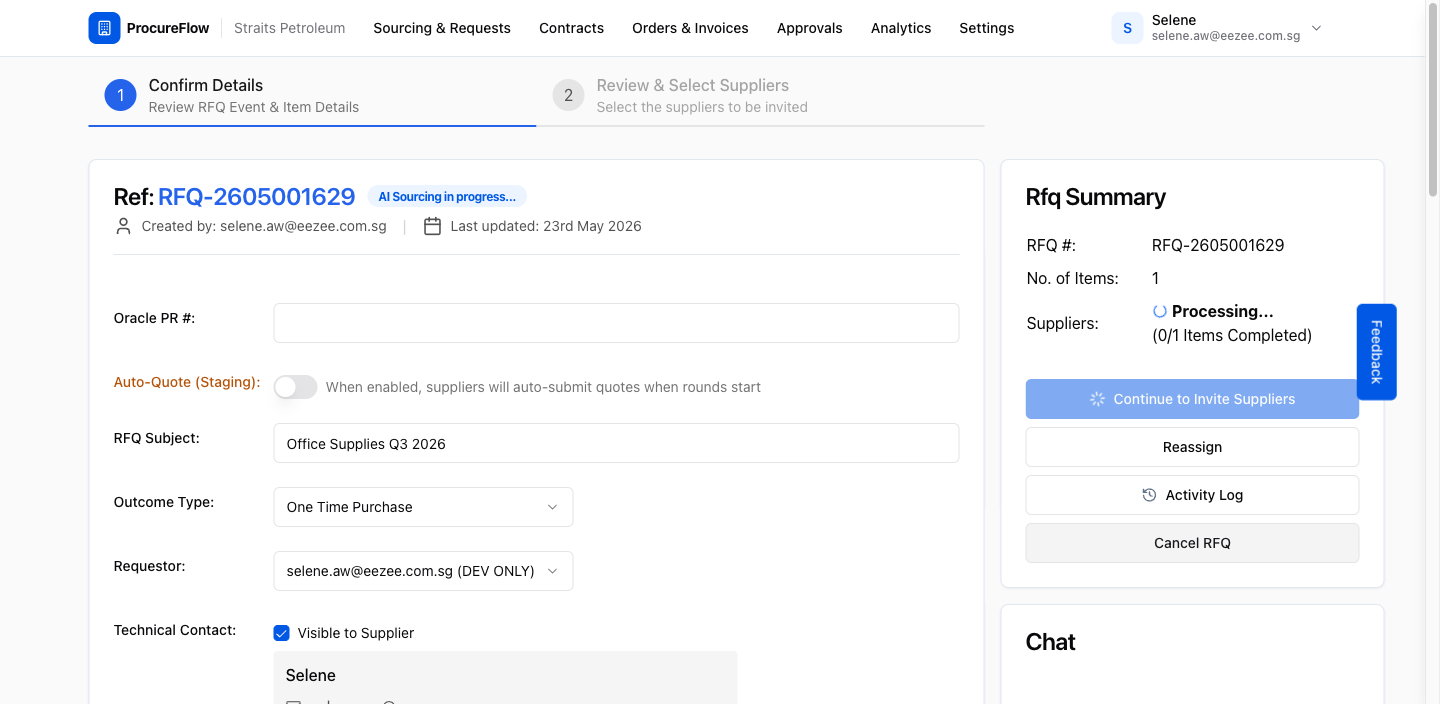
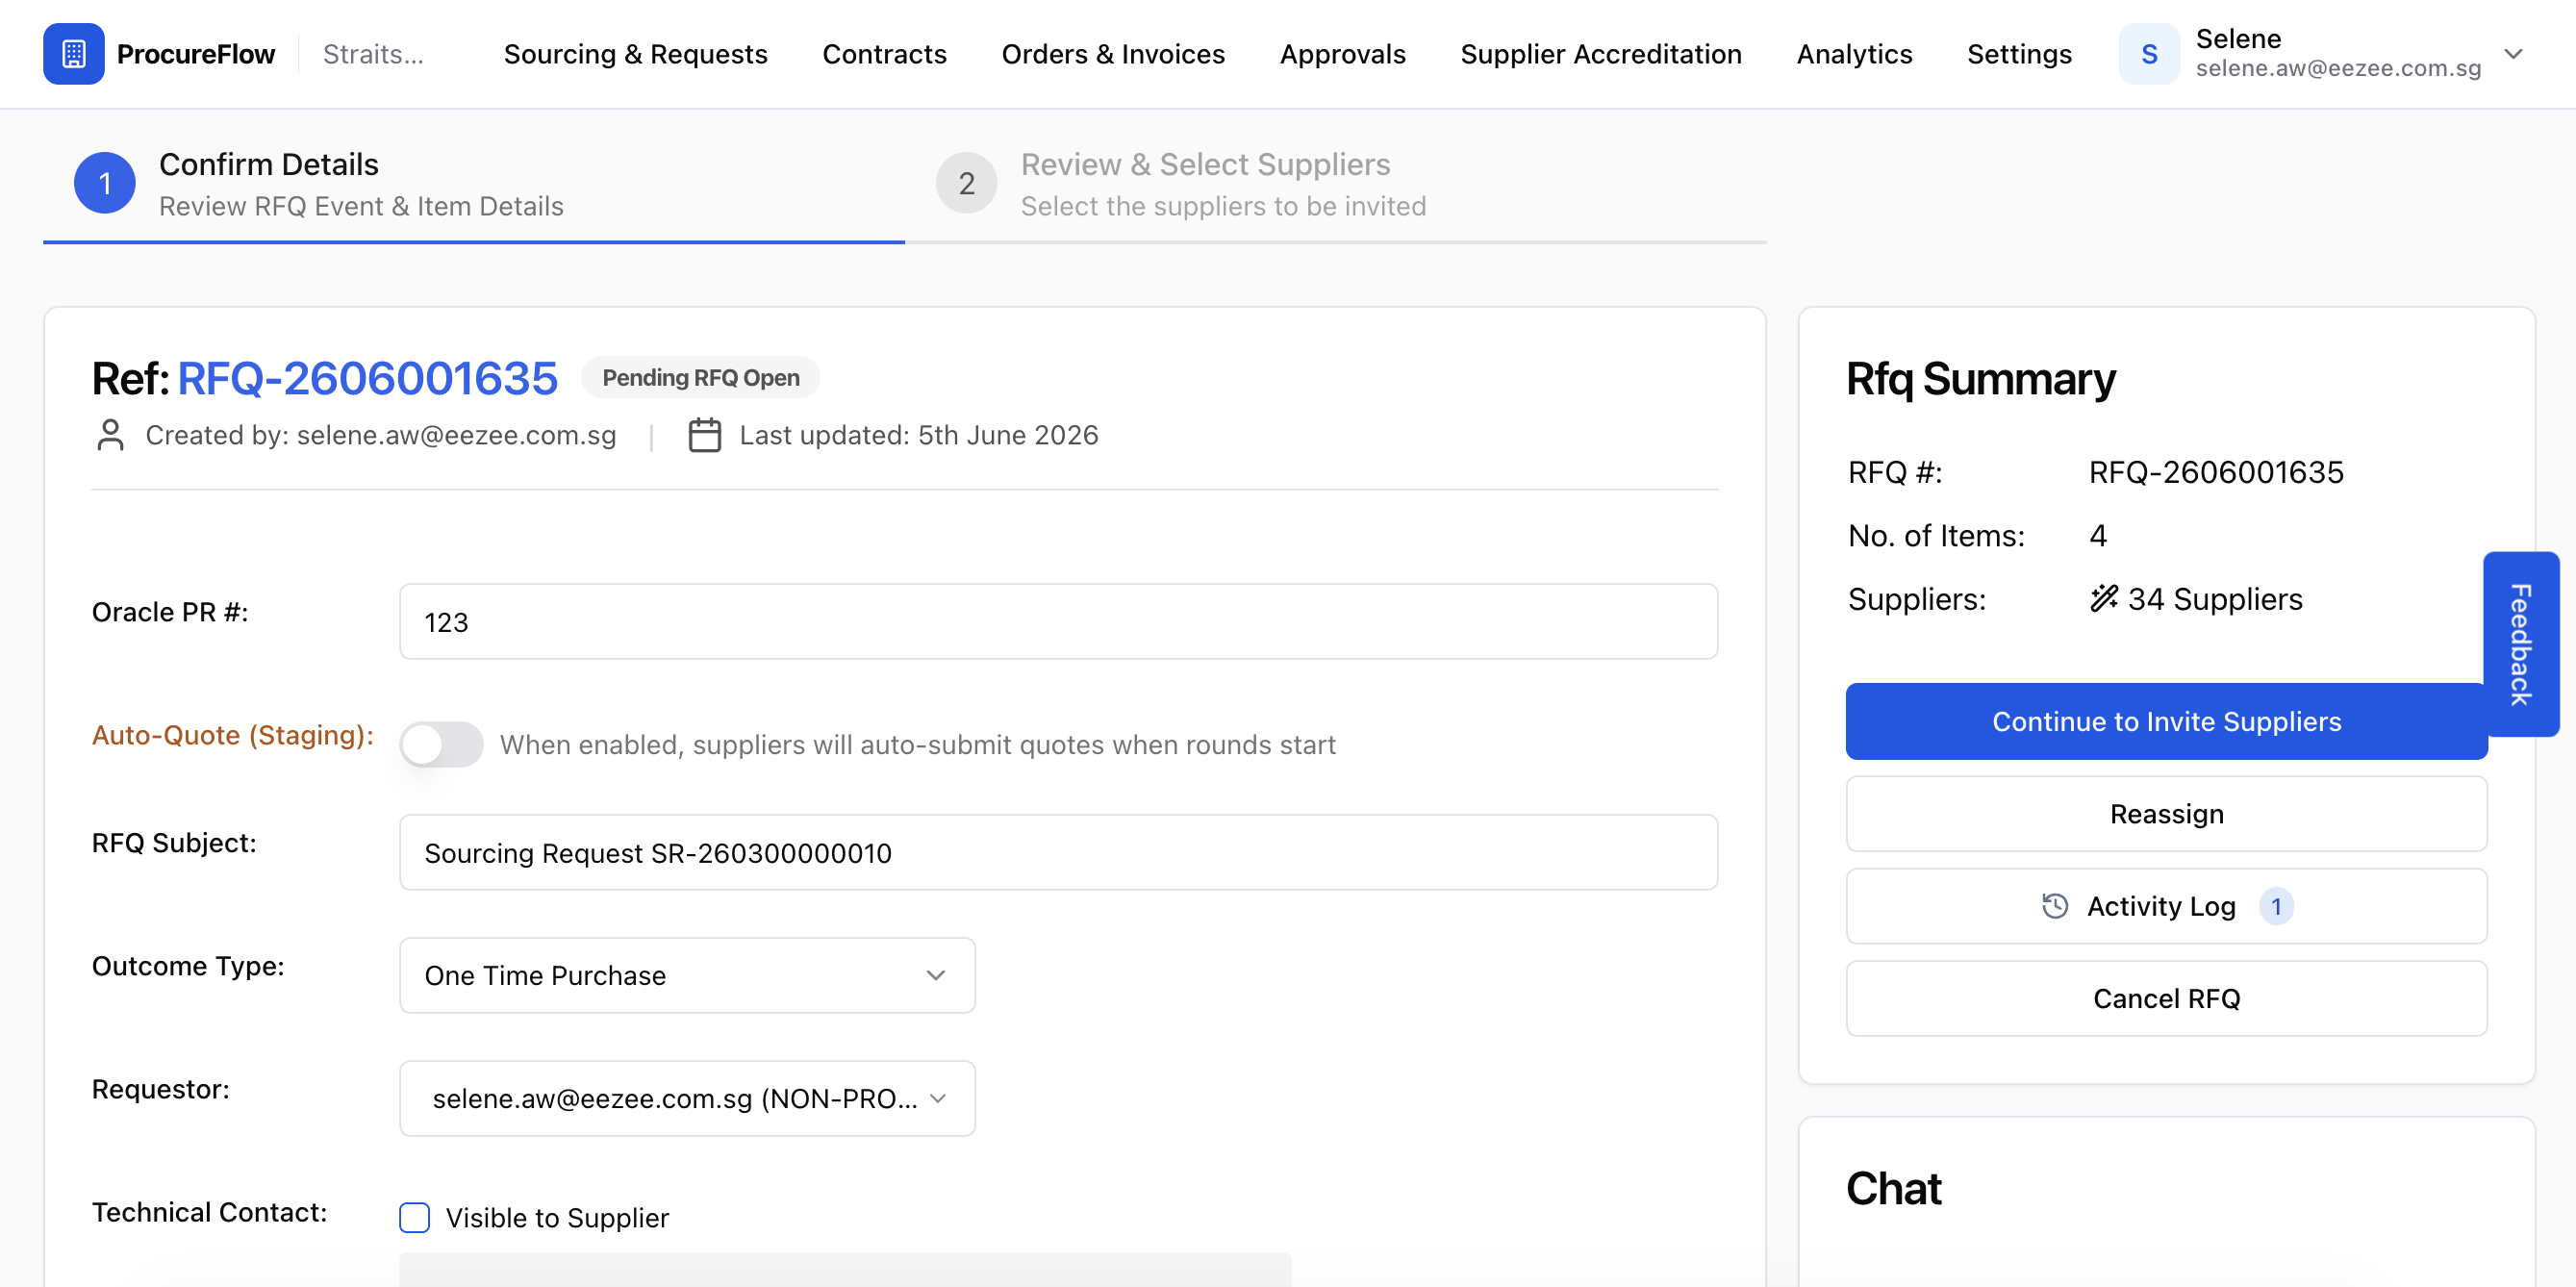
Your RFQ has been automatically created in ProcureFlow from your offline purchase request data.
Open the draft RFQ to review its details before sending to suppliers.
On the right side of the page you will see the RFQ Summary panel. While AI sourcing is running, it shows "Processing..." next to the Suppliers count.
Wait a moment for it to complete before proceeding.
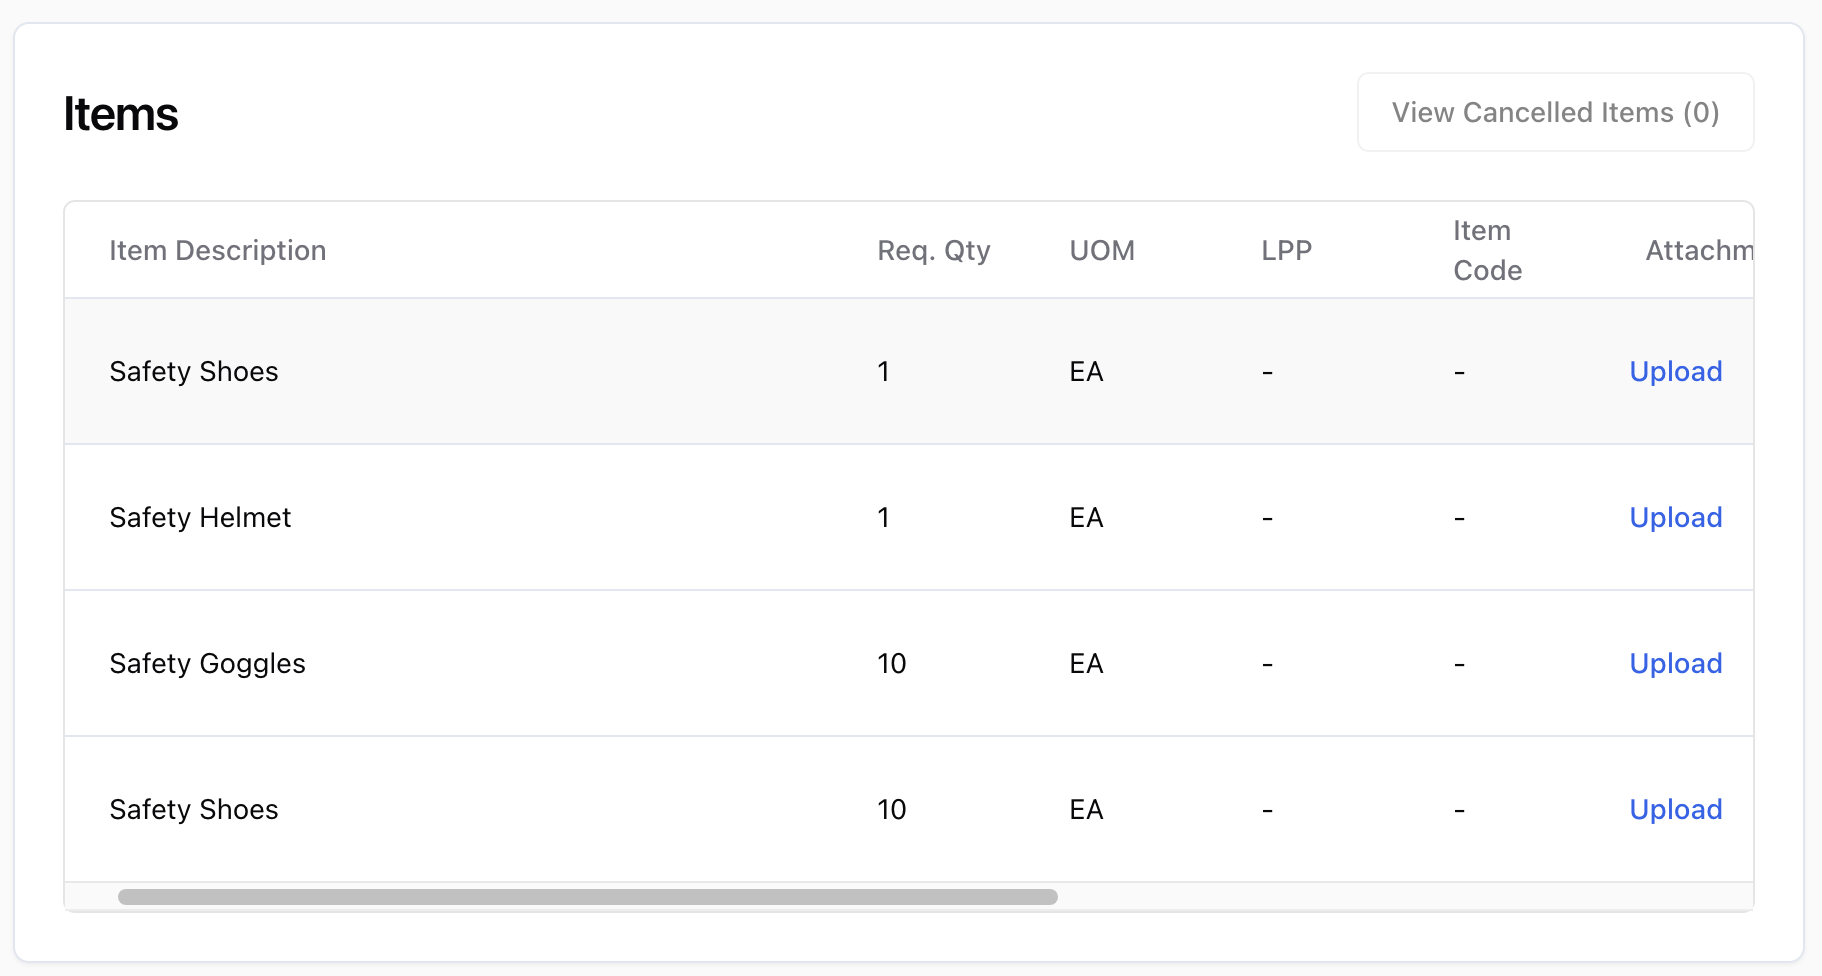
Check Document and Line Item Attachments
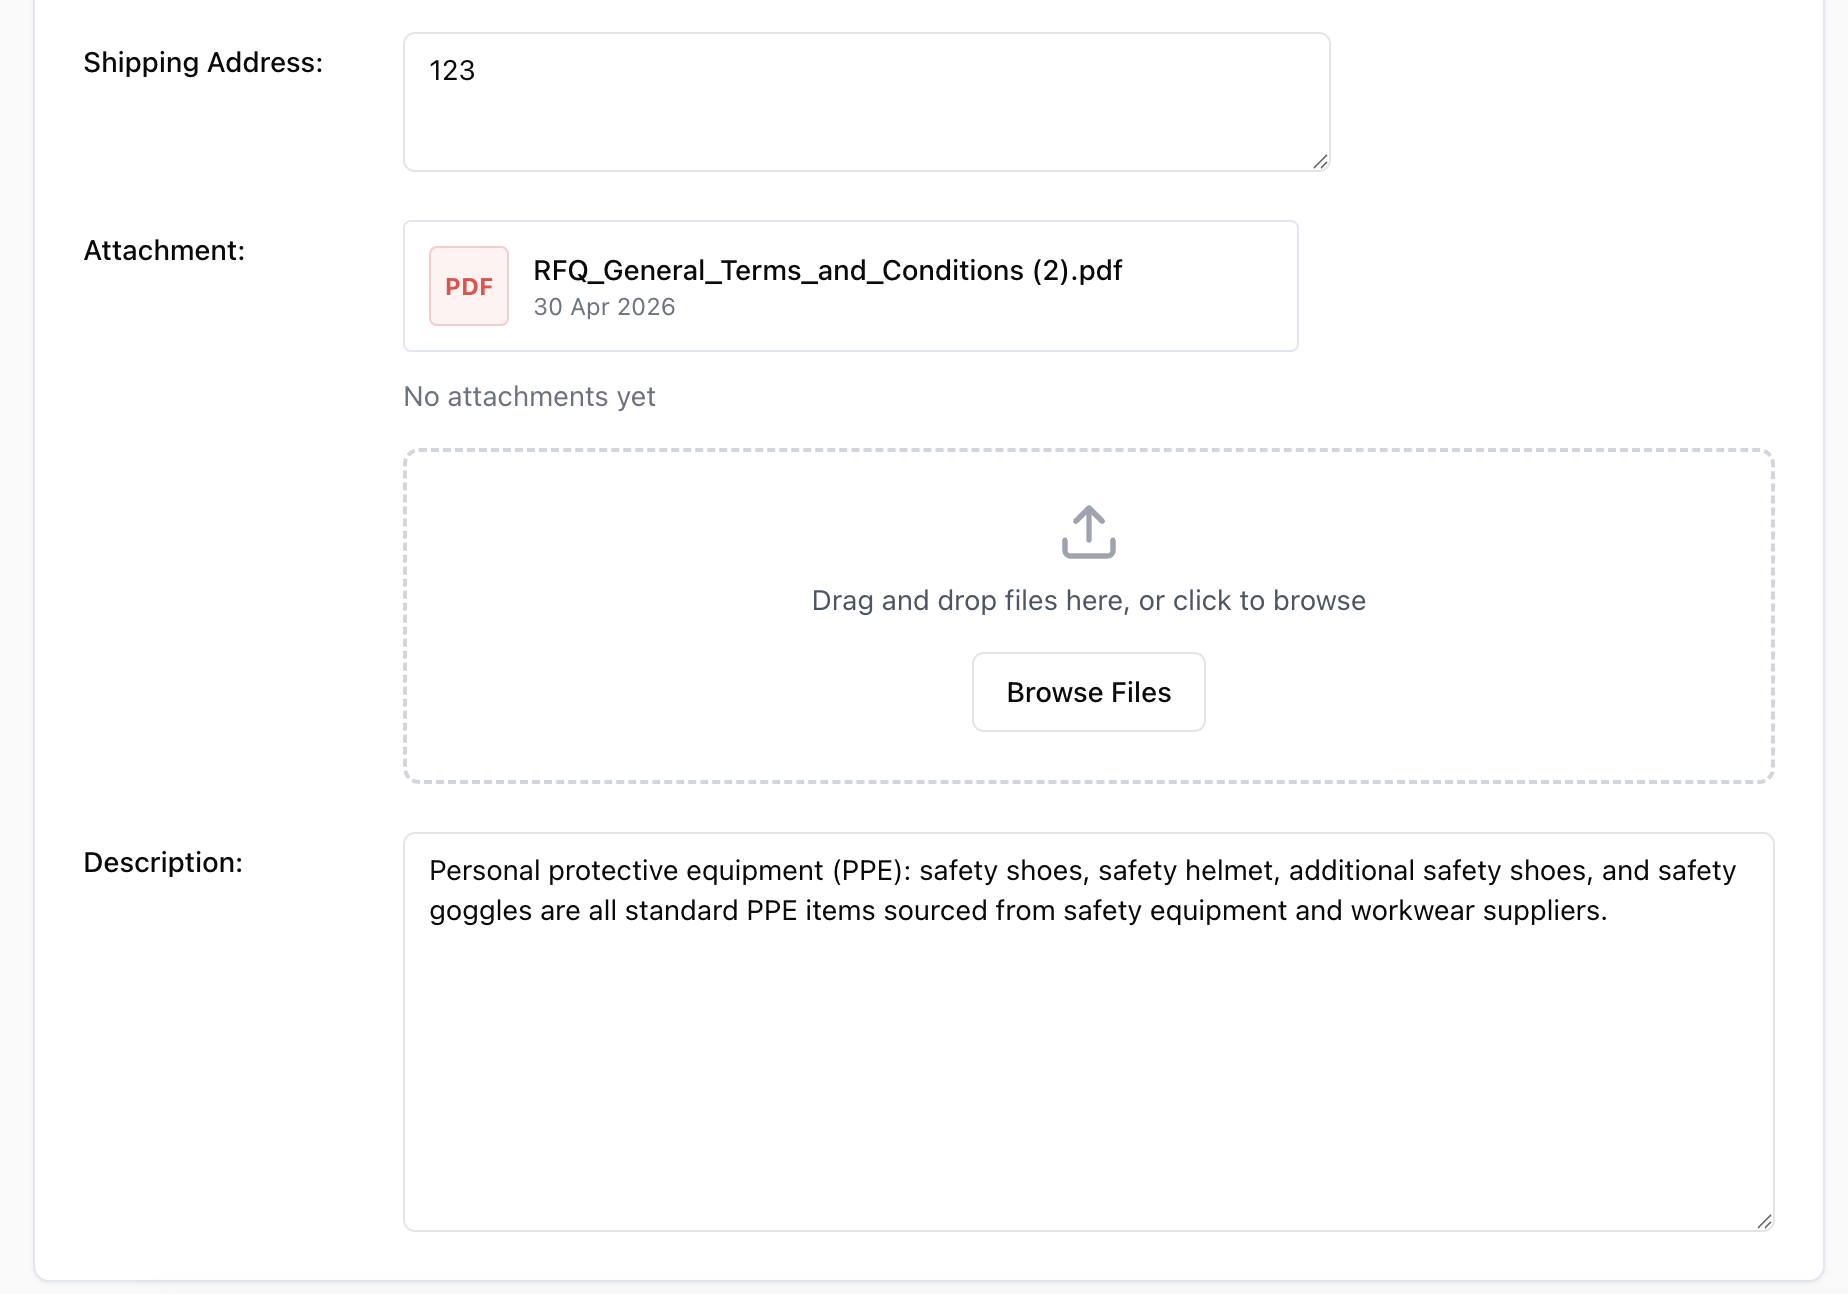
The RFQ has two levels of attachments to check before proceeding.
Document level: The Attachments card on the RFQ shows files attached to the overall request (for example, general terms & conditions or scope-of-supply documents).
Confirm the correct files are listed and remove any that do not apply.
Line item level: Each line item can carry its own attachment (for example, a technical drawing or product specification).
Expand each line item row and verify that any item-specific documents are present and correct.
Set the Bid Closing Date and Time
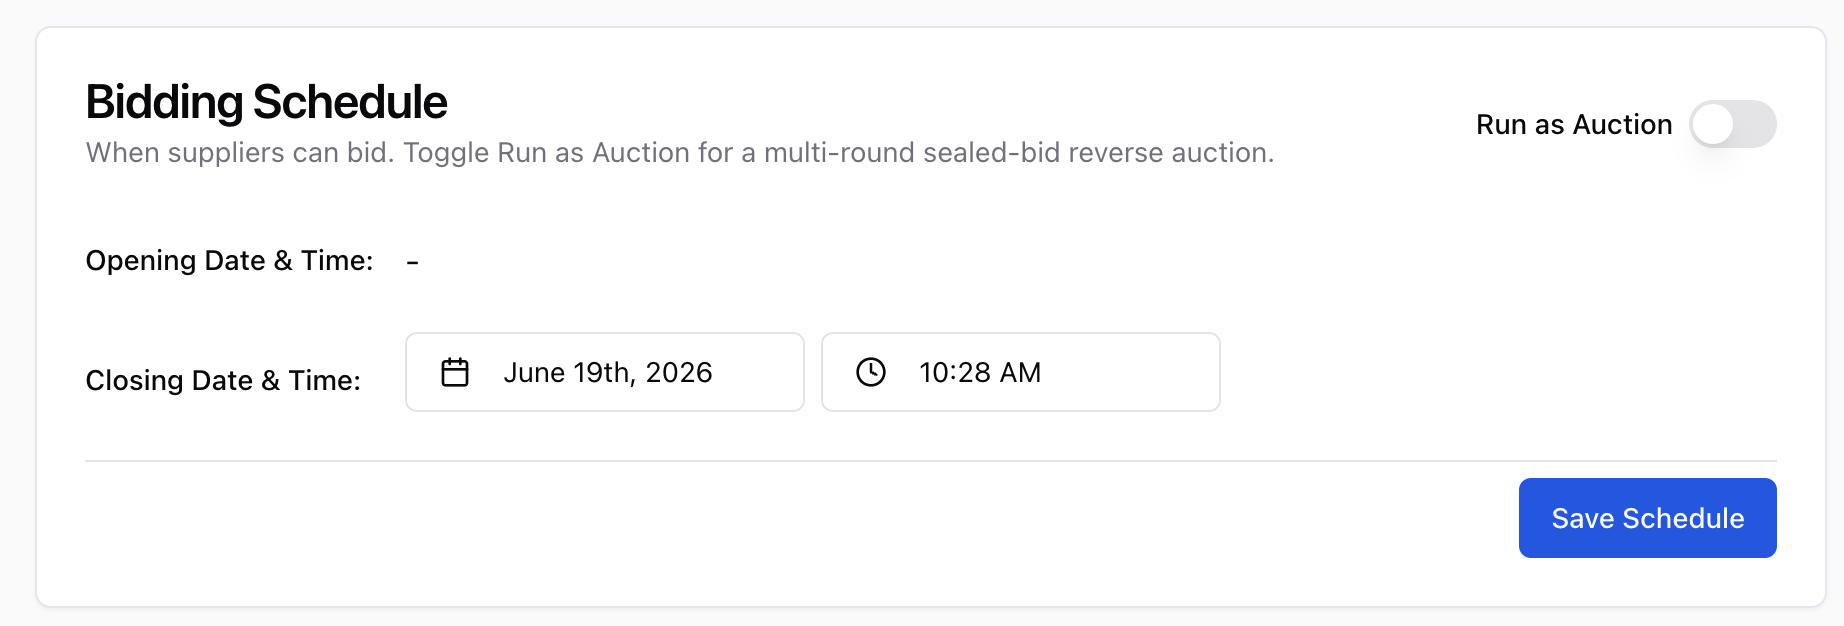
- Locate the Bidding Schedule card on the page.
- Confirm the Bid Closing Date and Bid Closing Time are correct. This is the deadline by which all suppliers must submit their quotations.
- Click the date or time field to edit them if an adjustment is needed before sending.
Proceed to Invite Suppliers
When AI sourcing is complete, the RFQ Summary panel on the right will show a supplier count next to Suppliers and the Continue to Invite Suppliers button will become active.
Click Continue to Invite Suppliers to move to the supplier selection step.
Review and Select AI-Suggested Suppliers
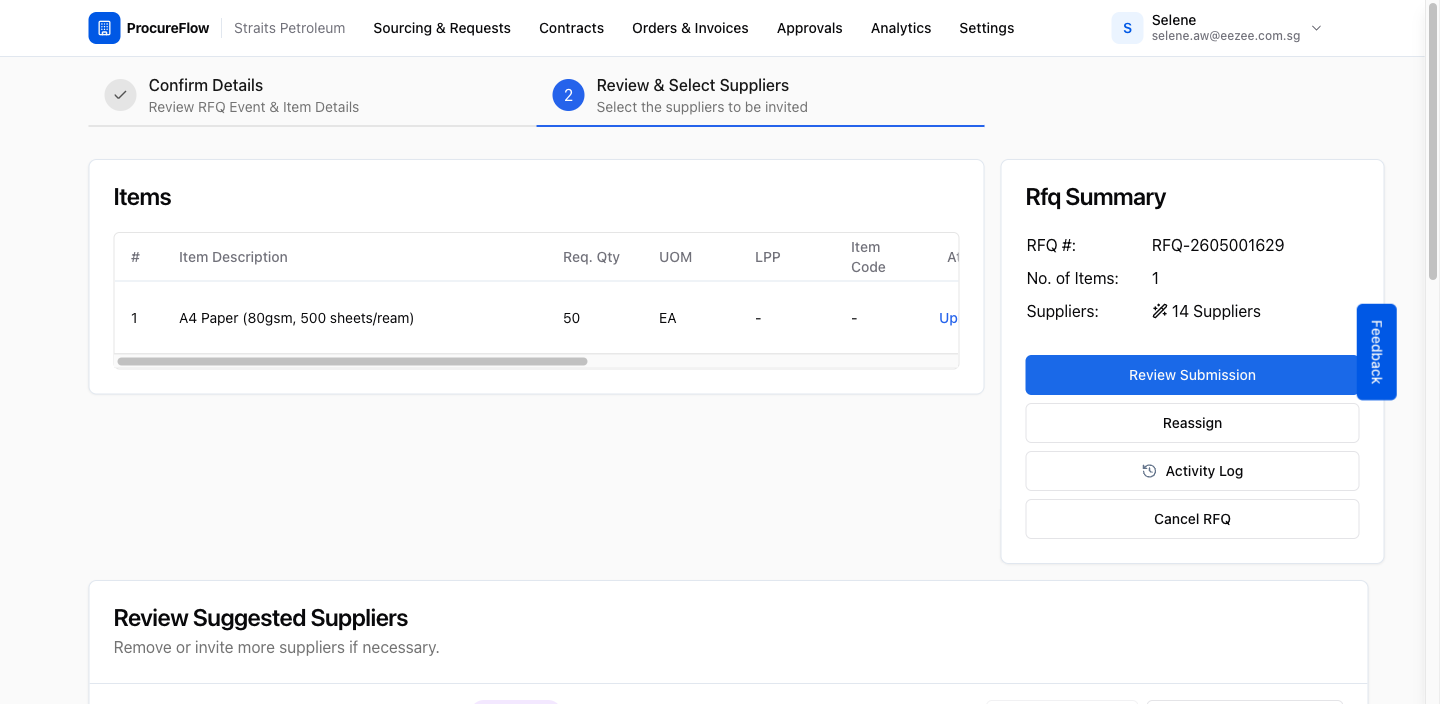
You are now on Step 2: Review & Select Suppliers. The top of the page shows your line items, and below is the Review Suggested Suppliers table.
The supplier table shows each AI-suggested supplier along with key metrics to help you decide:
| Column | What It Shows |
|---|---|
| Supplier Relevancy | AI-calculated relevancy score based on past RFX data |
| Matched Items | Number of line items this supplier can supply |
| Match Strategy | How the match was determined (Exact or Adjacent category) |
| Last Participated | The most recent date this supplier responded to an RFQ |
| Invited / Participated / Awarded | Historical performance statistics |
Check the checkbox on the left of each row to select suppliers you want to invite.
You must select at least the minimum number of suppliers required by your organisation's policy.
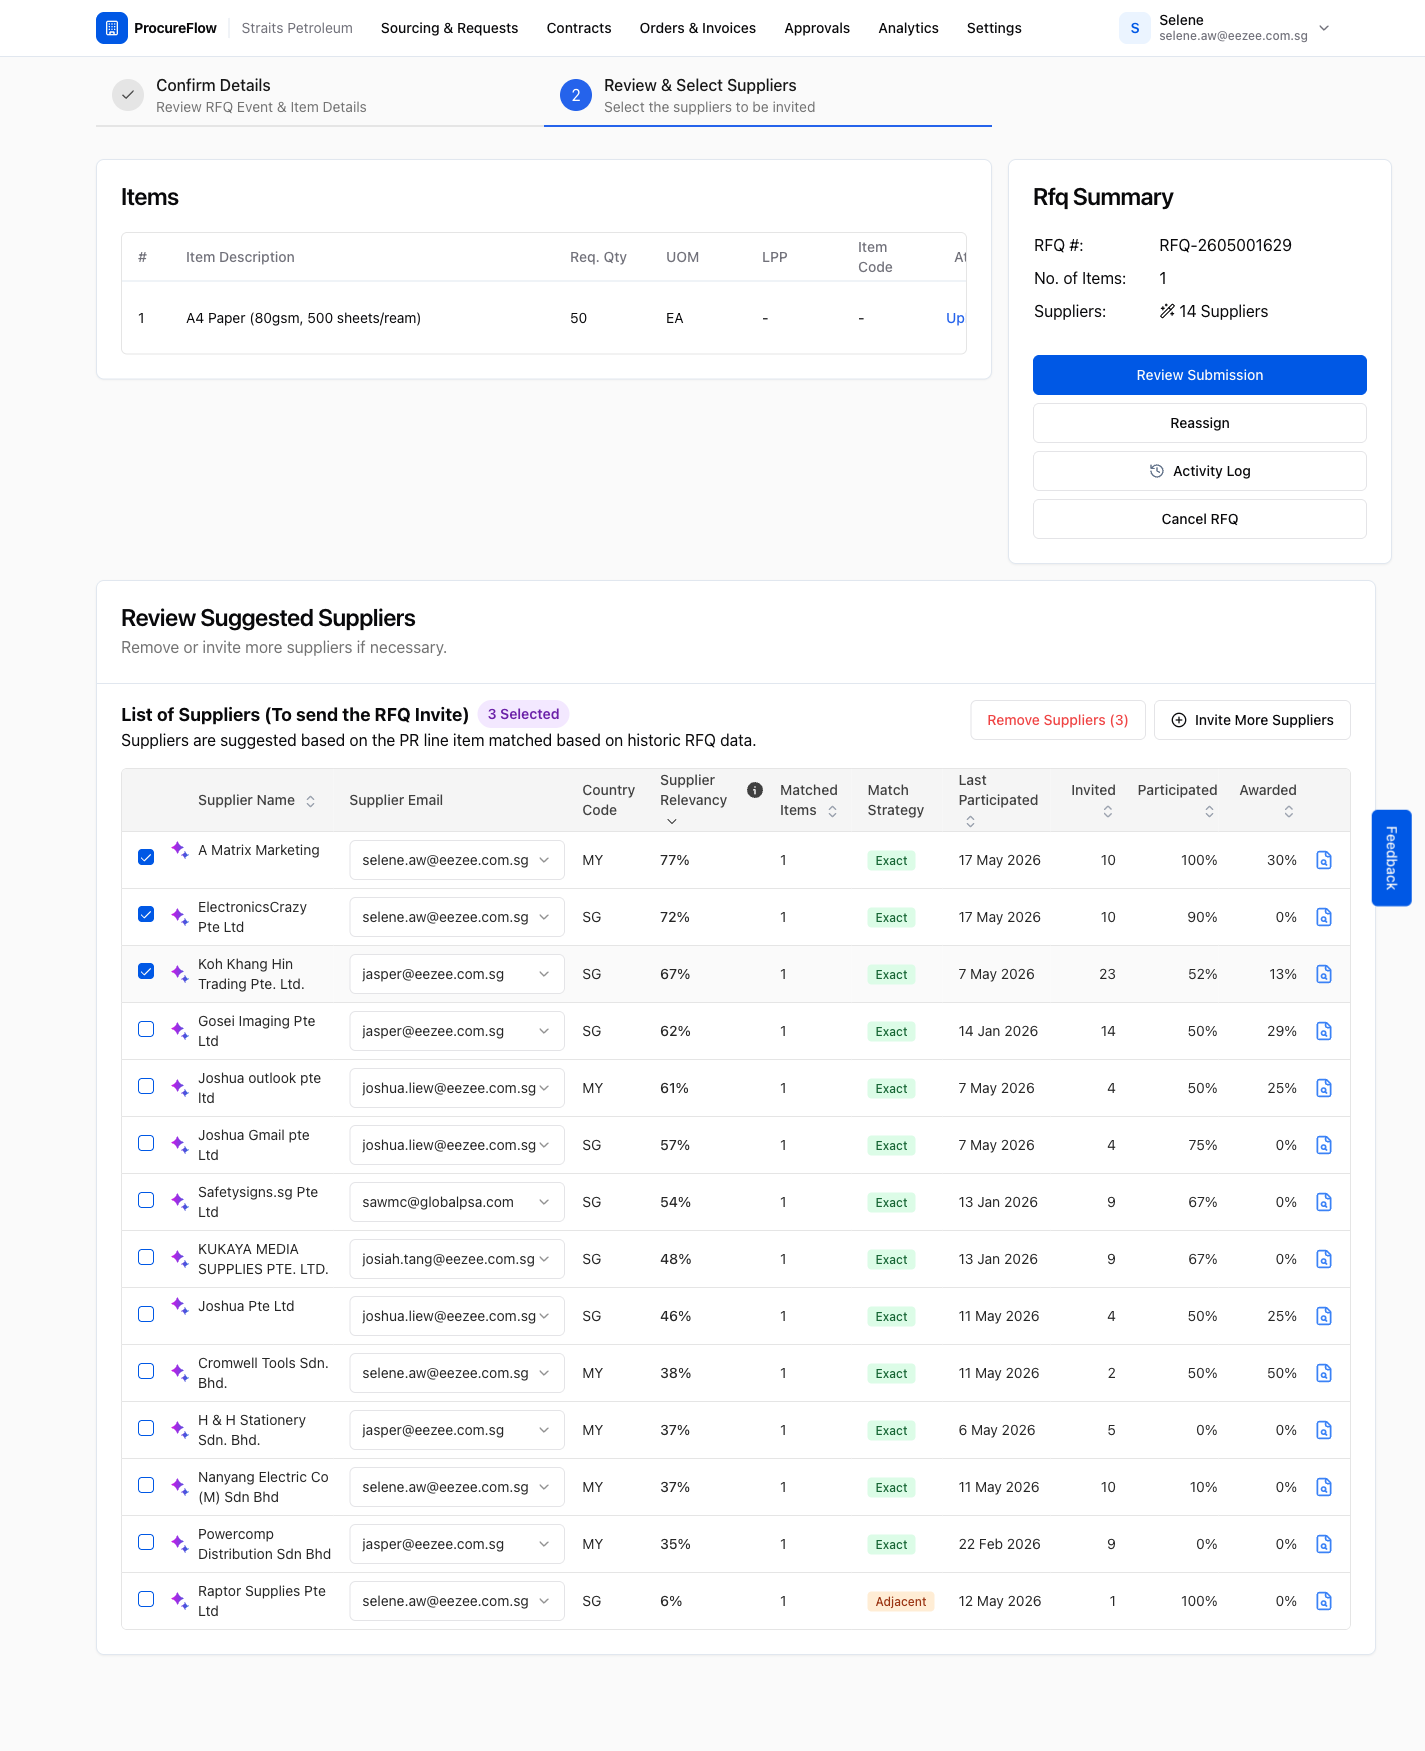
Once you have selected your suppliers, click Review Submission in the RFQ Summary panel on the right.
Add Suppliers Not in the AI Suggestions

If the AI-suggested suppliers do not cover all the vendors you want to invite, you can add them manually.
In the supplier table, click Invite More Suppliers in the top-right corner.
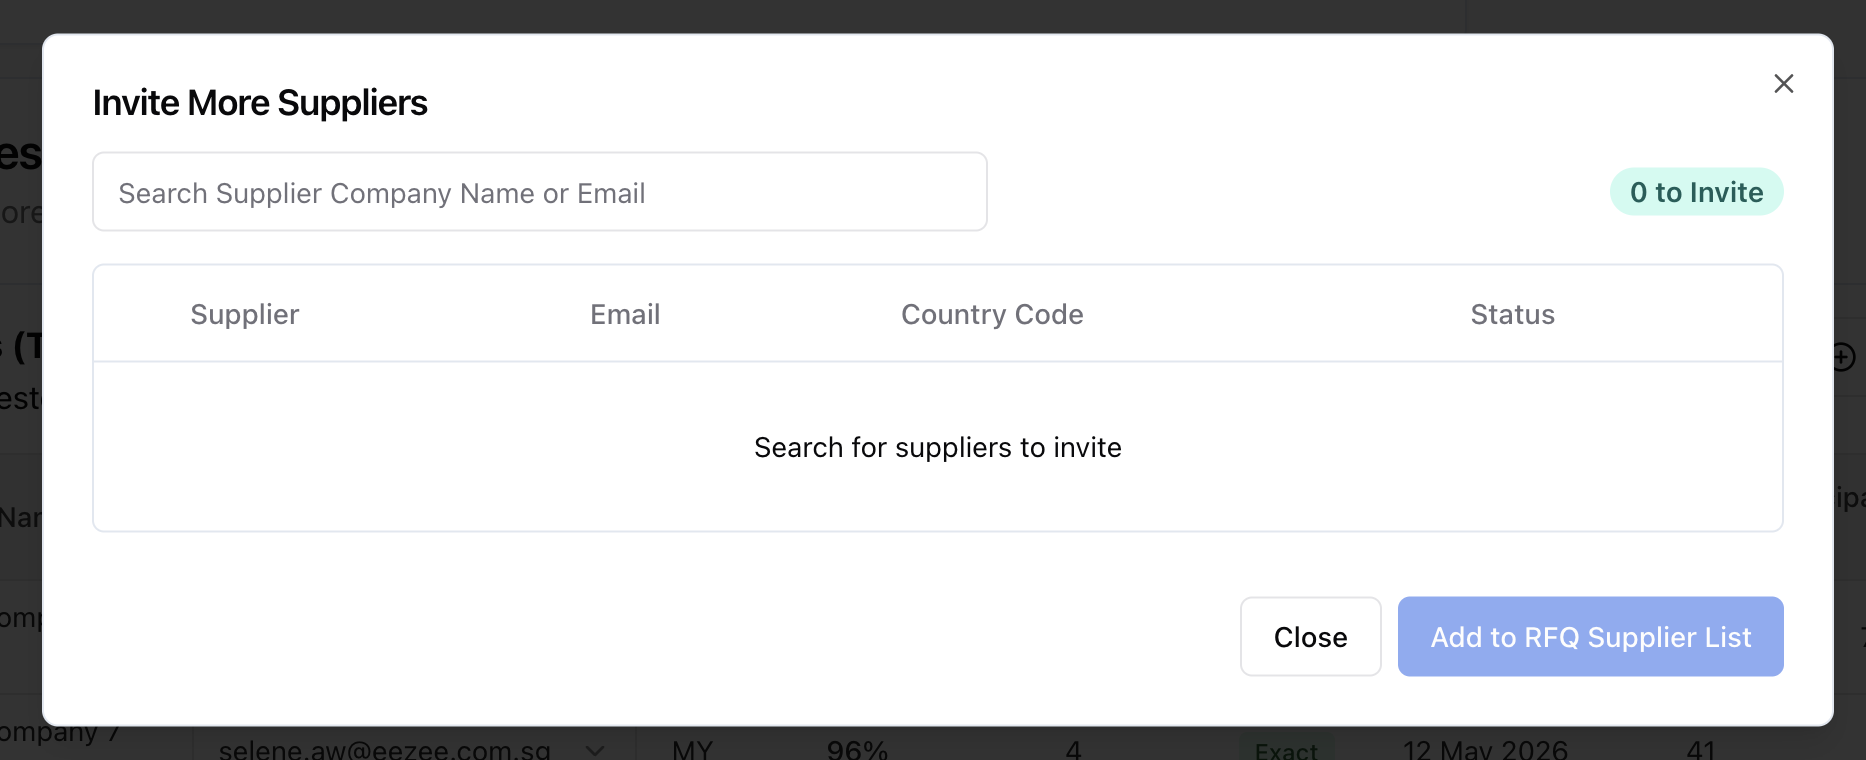
A search panel will appear.
Search for the supplier by name and select them from the results to add them to the invite list.
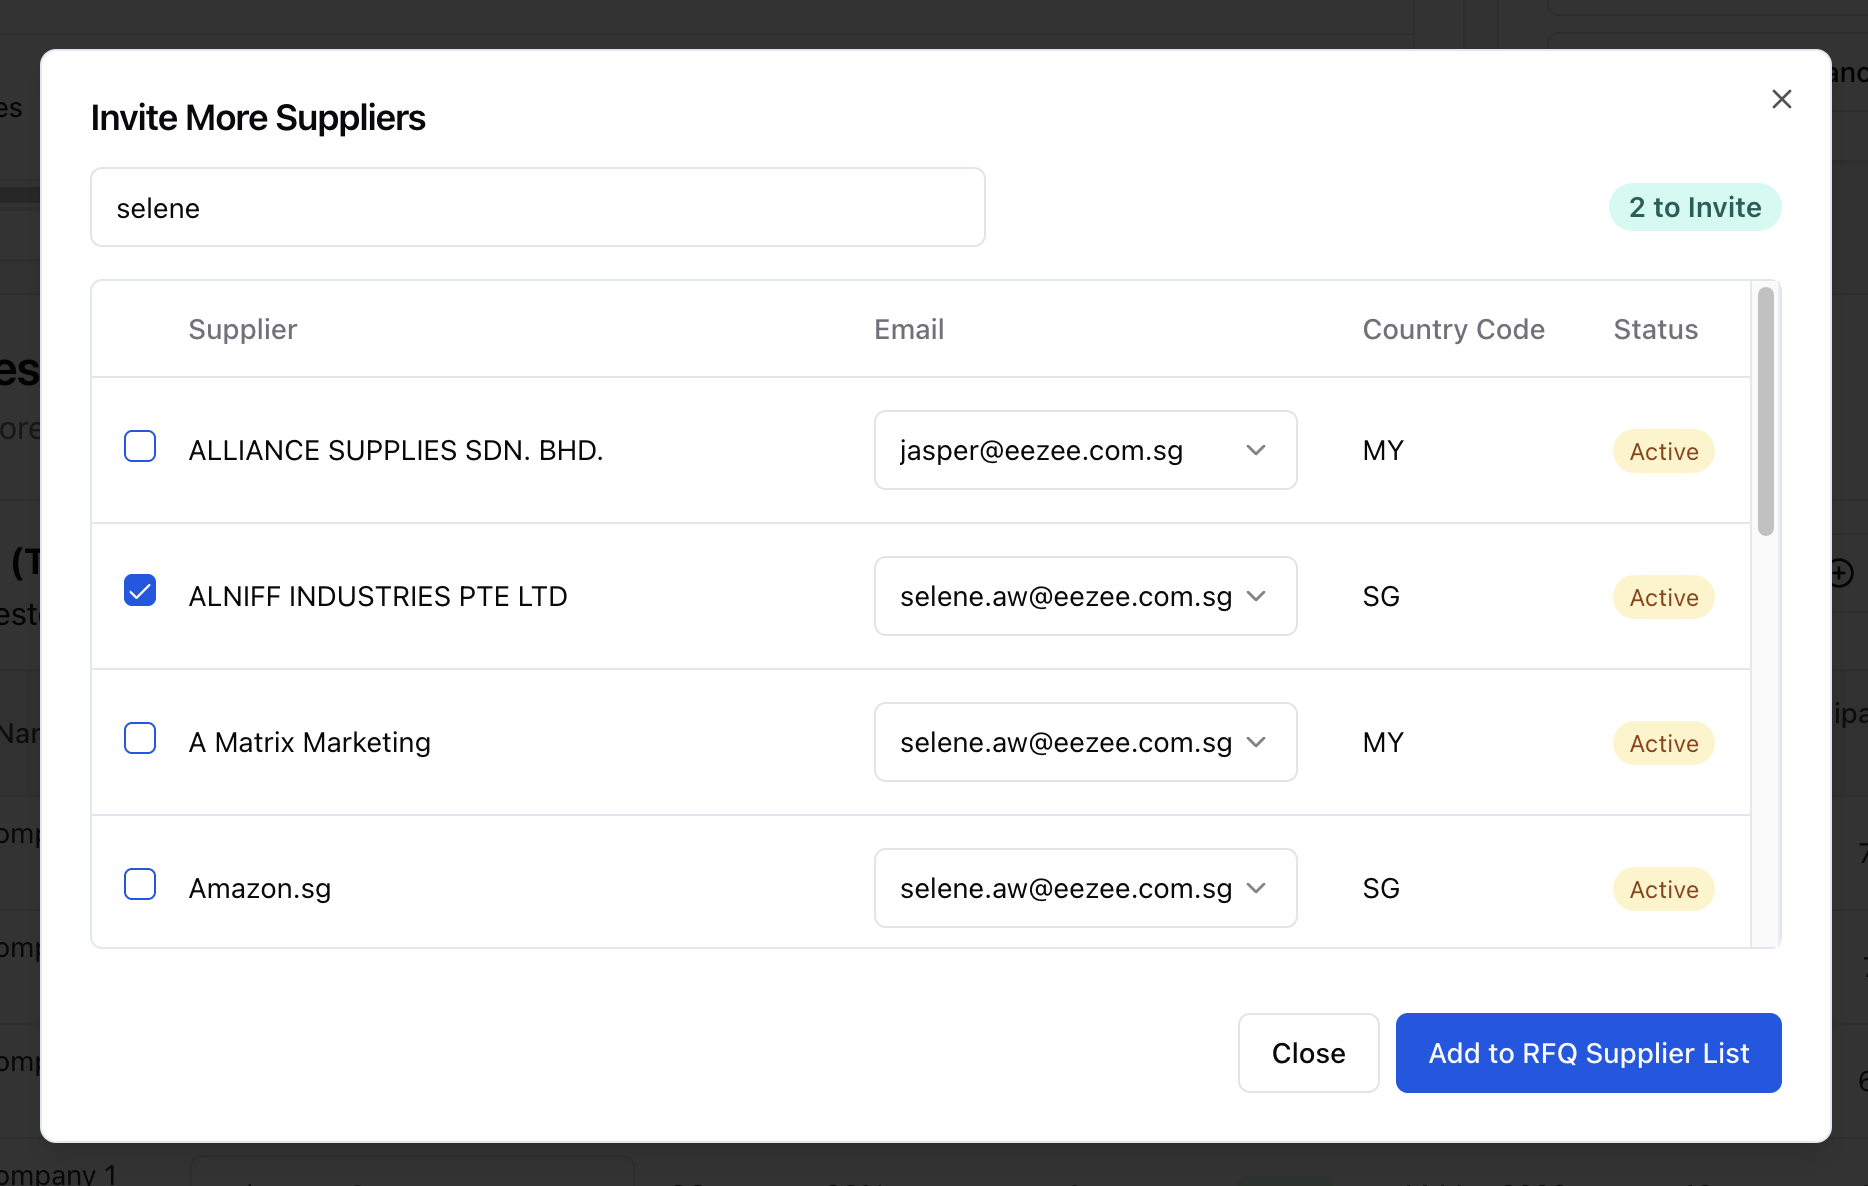
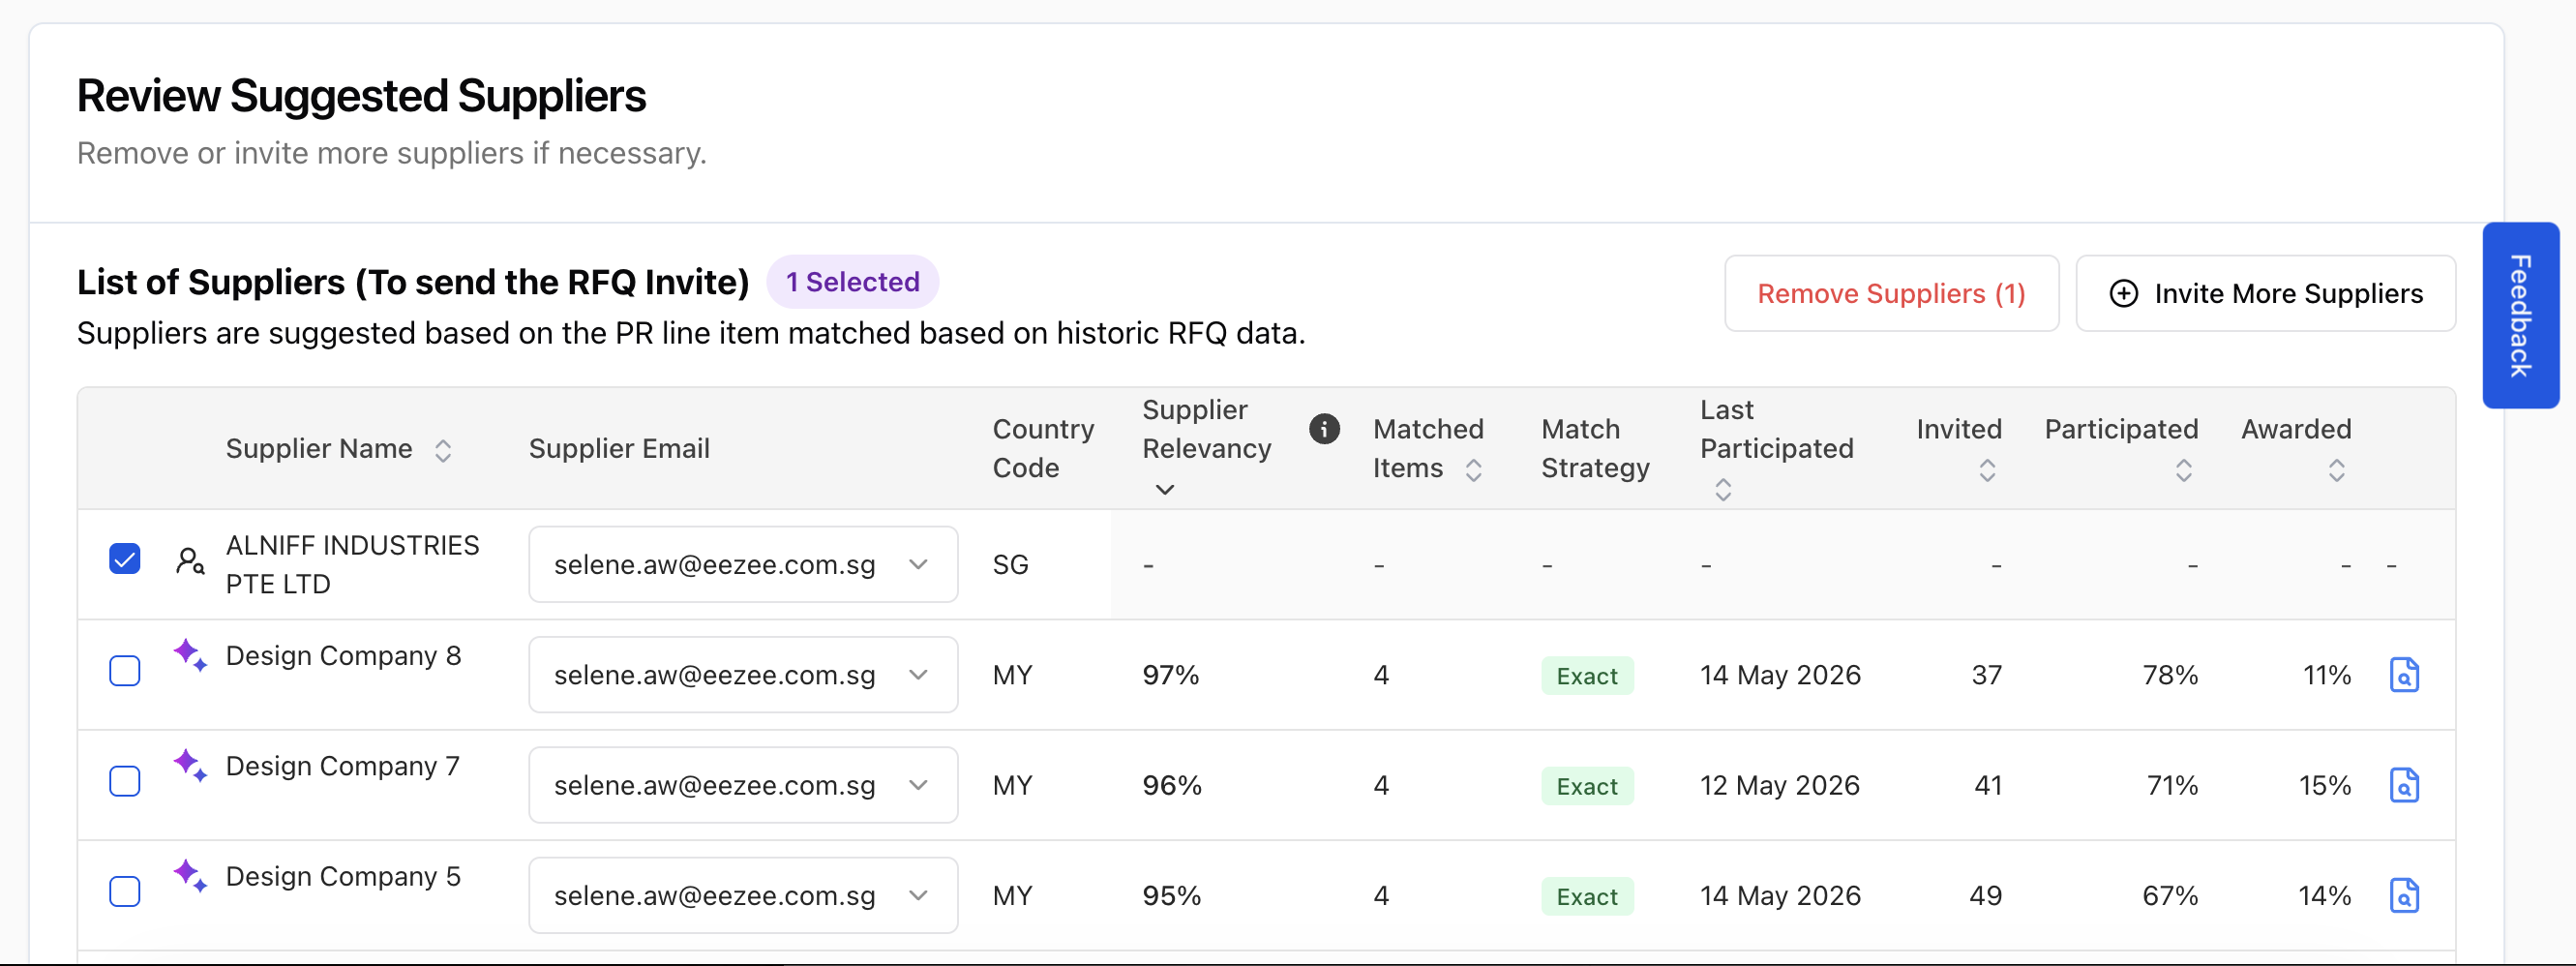
Manually added suppliers will appear at the top of the supplier table, clearly marked.
Confirm they are checked before proceeding to send.
Confirm and Send the RFQ to Suppliers
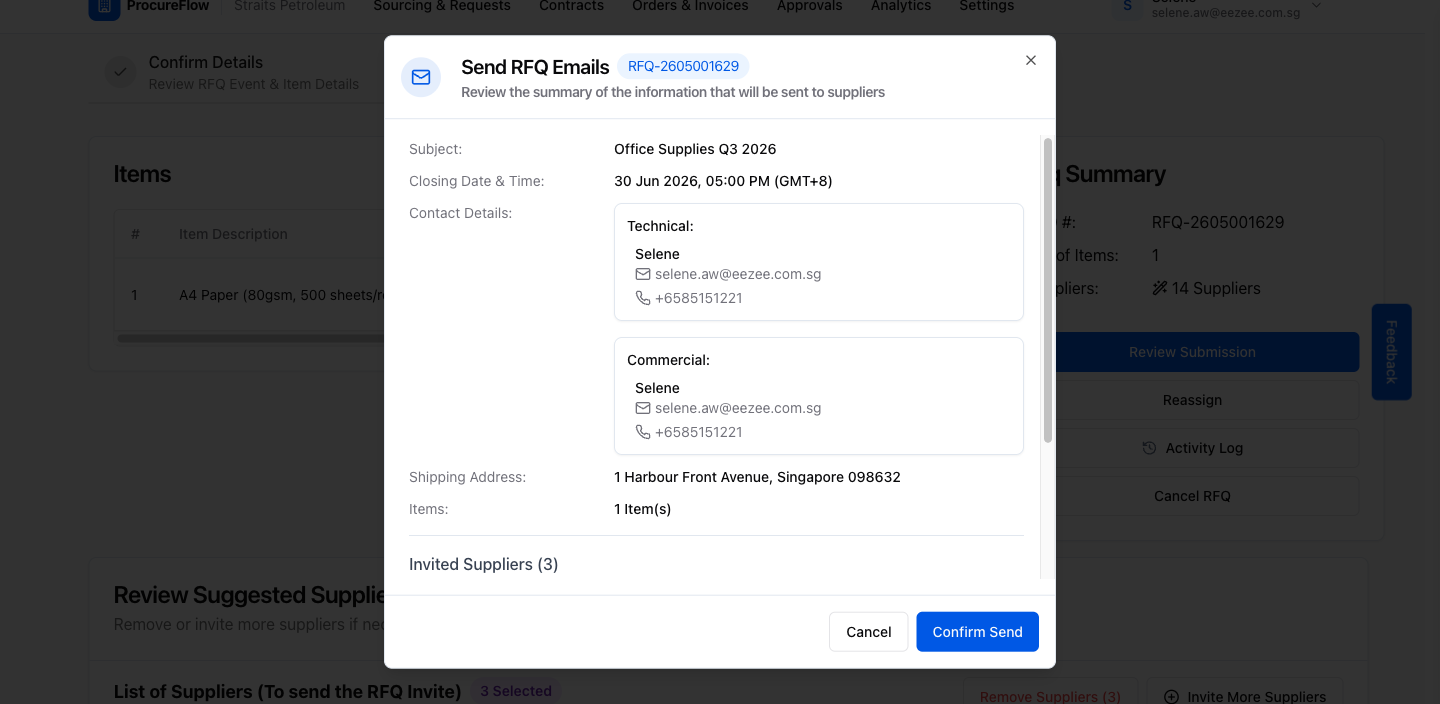
A Send RFQ Emails confirmation dialog appears. Review the summary before sending:
| Field | What It Shows |
|---|---|
| Subject | The RFQ title that will appear in the supplier's email |
| Closing Date & Time | The bid deadline shown to suppliers |
| Contact Details | Technical and Commercial contacts that suppliers can reach out to |
| Shipping Address | Delivery location shown to suppliers |
| Items | Number of line items included in the RFQ |
| Invited Suppliers | The number of suppliers who will receive the invitation email |
Choose one:
- Click Confirm Send if everything looks correct.
- Click Cancel to go back and make changes.
RFQ Sent: Monitor Responses and Next Steps
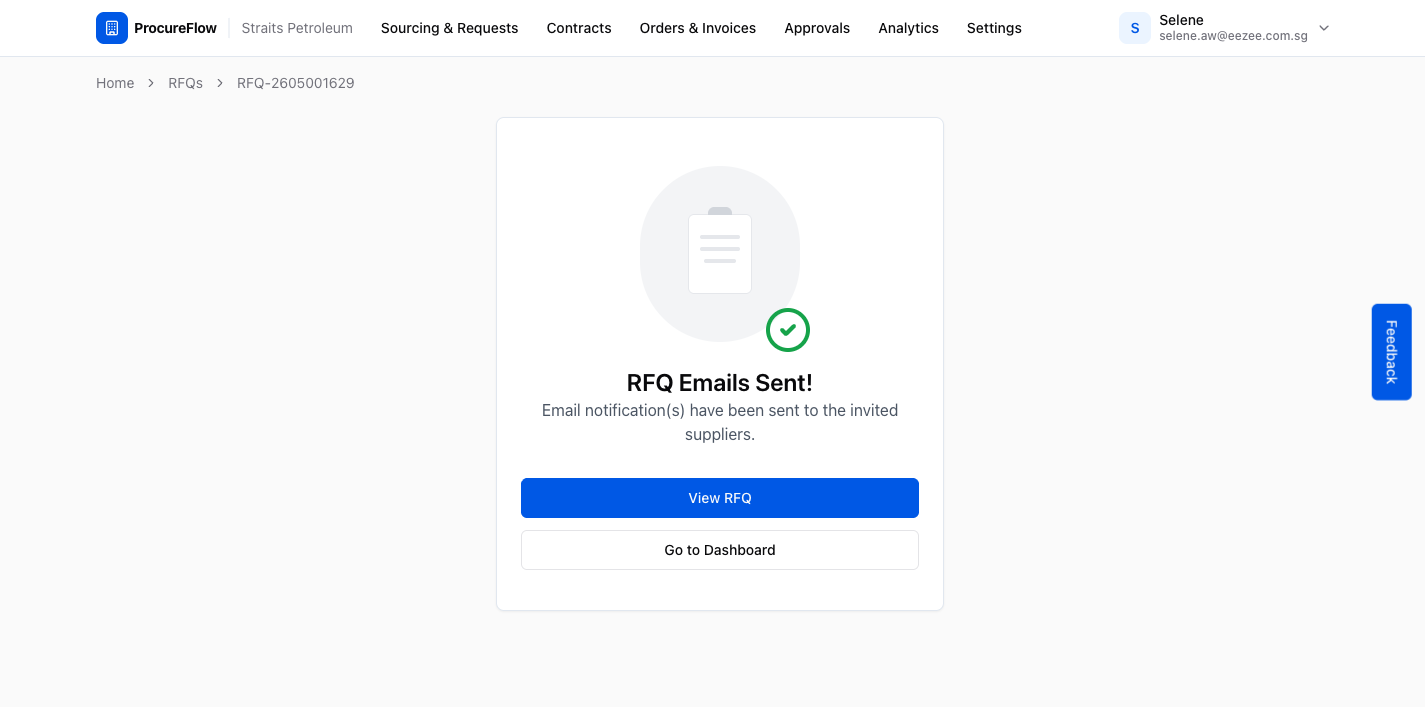
After confirming, you will see a success confirmation screen.
Choose where to go next:
- Click View RFQ to open the RFQ detail page and monitor supplier responses.
- Click Go to Dashboard to return to the main dashboard.
Receive Your Email Confirmation
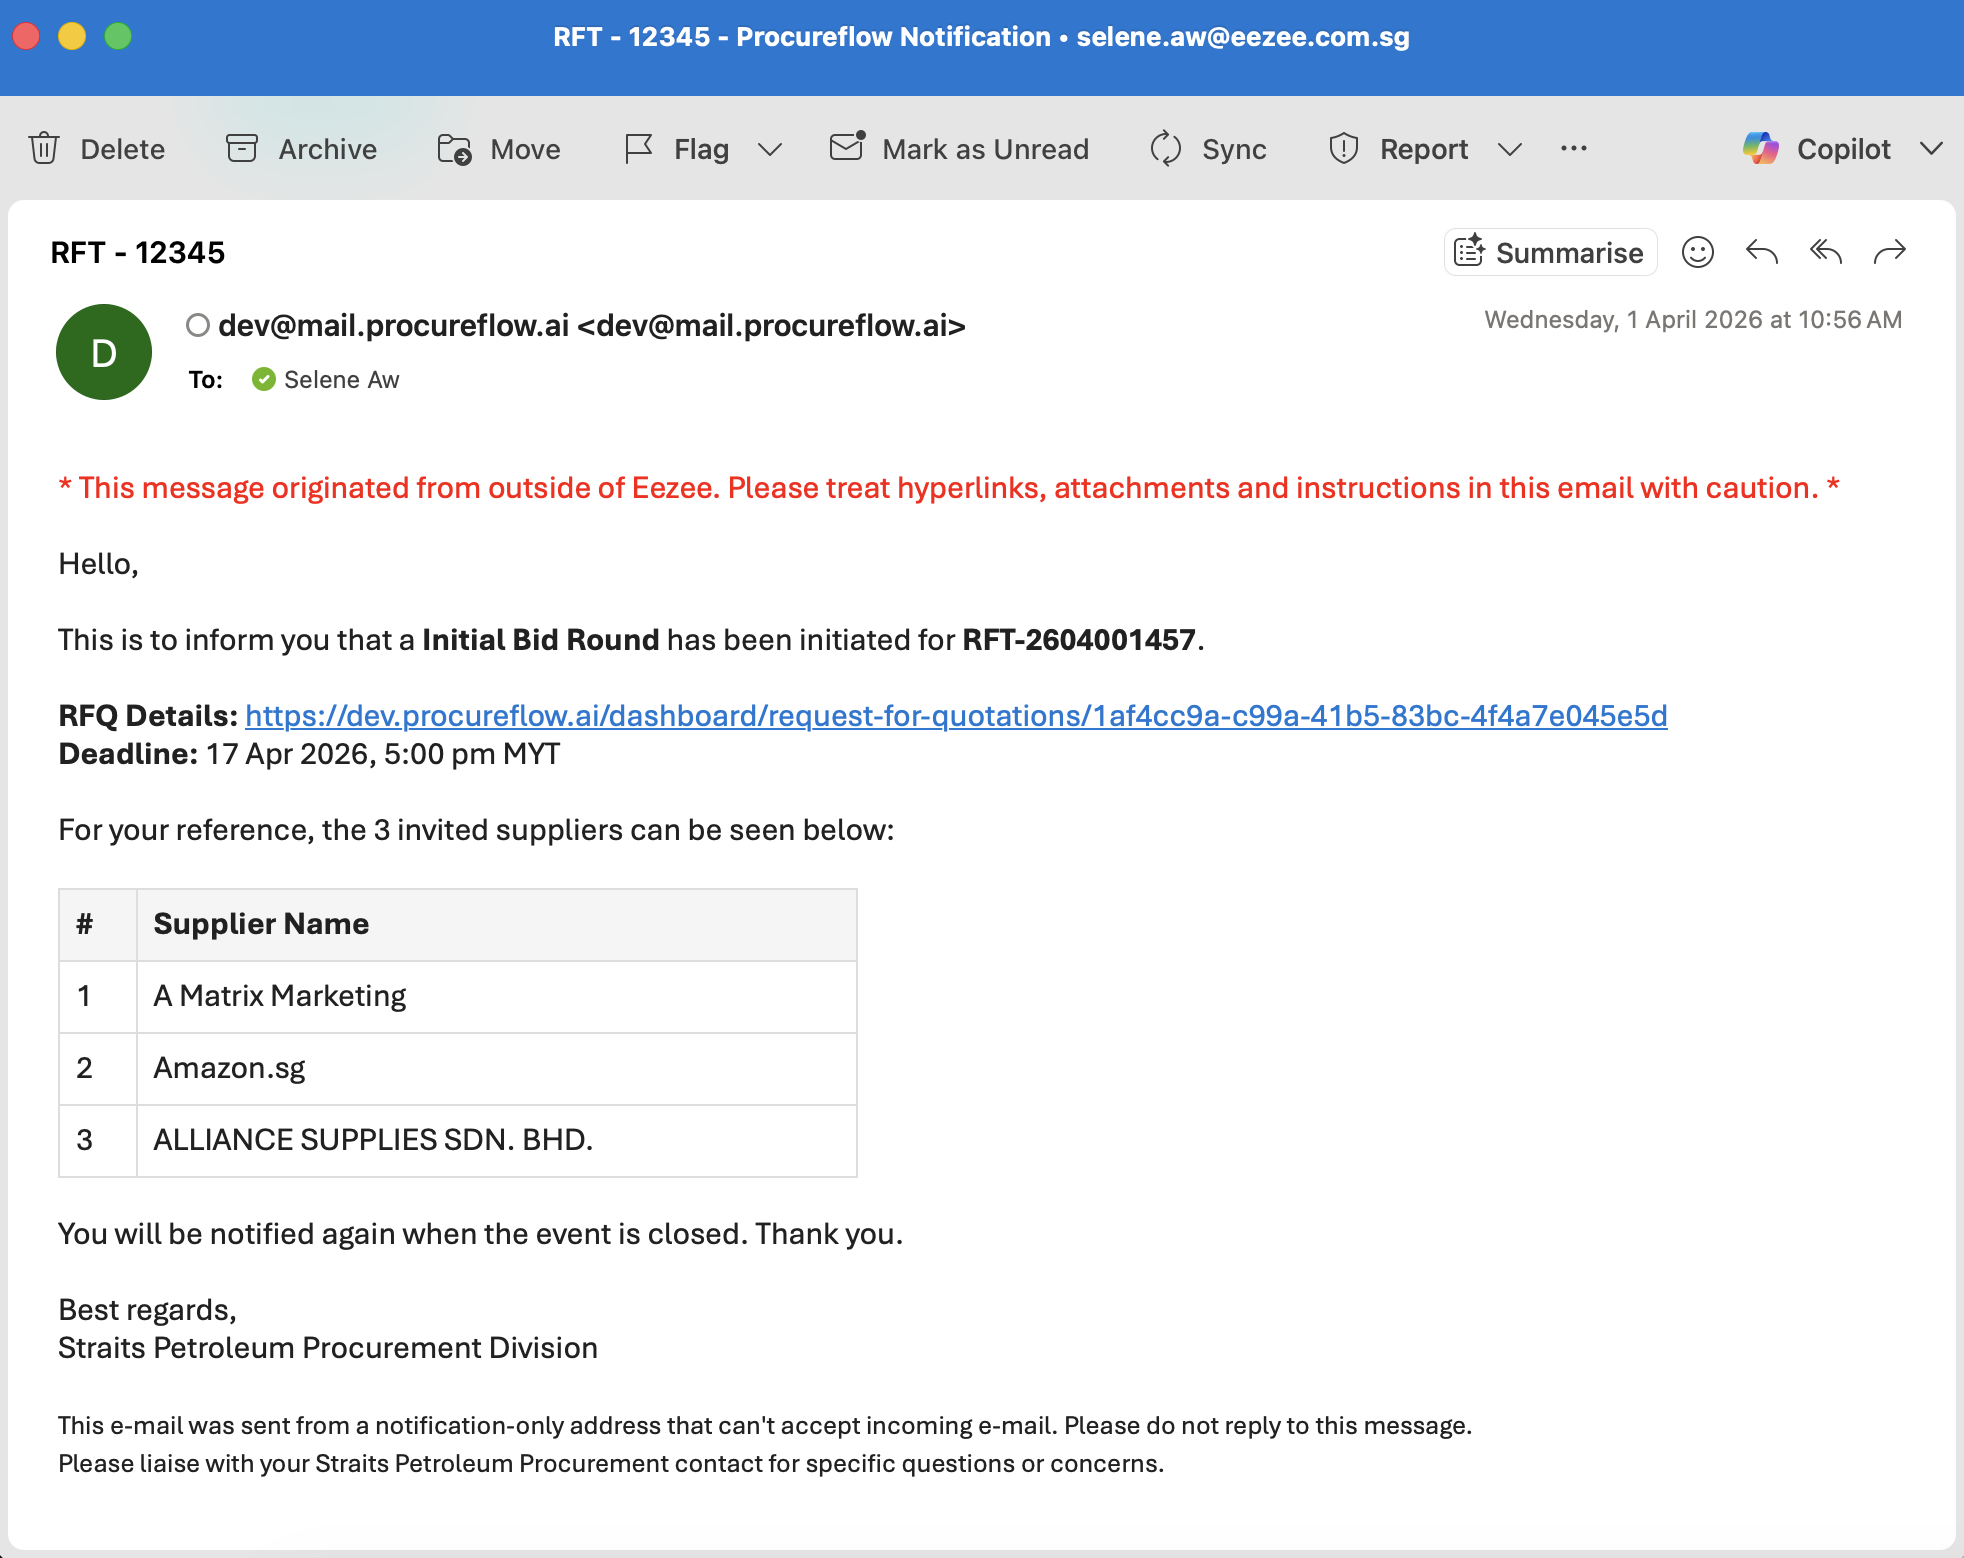
After the RFQ is sent, you will receive an email confirmation summarising the invitations that were dispatched to suppliers. Keep this for your records.